- English
- Čeština
- Español
- Italiano
- Deutsch
- Polski
- Français
- Home
- あなたのプリンターについて
- プリンターの機能
- LCD screen contrast adjustment (i3)
LCD screen contrast adjustment (i3)
- プリンターの説明
- プリンターの機能
- Accelerometer (MK4/S, MK3.9/S)
- Brightness adjustment (SL1)
- Buddy firmware-specific G-code commands
- オブエジェクトのキャンセル (MK4, MK3.9, XL, MINI/+)
- 衝突検知
- クラッシュダンプ
- Creating a resin calibration object (SL1/SL1S)
- Dump memory (MK3/S/+ and MK2.5/S)
- Experimental menu (MK3/S/+)
- 実験的なメニュー (MK4/S, MK3.9/S, MK3.5/S, XL, MINI/+)
- フィラメントセンサー (MK4/S, MK3.9/S, XL)
- Filament sensor MK3 (non-S)
- Flashing custom firmware (MK4/S, MK3.9/S, MK3.5/S)
- 柔軟性のあるスチールシート(ガイドポスト)
- GPIO Module
- High flow print head (HT90)
- High temperature print head (HT90)
- ハードウェアセットアップ (MINI/MINI+)
- ハードウェアセットアップ (MK2.5/S & MK3/S/+)
- Internet connection (SL1/SL1S)
- IR フィラメントセンサー (MK2.5S, MK3S/+, MK3.5/S))
- IRフィラメントセンサーの検出(MK3S)
- LCD brightness adjustment (MK3S)
- LCD screen contrast adjustment (i3)
- How to adjust the contrast
- ロードセル (MK4/S, MK3.9, XL)
- Menu structure (SL1/SL1S)
- MMU3における PrusaノズルとCHTノズル
- Model preview
- Network Connection (MK4S, MK3.9S)
- Nextruder silicone sock (XL, MK4, MK3.9)
- NFC antenna
- フィラメントセンサーのノイズ(MINI)
- ワンクリックプリント
- Pouring resin and starting print
- パワーパニック
- パワーモード
- PP steel sheet
- Print Profile (SL1/SL1S)
- プリンタの統計情報
- Printer statistics and system information (SL1/SL1S)
- PronterfaceとUSBケーブル
- Prusa firmware-specific G-code commands
- Prusa Pro Filament Drybox
- Resin Calibration (SL1/SL1S)
- Resin Tank Cleaning (SL1/SL1S)
- 艶消しパウダーコートシート
- SDカードのデータのソート
- スムースPEIシート
- サウンドモード (MINI/MINI+)
- Special PA Nylon steel sheet
- スプールジョイン機能 (MMU2S)
- スチールシートプロファイル
- フィラメントスタックの検出 #26101 (MK4S) #13101 (MK4) #21101 (MK3.9) #17108 (XL)
- Support menu (MK3/S/+)
- XLにおけるサポート材の設定
- テクスチャーパウダーコートシート
- 温度管理機能のキャリブレーション
- ツールマッピング (XL)
- ツールマッピングとフィラメントマッピング (XL, MMU3)
- Top-bar Notifications (SL1/SL1S)
- タッチスクリーン機能 (MK4, MK3.9, MK3.5, XL)
- チューニングメニュー
- Water-soluble materials (PVA/BVOH)
- 一般情報
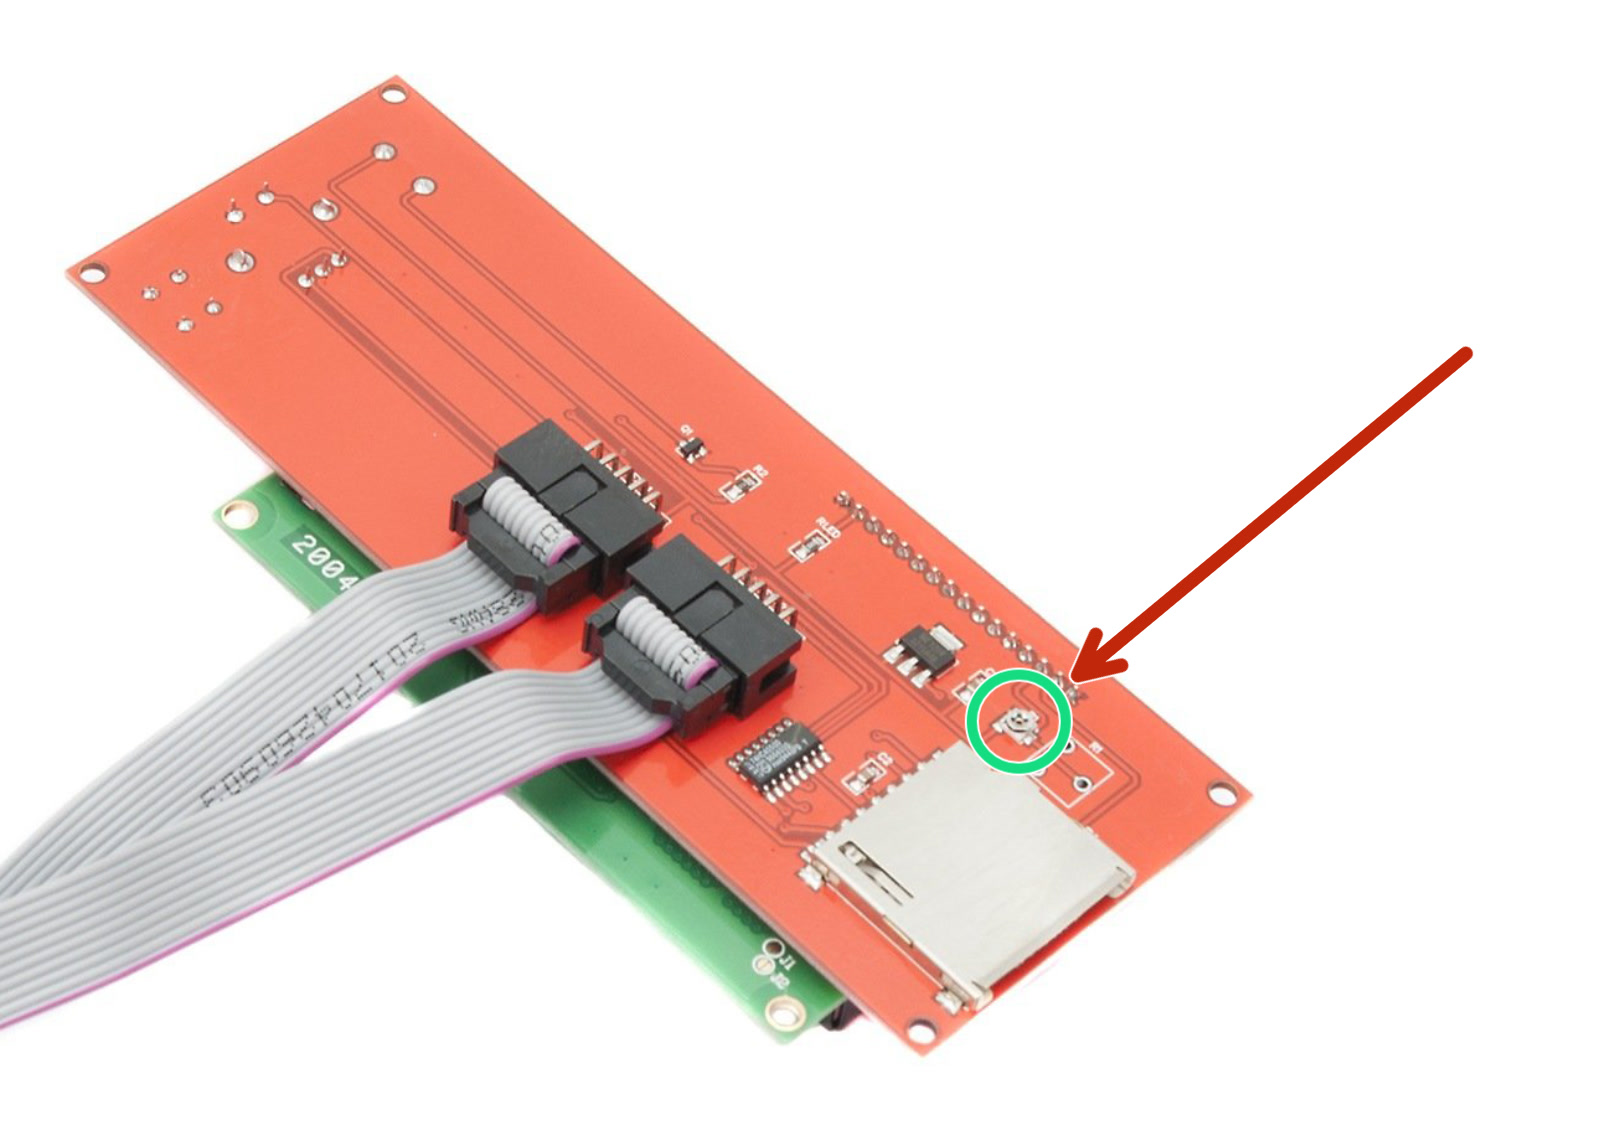
In case you experiencing issues with the screen readability, you can try adjusting the contrast on the LCD-module. On the back of the LCD-module, you will find a small potentiometer dedicated to this. If adjusted to an extreme, the image of the LCD-module can be entirely burned out, with no visible letters.
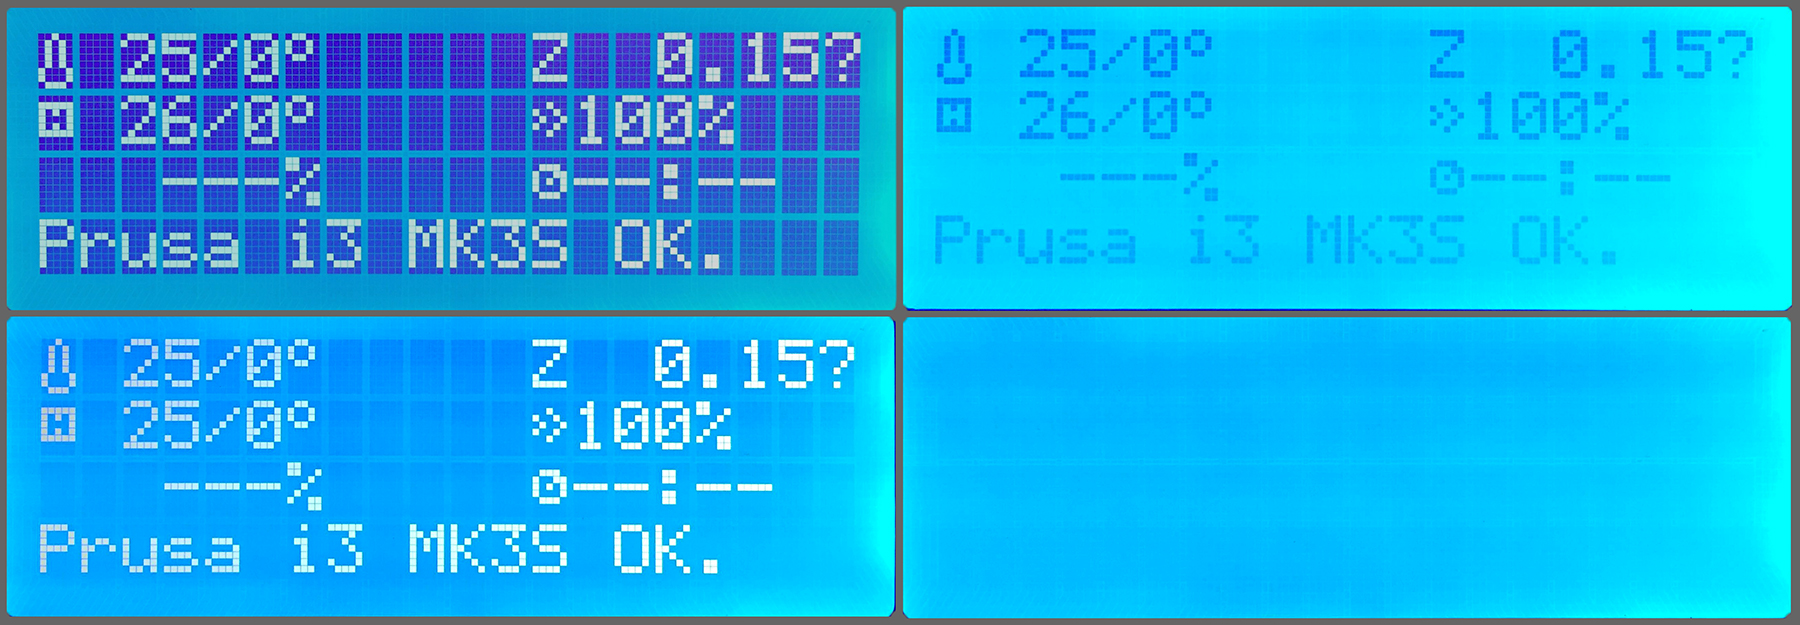
LCD module adjusted to 4 different levels
How to adjust the contrast
Before you dive into the disassembly, ensure once again that the cables are properly connected both to the LCD and to the Einsy board. Some image distortions can be caused just by incorrectly seated connectors.
- Detach the LCD assembly by removing the 4 screws that hold the LCD module (purple arrows). By sliding the printer to the edge of the table you will have access to the screws from below.
- Remove the two screws securing the module in the cover (blue arrows).
- Remove the LCD module from the cover and slide off the LCD-holder (green arrows)
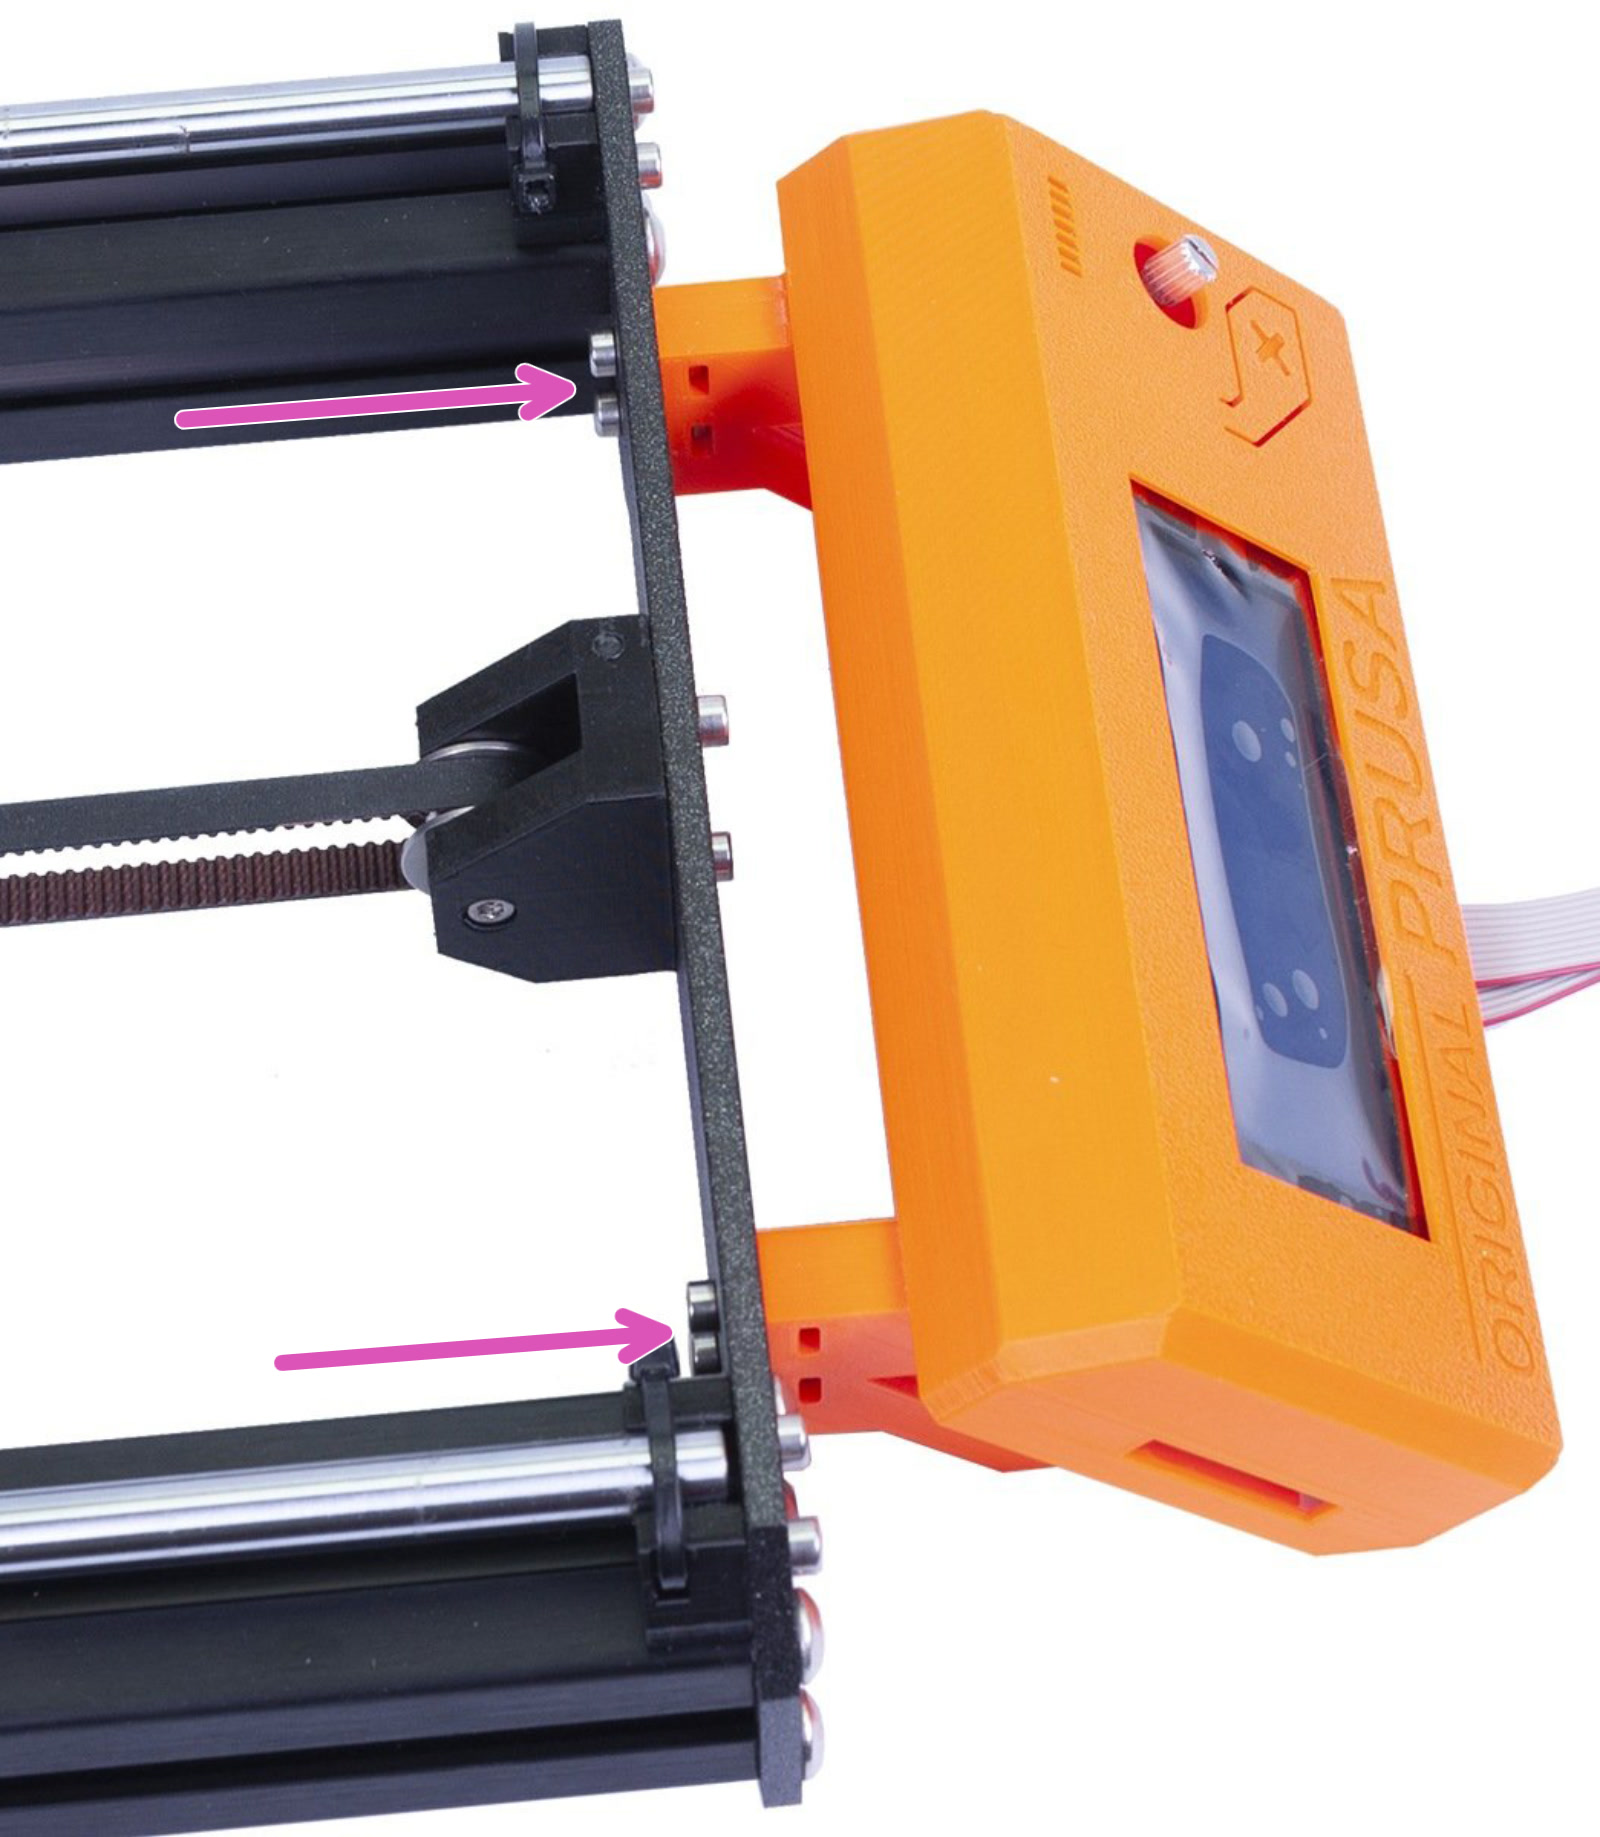 | 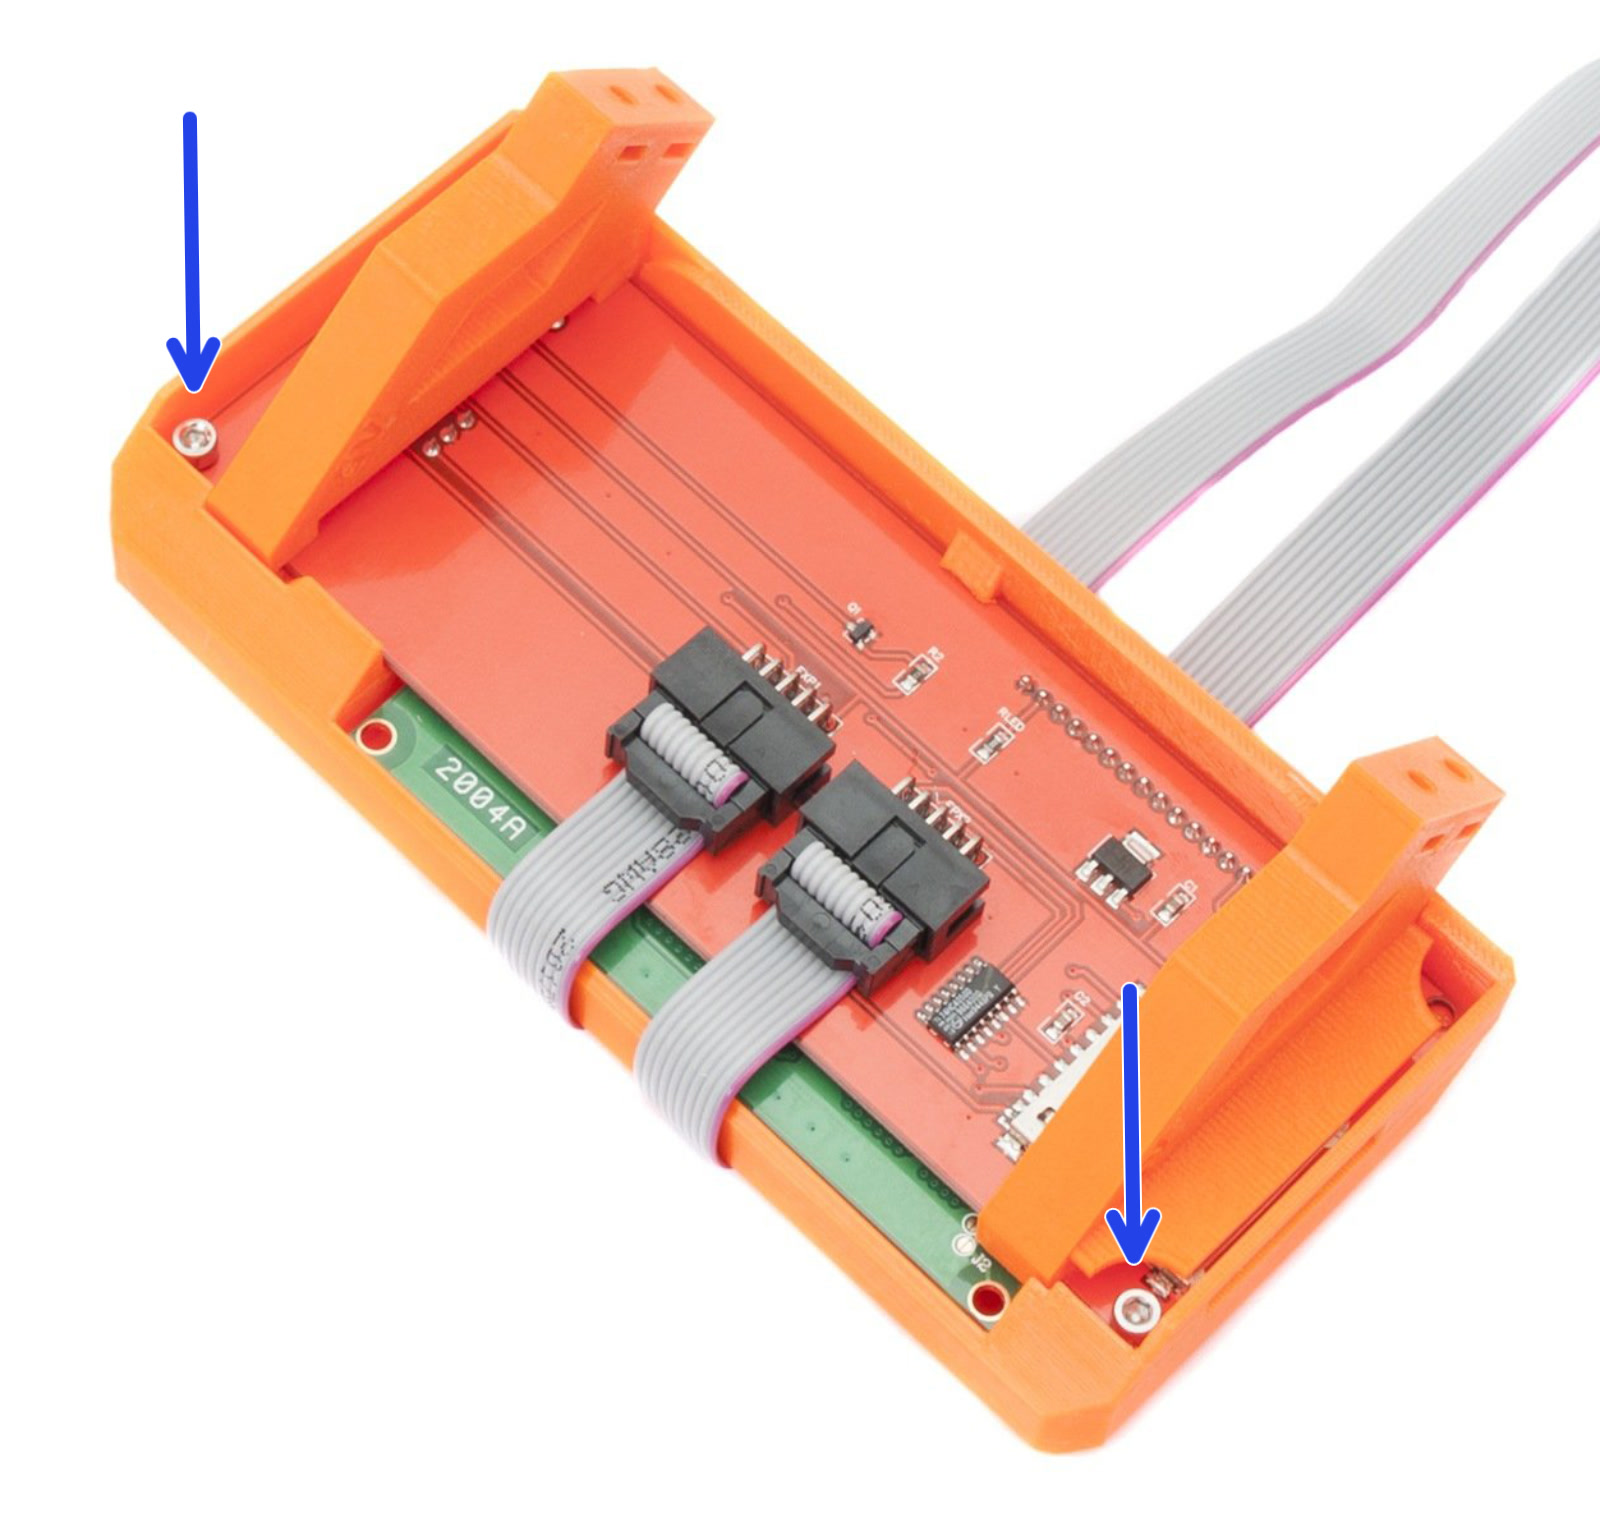 |
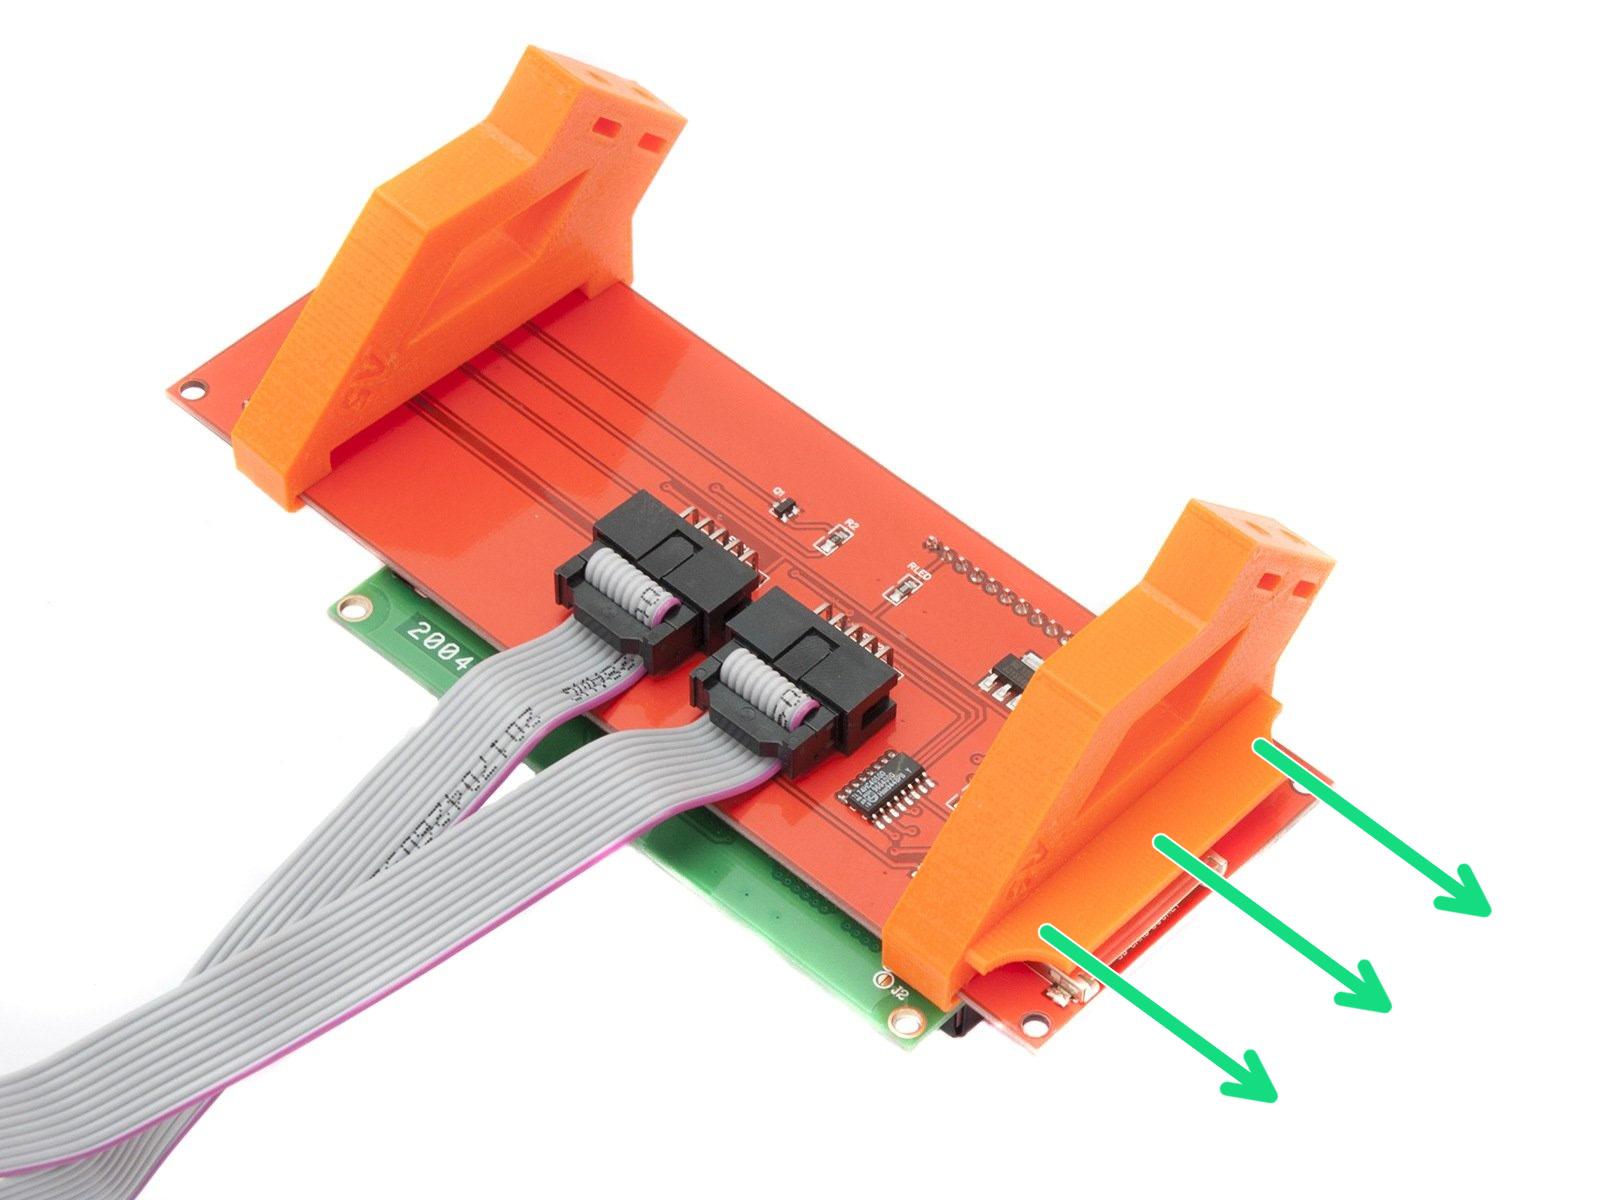
- You now have access to a small potentiometer on the back of the LCD module (red arrow). Use a small screwdriver to turn the potentiometer. Turn the printer on to see the contrast change when adjusted.
Comments
Still have questions?
If you have a question about something that isn't covered here, check out our additional resources.
And if that doesn't do the trick, you can send an inquiry to [email protected] or through the button below.