FR
Se Connecter- English
- Italiano
- Deutsch
- Home
- Utilisation de l'imprimante
- Entretien de l'imprimante
- Changing the print head
Changing the print head
Menu
- Modèles 3D
- Guide des matériaux
- Découpage
- Entretien de l'imprimante
- Réglage de la tension de la courroie (MINI/MINI+)
- Réglage de la tension de la courroie (MK3/MK3S/MK3S+/MK3.5/MK4)
- Ajustement de la tension de la courroie (XL)
- Câble de l'électronique Buddy (MINI)
- Changement ou remplacement de la buse (MK2.5S/MK3S/MK3S+)
- Changing the print head
- Removing print head
- Installing print head
- Changement/remplacement de la buse (MINI)
- Vérification/réalignement de l'entraînement Bondtech (MK3S/MK2.5S)
- Traction à froid (cold pull) (MINI)
- Traction à froid (cold pull) (MK3.9, MK4) #13702
- Traction à froid (cold pull) (MK3S/MK2.5S)
- Traductions communautaires
- Maintenance de la CW1
- Remplacement du film FEP (SL1)
- Système d'extinction d'incendie (Enclosure)
- Mise à jour du firmware (CW1)
- Mise à jour du firmware (MINI/MINI+)
- Mise à jour du firmware (MK2.5S/MK2S)
- Mise à jour du firmware (MMU2S)
- Mise à jour du firmware (SL1/SL1S)
- HEPA filter replacement (HT90)
- Démontage de la hotend et barrière thermique bloquée dans le dissipateur thermique
- Comment retirer une vis à tête abîmée
- Comment mettre à jour le firmware (MK3S+/MK3S/MK3)
- Comment mettre à jour le firmware (MK4/XL)
- Maintenance régulière de l'imprimante i3
- Filtre à pigments de l'IPA (CW1/CW1S)
- Maintenance régulière du MMU2S
- Maintenance régulière du MMU3
- Nozzle replacement (HT90)
- Panneaux PETG (Enceinte)
- Préparation de la surface d'impression
- Printing without purge tower on the XL (Multi-Tool)
- Maintenance régulière (MINI)
- Regular printer maintenance (HT90)
- Maintenance régulière de l'imprimante (MK4, MK3.9)
- Maintenance régulière de l'imprimante (XL)
- Retrait manuel du filament de l'extrudeur
- Cartes SD et clés USB
- Maintenance de la SL1/SL1S
- Retrait d'une impression de la SL1/SL1S
- Test des fonctionnalité de sécurité (MK3/MK3S)
- Vibrations lors de l'impression (MINI/MINI+)
- Prusa Connect & PrusaLink
Pertinent pour:
Dernière mise à jour 4 days agoCette article est également disponible dans les langues suivantes : 


The Prusa Pro HT90 can be used with two print head configurations. The printer comes with a high-flow print headhigh-flow print head that can print materials up to 300 ºC. For printing industrial materials such as PEI, PEKK, and PEAK, the high temperature print head with a temperature limit of 500°C is required.
Removing print head
- First, unload the filament from the nozzle and cool the print head to below 50°C.
- Extend the door to the maximum height.
- At the top of the printer, behind the HEPA filter, there is a holder for the cable bundle and the air hose. It is fastened with one screw, which should be unscrewed using a 2.5mm hex key.
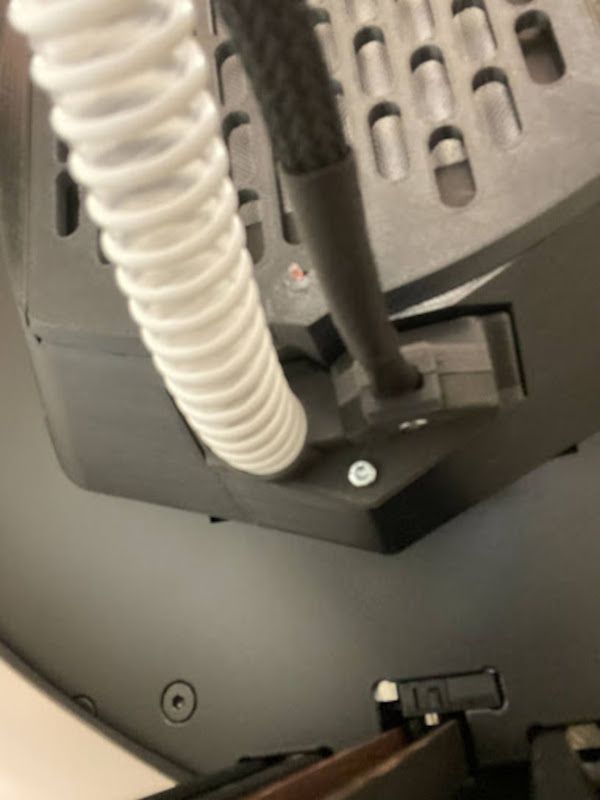
- Pull the entire holder downwards.
- Now, using a 2.5mm hex key, unscrew the screw from the air hose and cable bundle holder.
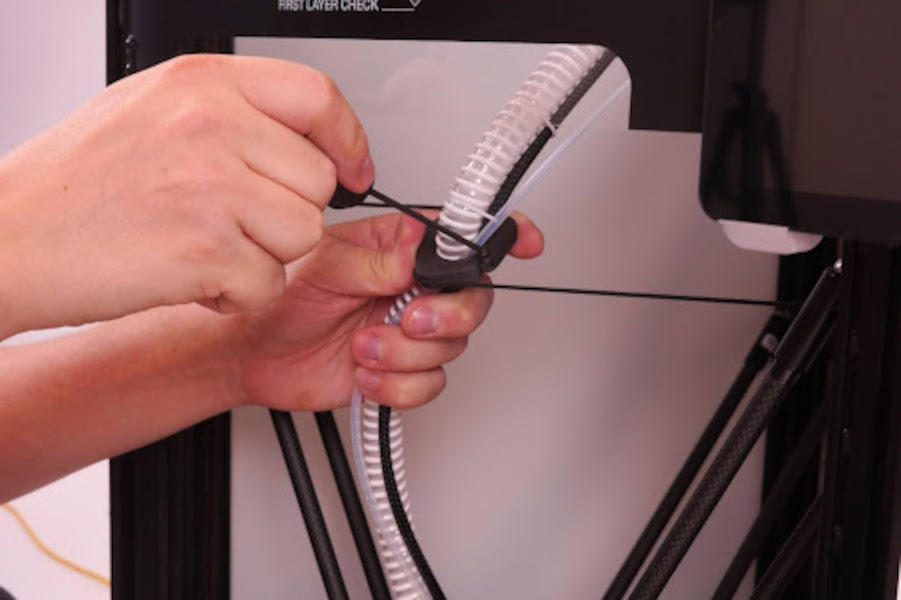
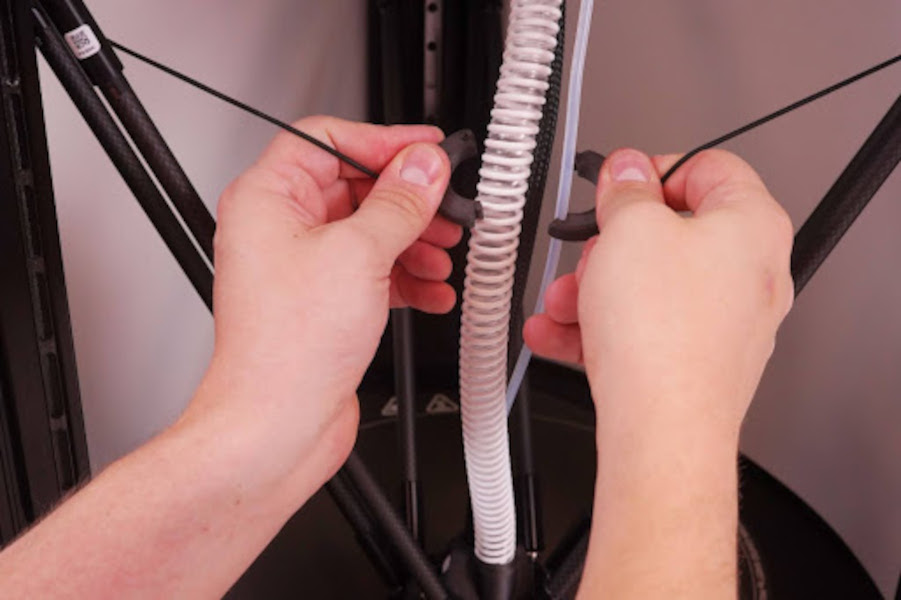
- After unscrewing it, split the holder into two halves.
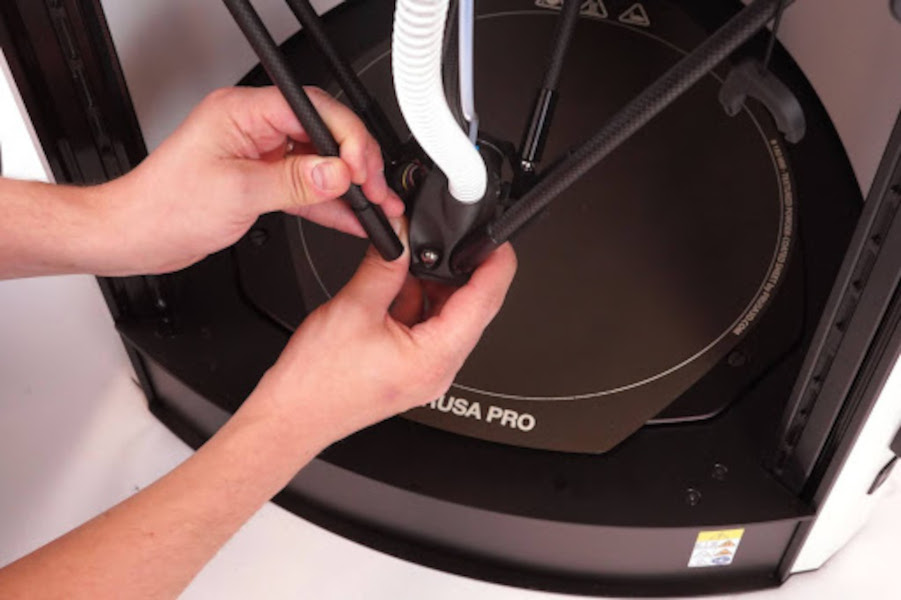
- Hold the print head with one hand and carefully disconnect the arm from the ball joints on the head with the other hand. This will release the entire print head.
Installing print head
- On the new print head, lubricate the ball joints with a small amount of PTFE lubricant.
- Hold up the print head and connect the arms to the ball joints.
- Join the two parts of the holder on the air tube and cables bundle.
- Now, using a 2.5mm hex key, screw the two parts of the holder.
- Carefully push the air hose and the cable bundle in their holders behind the HEPA filter. Use a using the 2.5mm hex key to tighten the screw.
Cet article vous a-t-il été utile ?
Commentaires


Vous avez encore des questions ?
Si vous avez une question sur un sujet qui n'est pas traité ici, consultez nos ressources supplémentaires.
Et si cela ne suffit pas, vous pouvez envoyer une demande à [email protected] ou via le bouton ci-dessous.