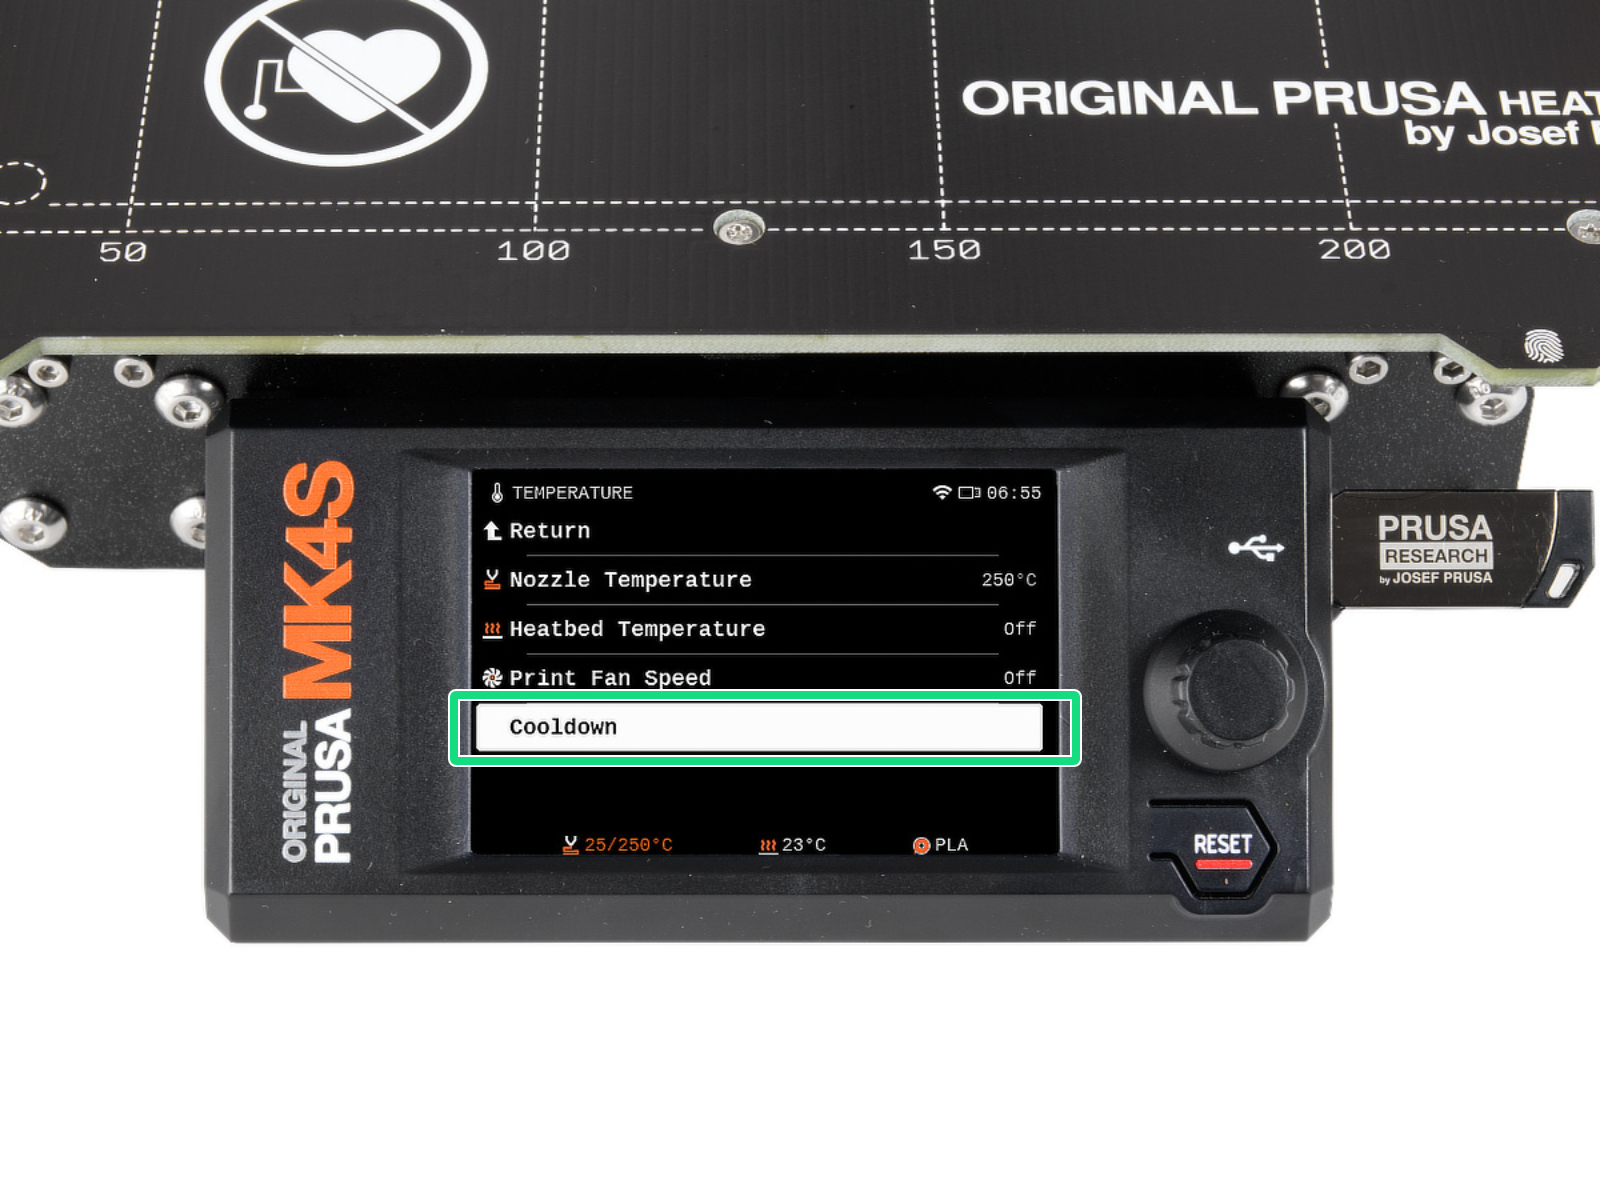
CAUTION!!! COOLDOWN THE PRINTER before proceeding with this step. Wait until the hot parts are cooled down to ambient temperature. It takes approximately 10 minutes.
Putting the Nextruder silicone sock on the hotend is optional, although recommended. More about Nextruder silicone sock.
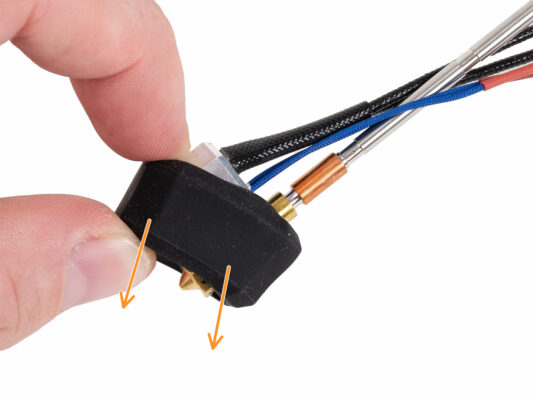
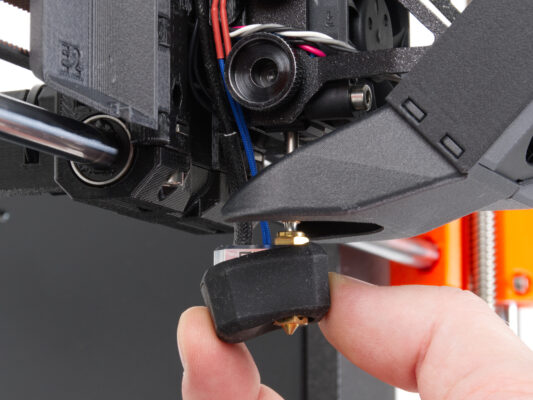
⬢Put the silicone sock back on the heaterblock. This is optional.
CAUTION!!! COOLDOWN THE PRINTER before proceeding with this step. Wait until the hot parts are cooled down to ambient temperature. It takes approximately 10 minutes.
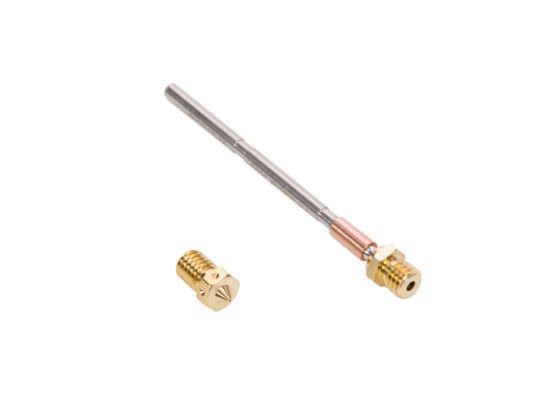
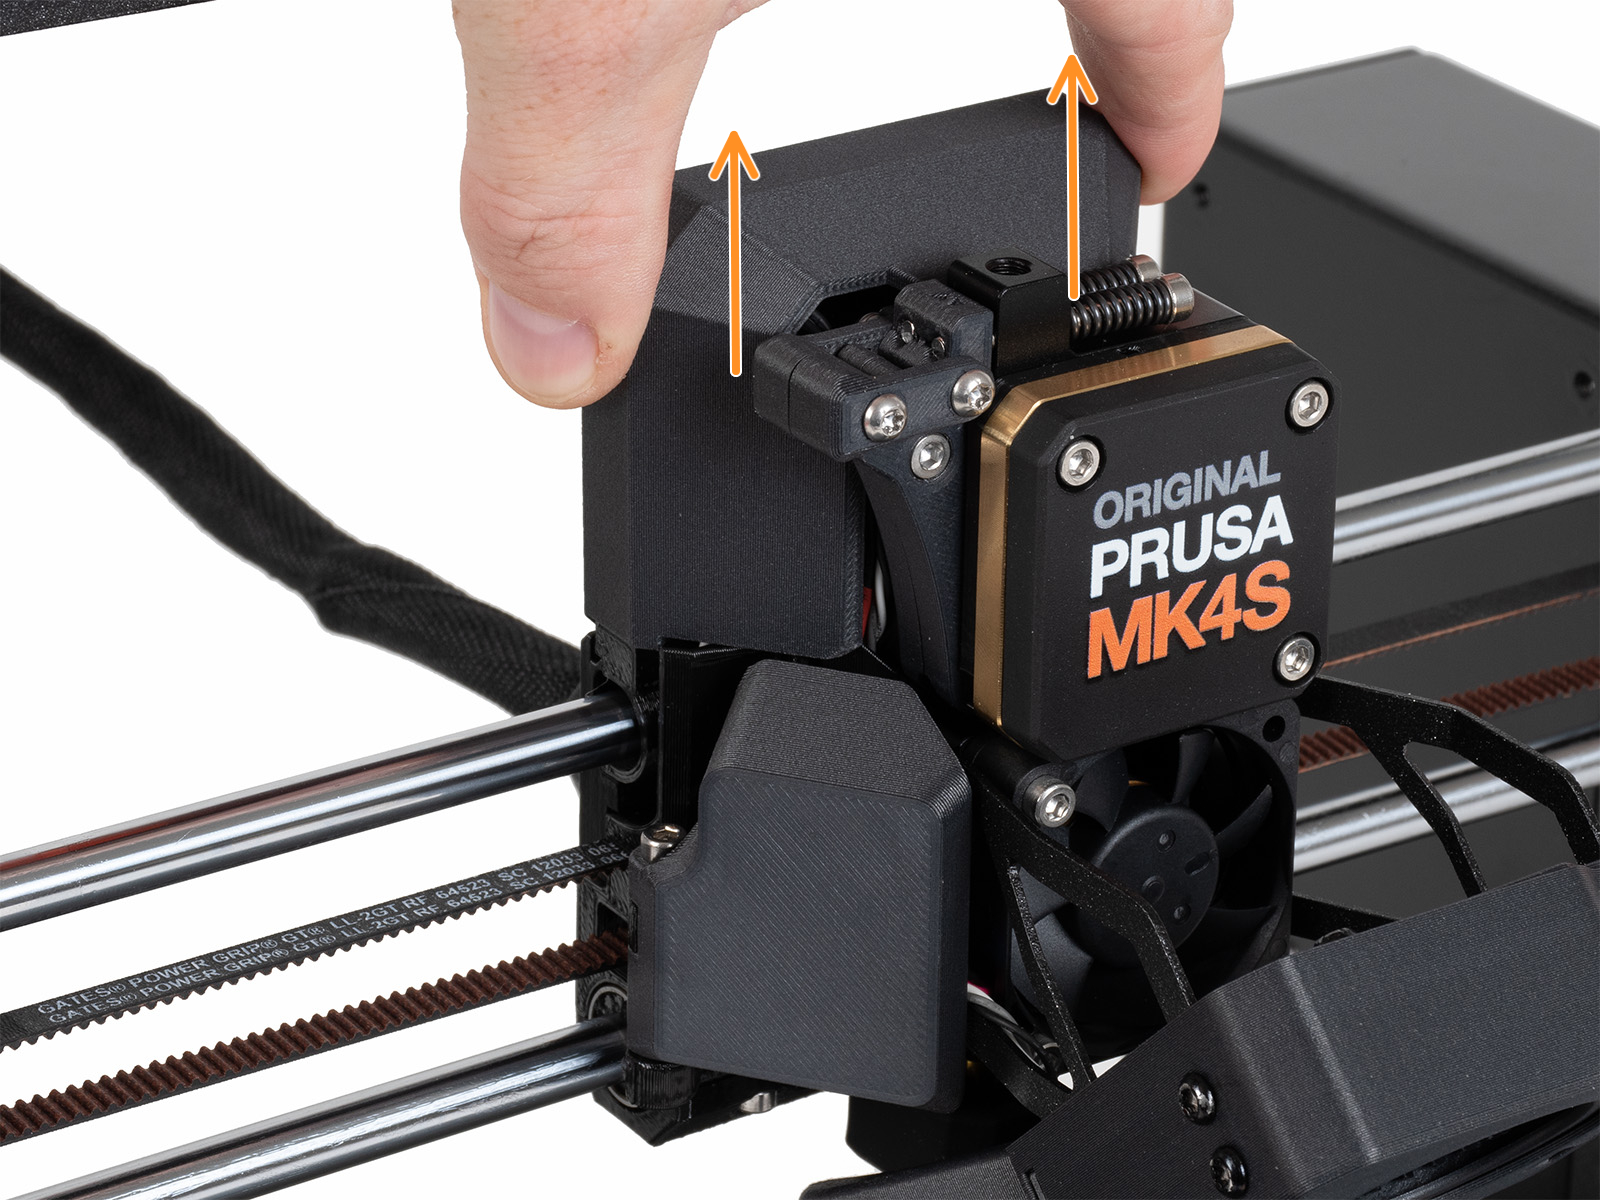
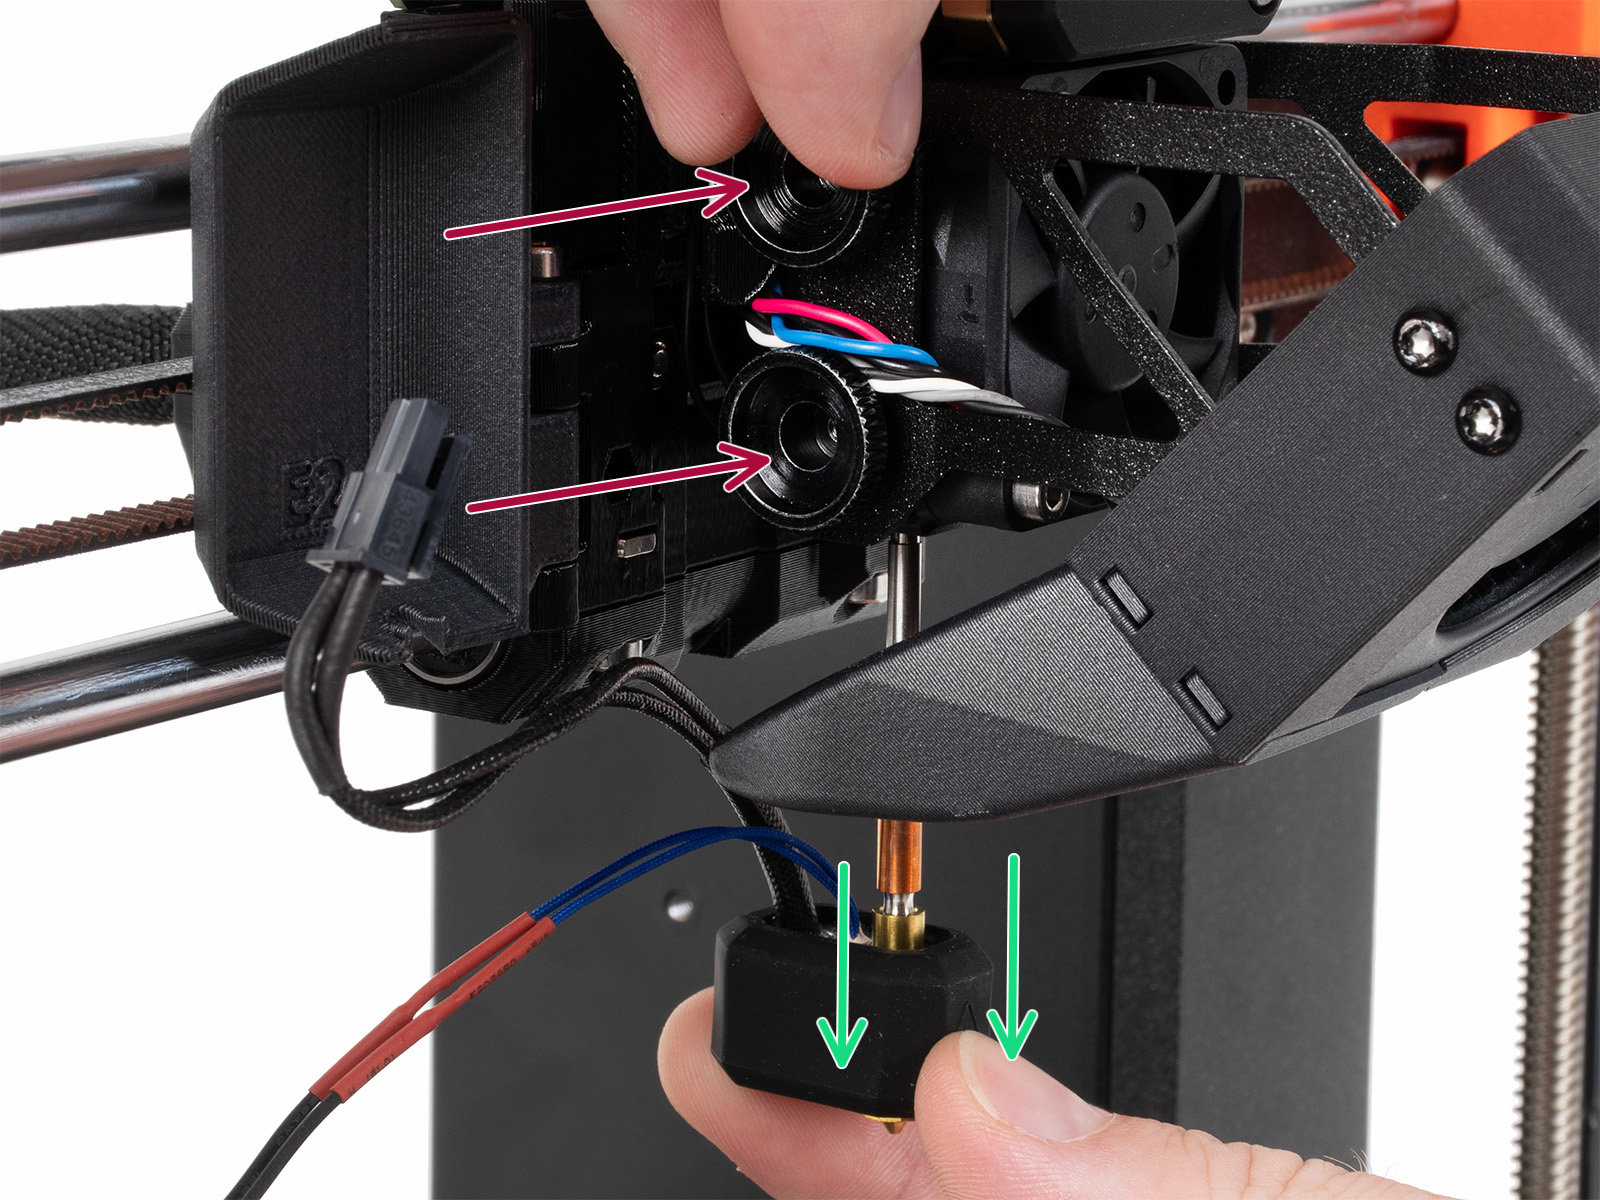
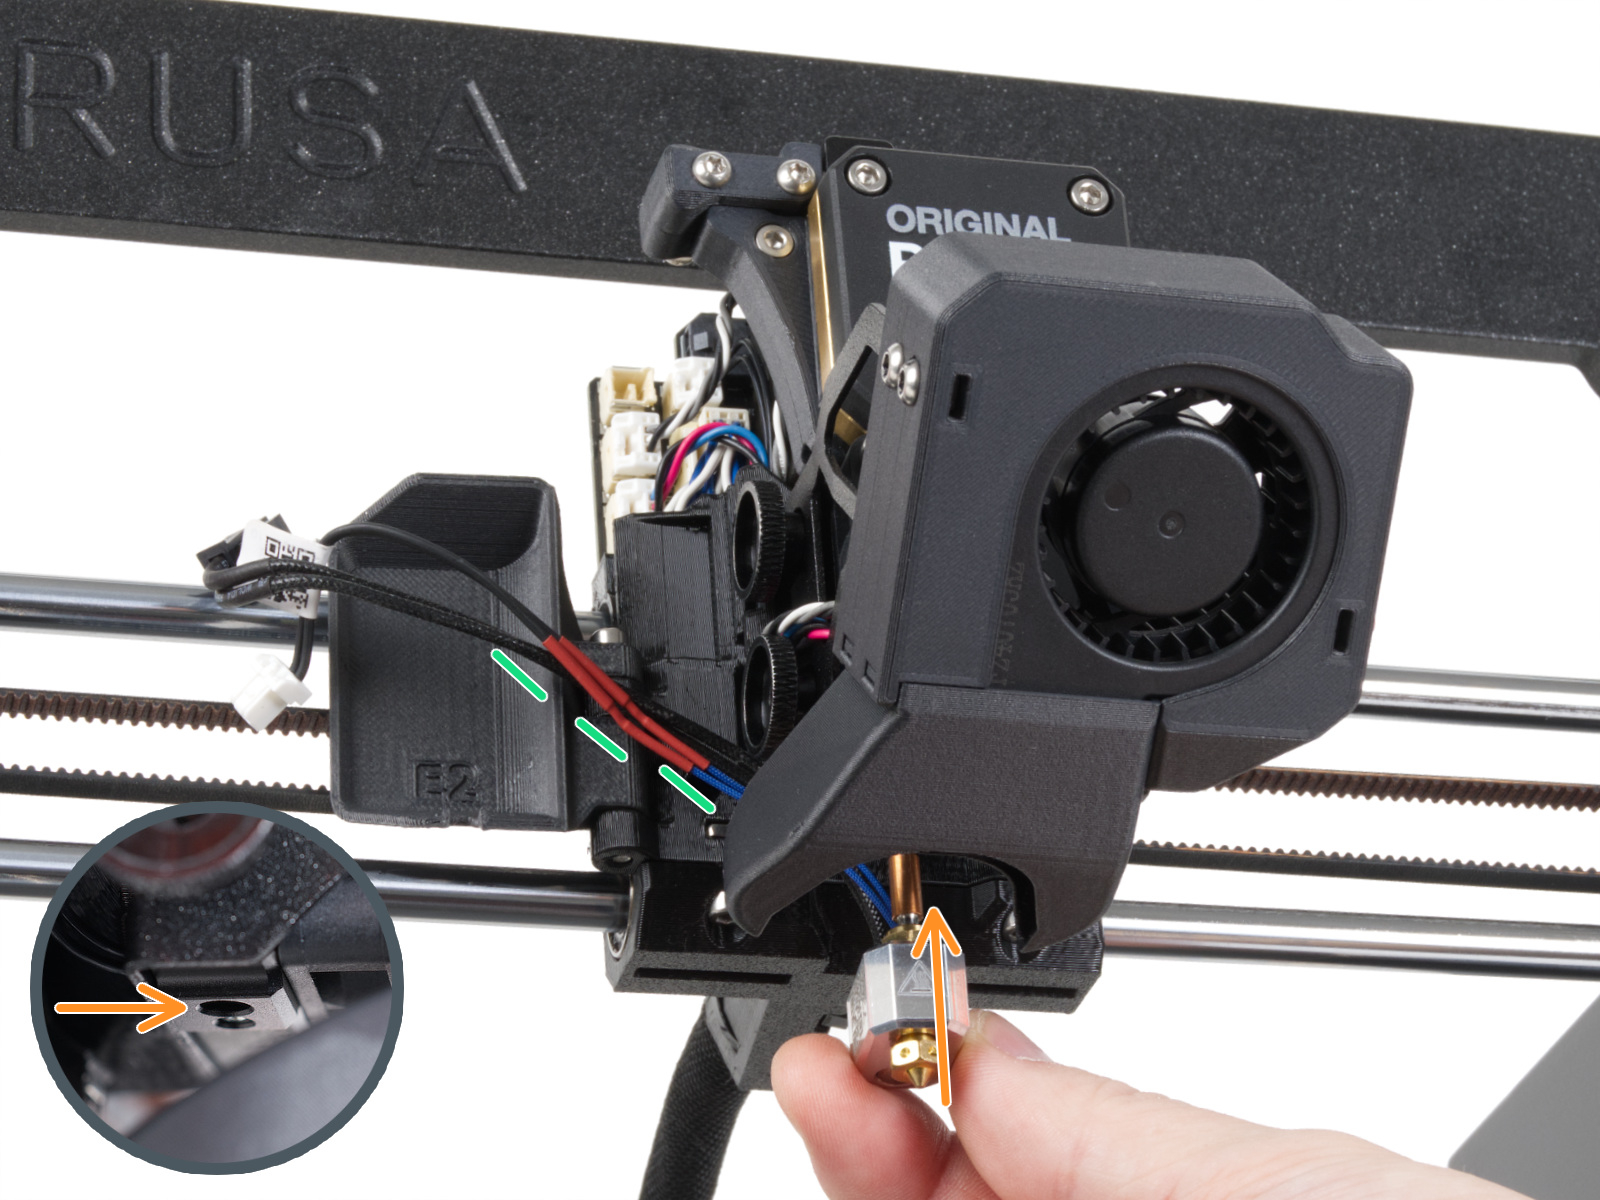
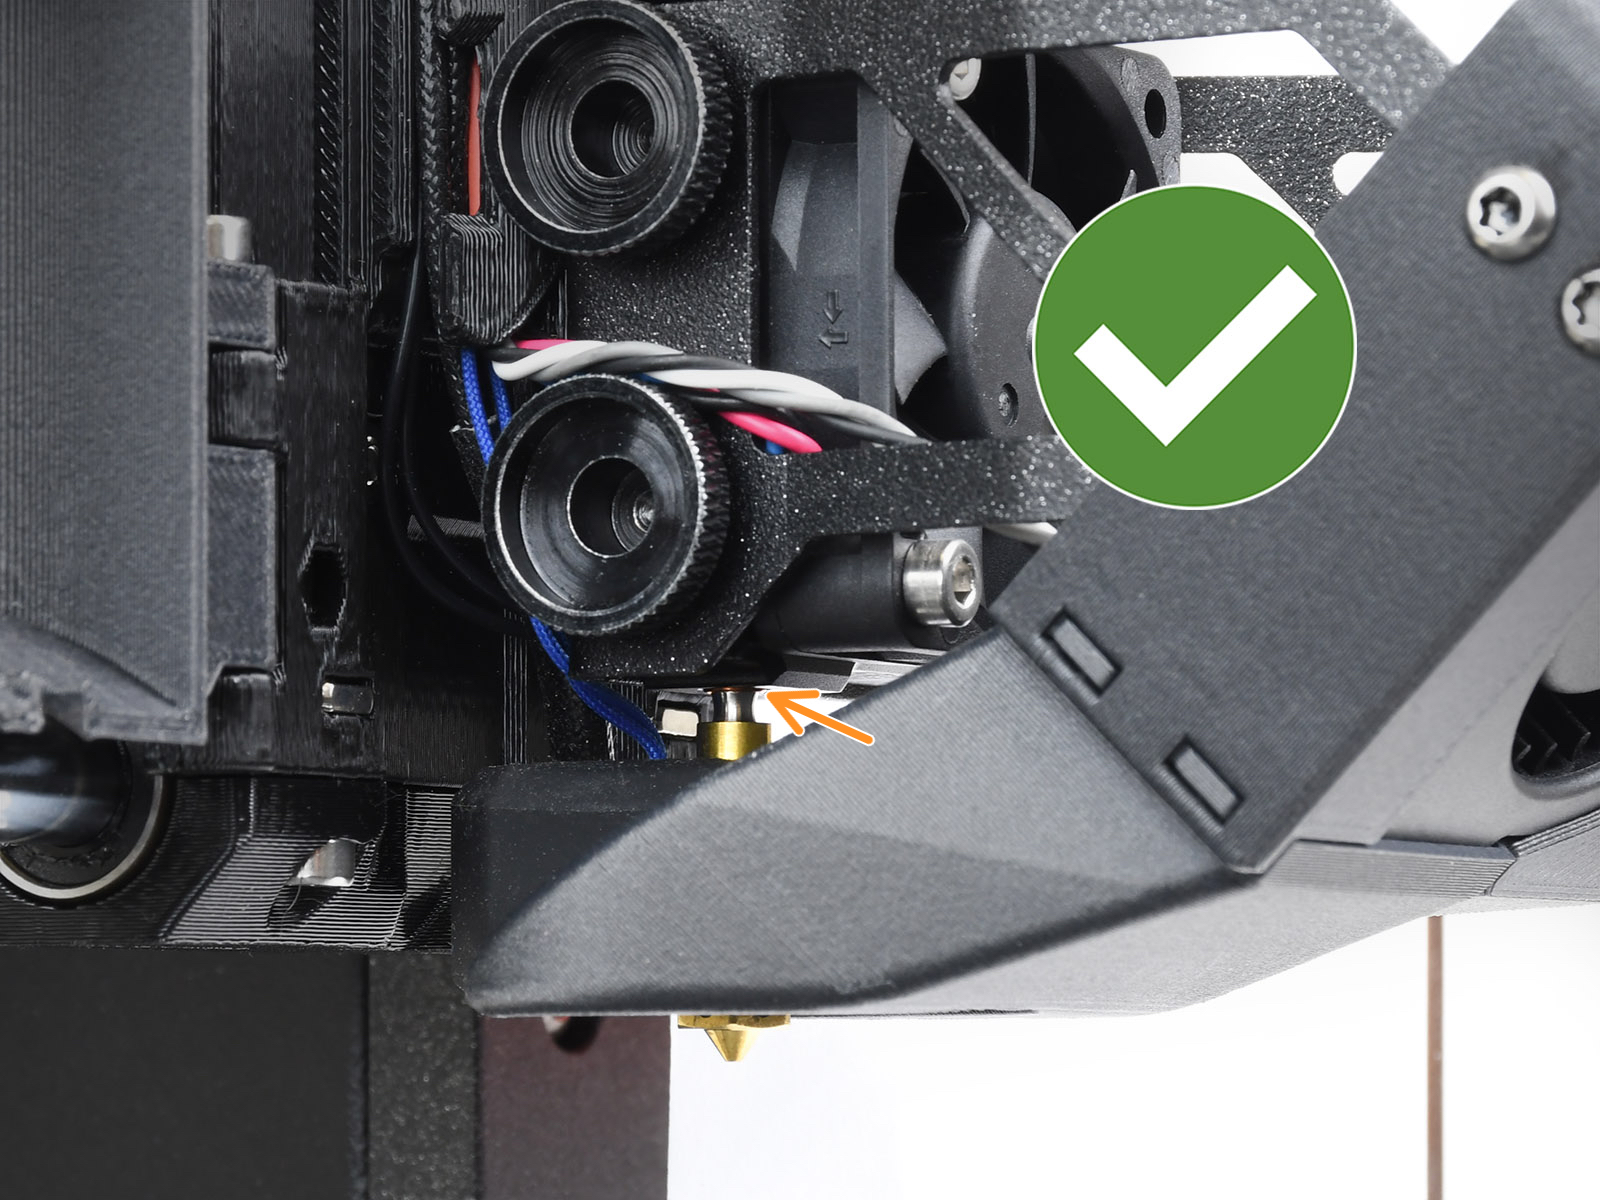
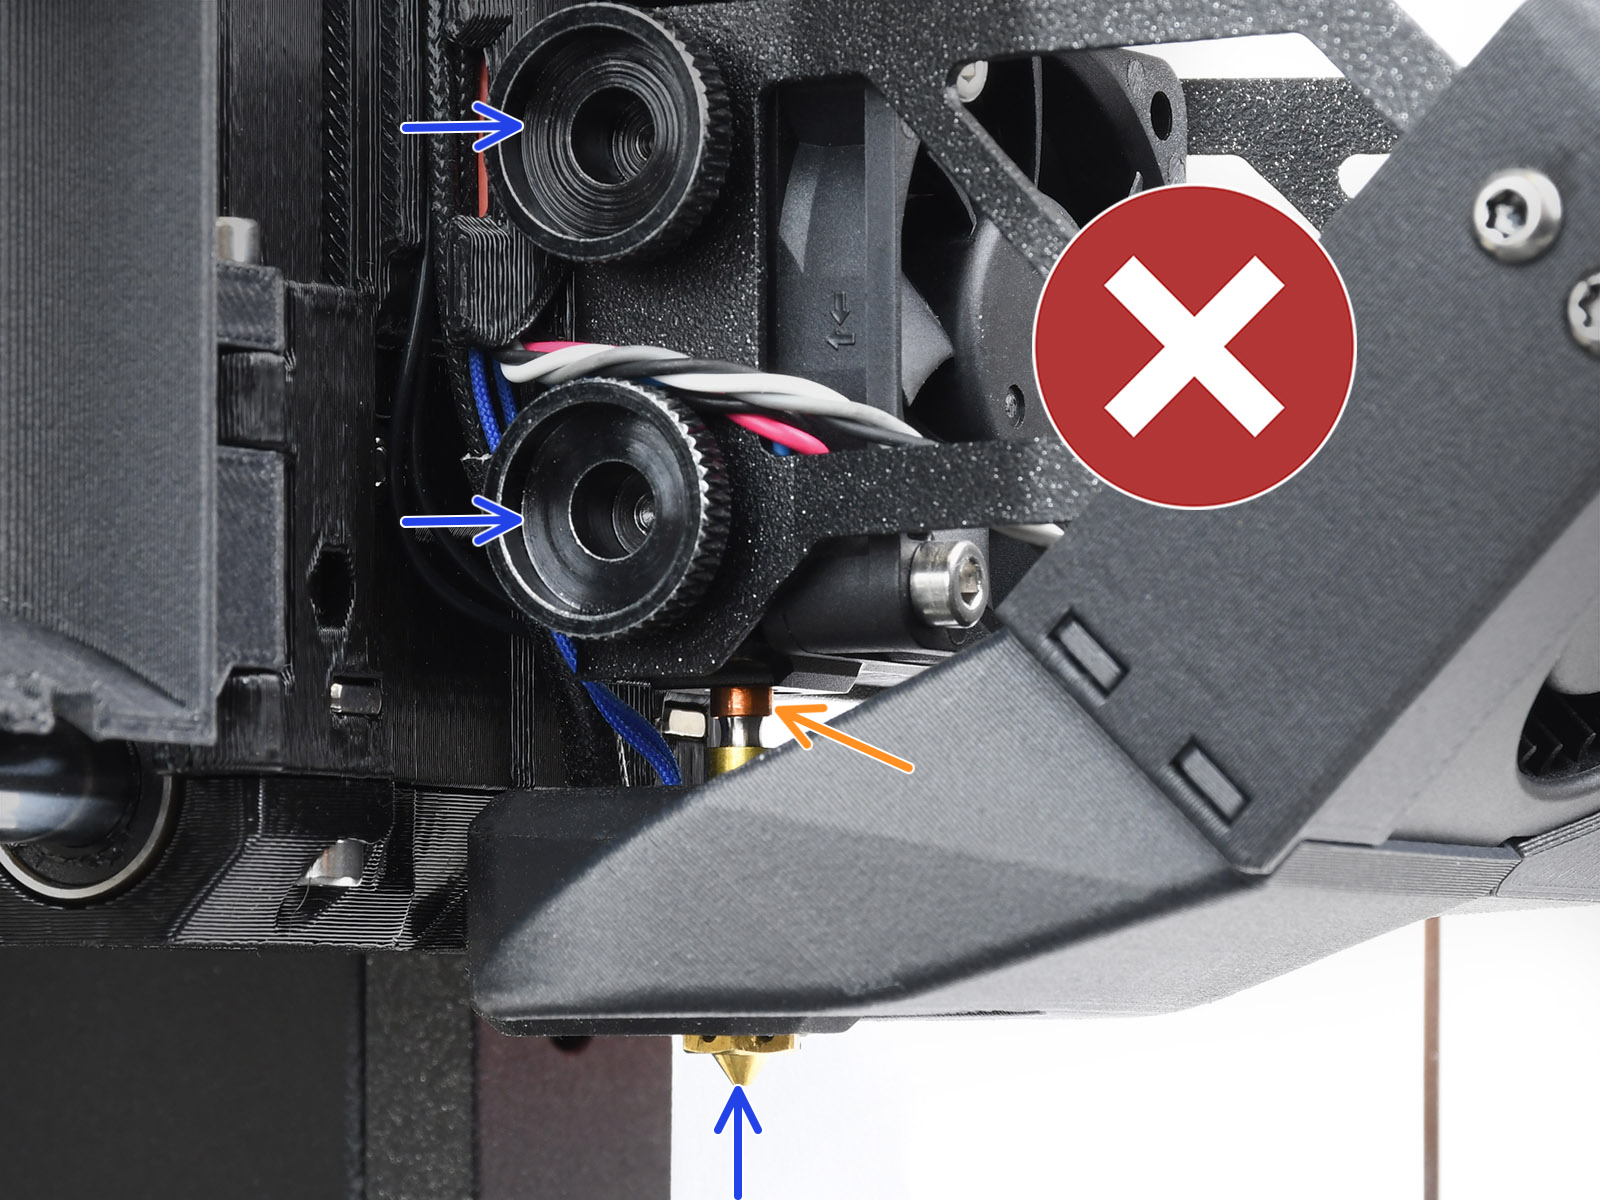
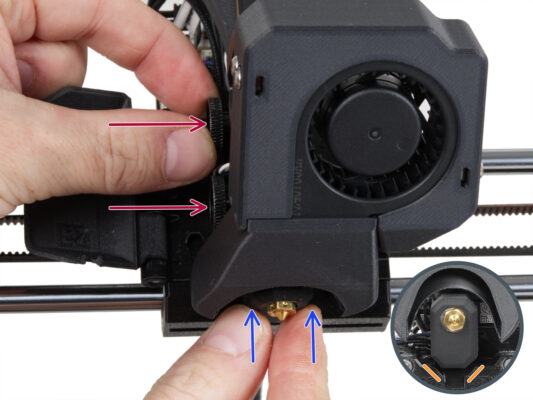
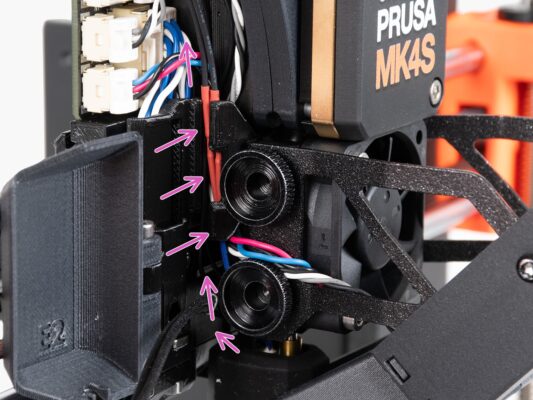
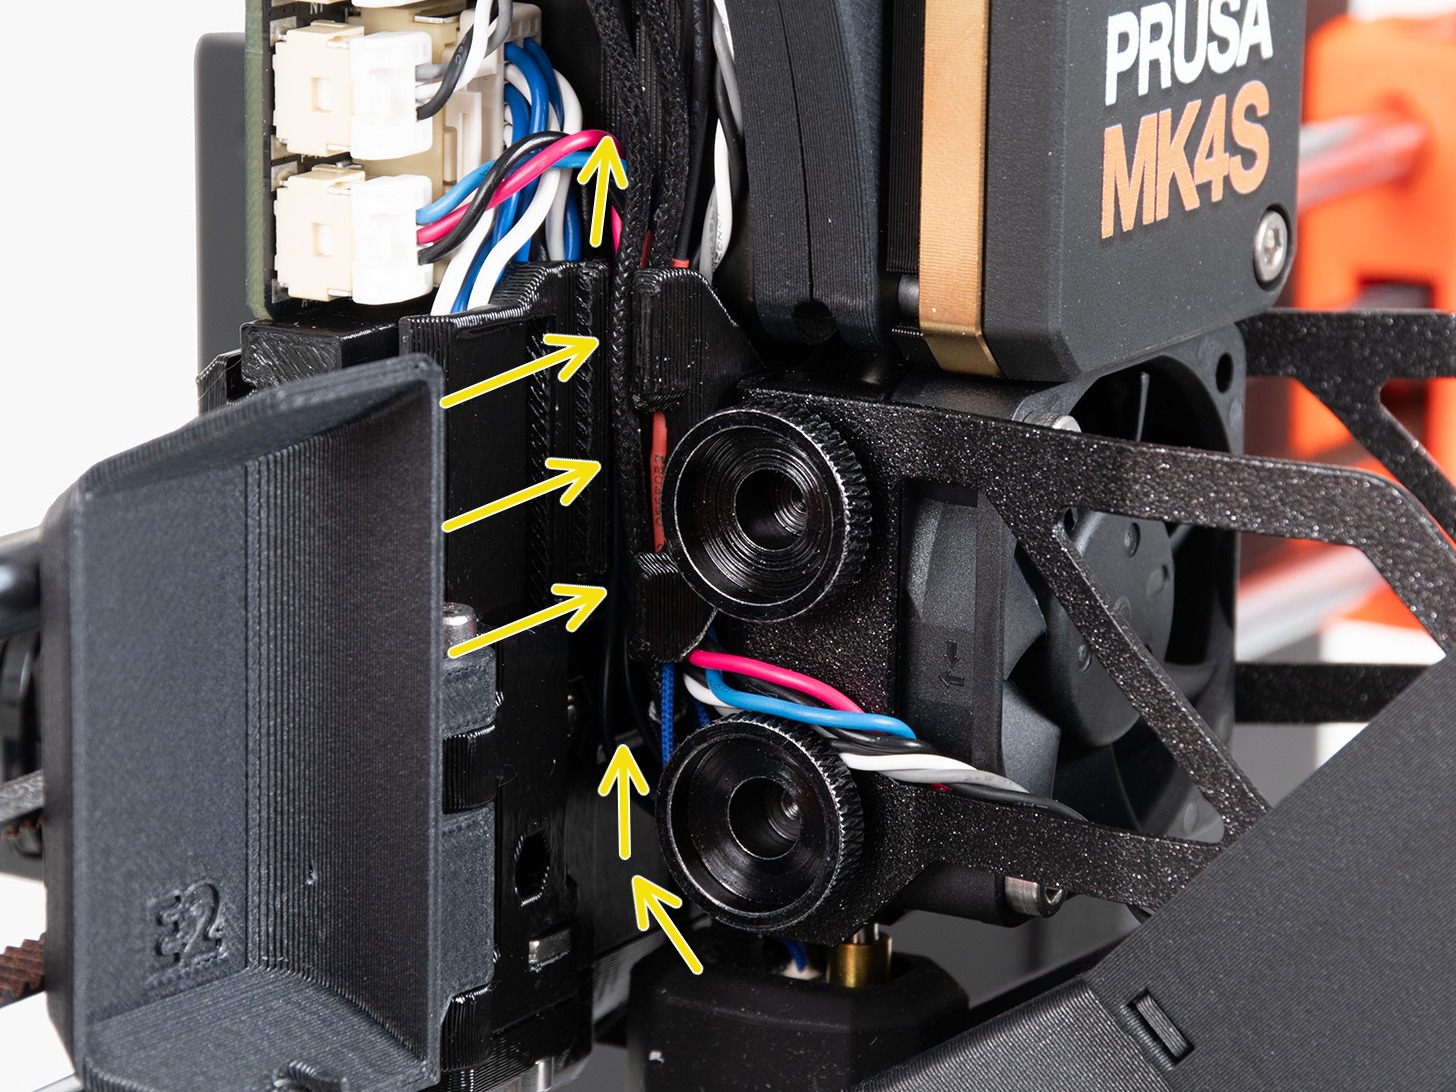
⬢Push the hotend assembly all the way into the heatsink.
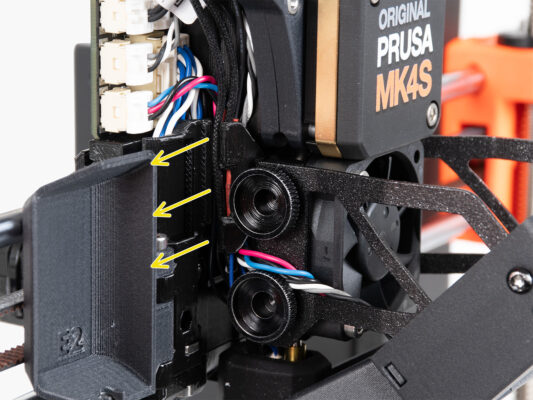
⬢While pushing the hotend assembly in, firmly tighten both thumb screws.
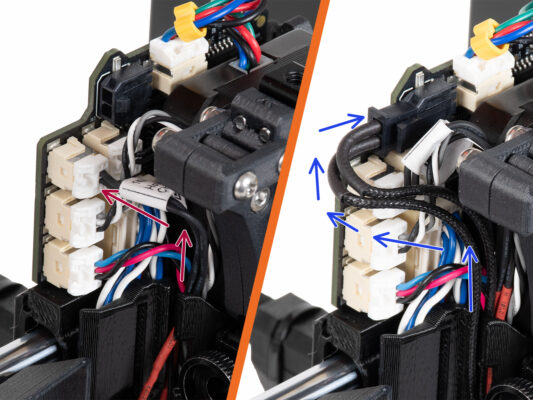
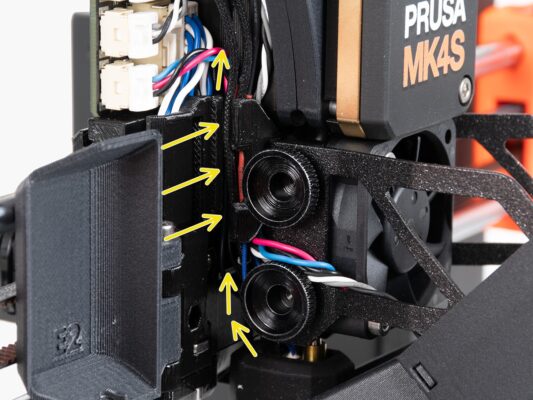
ネジとヒートシンクの間にケーブルを挟まないようにしてください!
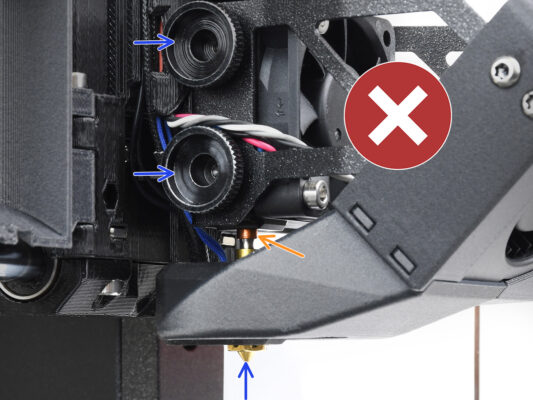
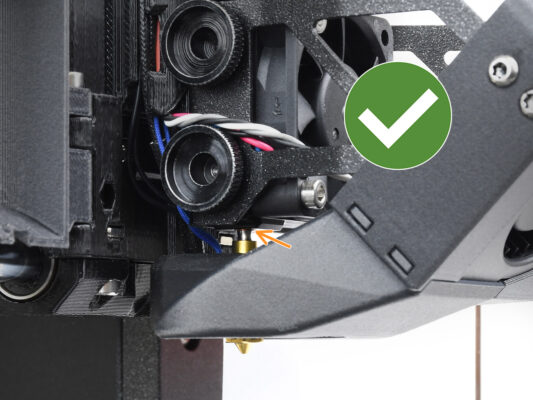
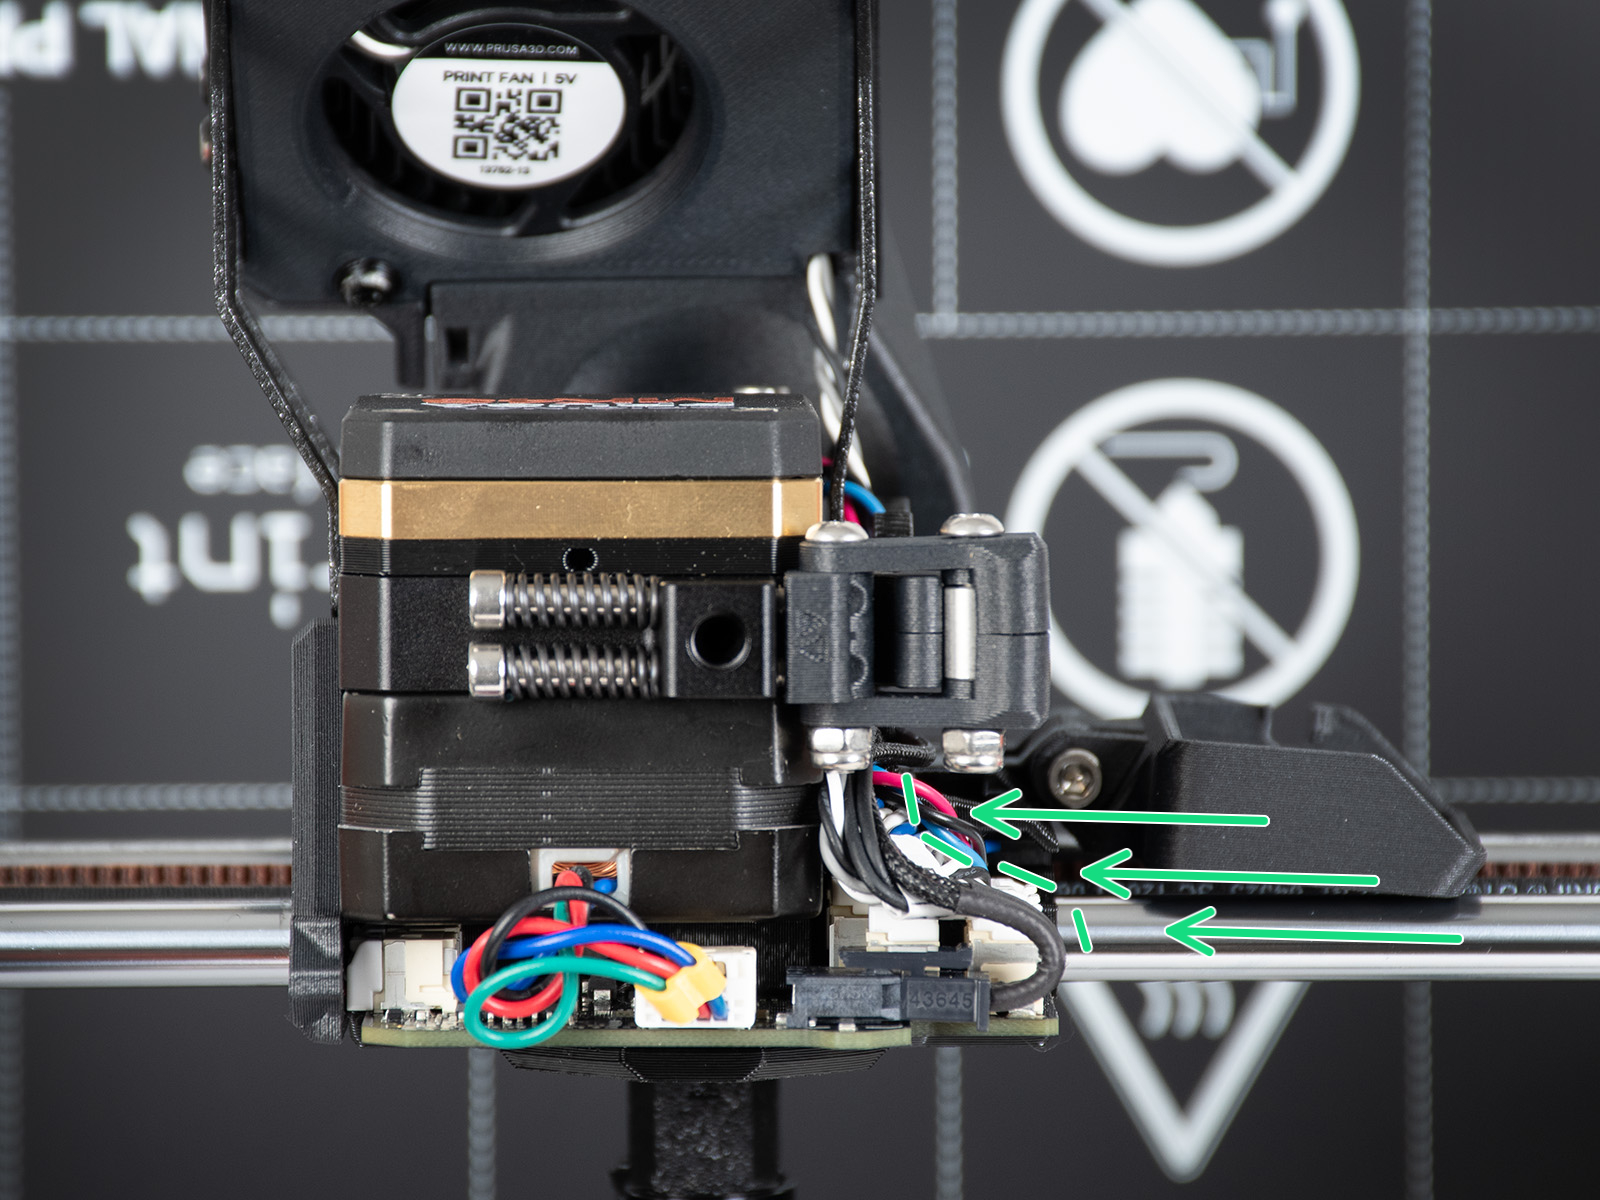
⬢From the underside, check that the hotend is oriented correctly. It must fit between the cutouts in the X-carriage.
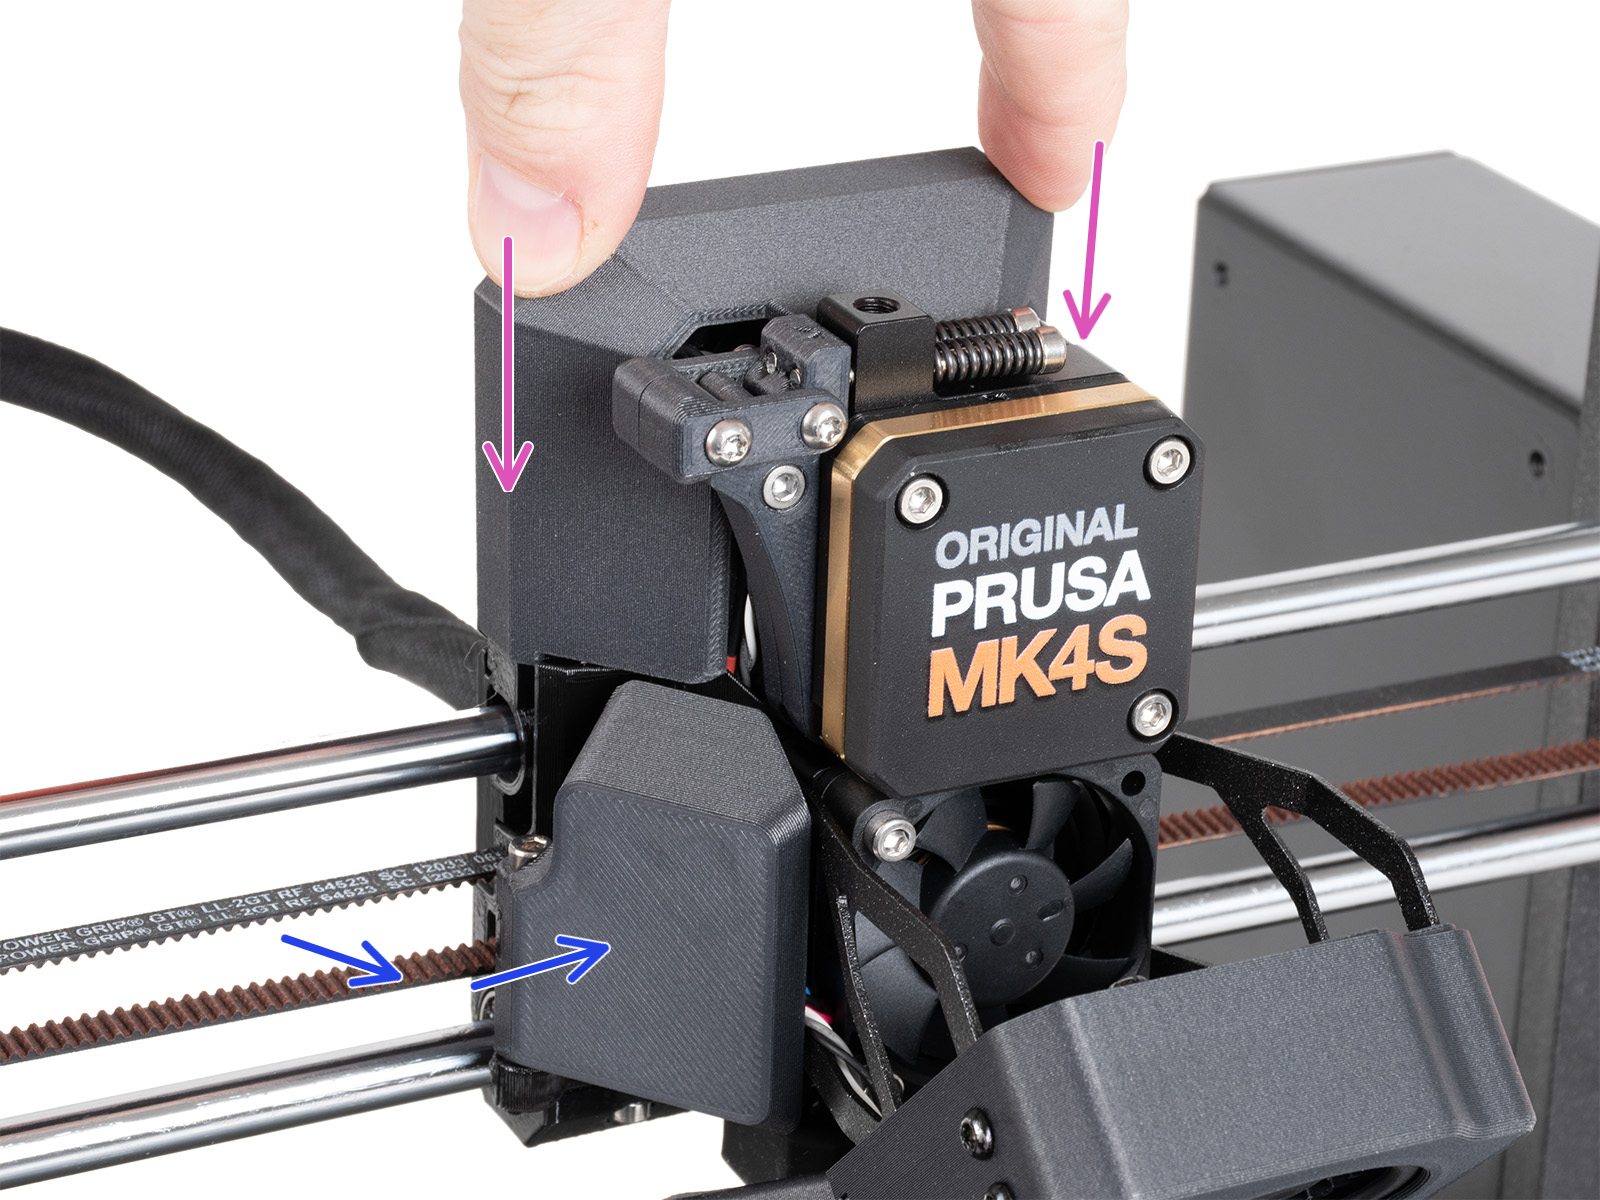
⬢Congratulations! You just successfully replaced the NextruderV6 Nozzle Adapter on your printer.
Was this guide helpful?
Comments
Still have questions?
If you have a question about something that isn't covered here, check out our additional resources. And if that doesn't do the trick, you can send an inquiry to [email protected] or through the button below.