English
Login
3D printers
Materials
Parts & Accessories
Software
3D Models
Applications
Community
Help
Academy
Blog
Company
Support
Original Prusa i3 MK3
Original Prusa i3 MK3 kit assembly
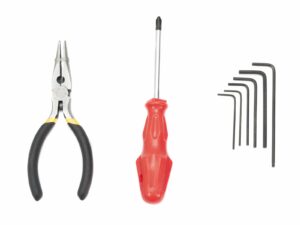
7. Heatbed & PSU assembly (textile sleeve) | Tools necessary for this chapter
1. Tools necessary for this chapter
Step 1 of 22 (Chapter 10 of 14)
Fullscreen mode
Contents
Comments
⬢
Needle-nose pliers for the heatbed assembly
⬢
2.5mm Allen key for M3 screws
⬢
2mm Allen key for heatbed alignment
Loading...
Next
Contents
Original Prusa i3 MK3 kit assembly
1. Introduction
Introduction
2. Y-axis assembly
3. X-axis assembly
4. Z-axis assembly
5. E-axis assembly (spiral wrap)
5. E-axis assembly (textile sleeve)
6. LCD assembly
7. Heatbed & PSU assembly (spiral wrap)
7. Heatbed & PSU assembly (textile sleeve)
Tools necessary for this chapter
Different heatbed versions
Heatbed cable assembly (part 1)
Heatbed cable assembly (part 2)
Heatbed cable assembly (part 3)
Preparing the heatbed
Preparing the heatbed-cable-cover
Mounting the heatbed-cable-cover
Proper cable management
Wrapping the heatbed cables
Securing the sleeve in place
Finalizing the wrap
Preparing the heatbed screws and spacers
Mounting the heatbed (part 1)
Mounting the heatbed (part 2)
Mounting the heatbed (part 3)
Mounting the heatbed (part 4)
Preparing the PSU
Assembling the PSU (part 1)
Assembling the PSU (part 2)
Heatbed and PSU are done!
Different versions of the Einsy-base
8. Electronics assembly (B3/R2 design)
8. Electronics assembly (B7/R3 design)
9. Preflight check
Manual changelog
Comments
Log in
to post a comment
Eyal Peleg
•
over 6 years ago
I would suggest that this stage clearly states (Again) that this entire guide is for you only if you have a textile wrap and a spiral wrap.
if you do not have the textile wrap but have a two spiral wraps instead, you should go back and choose the other number 7 guide,
i.e. the one titled “'''7. Heatbed & PSU assembly (spiral wrap)'''“'''.'''
Reply