What happened?
The printer is displaying the message: The Ambient temperature/UV LED temperature sensor failed.
Error name: Temperature sensor failed
Error code: #10205
The SL1 has several sensors measuring the temperature of various parts and components of the printer. If a wire has been disconnected or damaged, or the sensor itself has been damaged it can produce this error.
How to fix it?
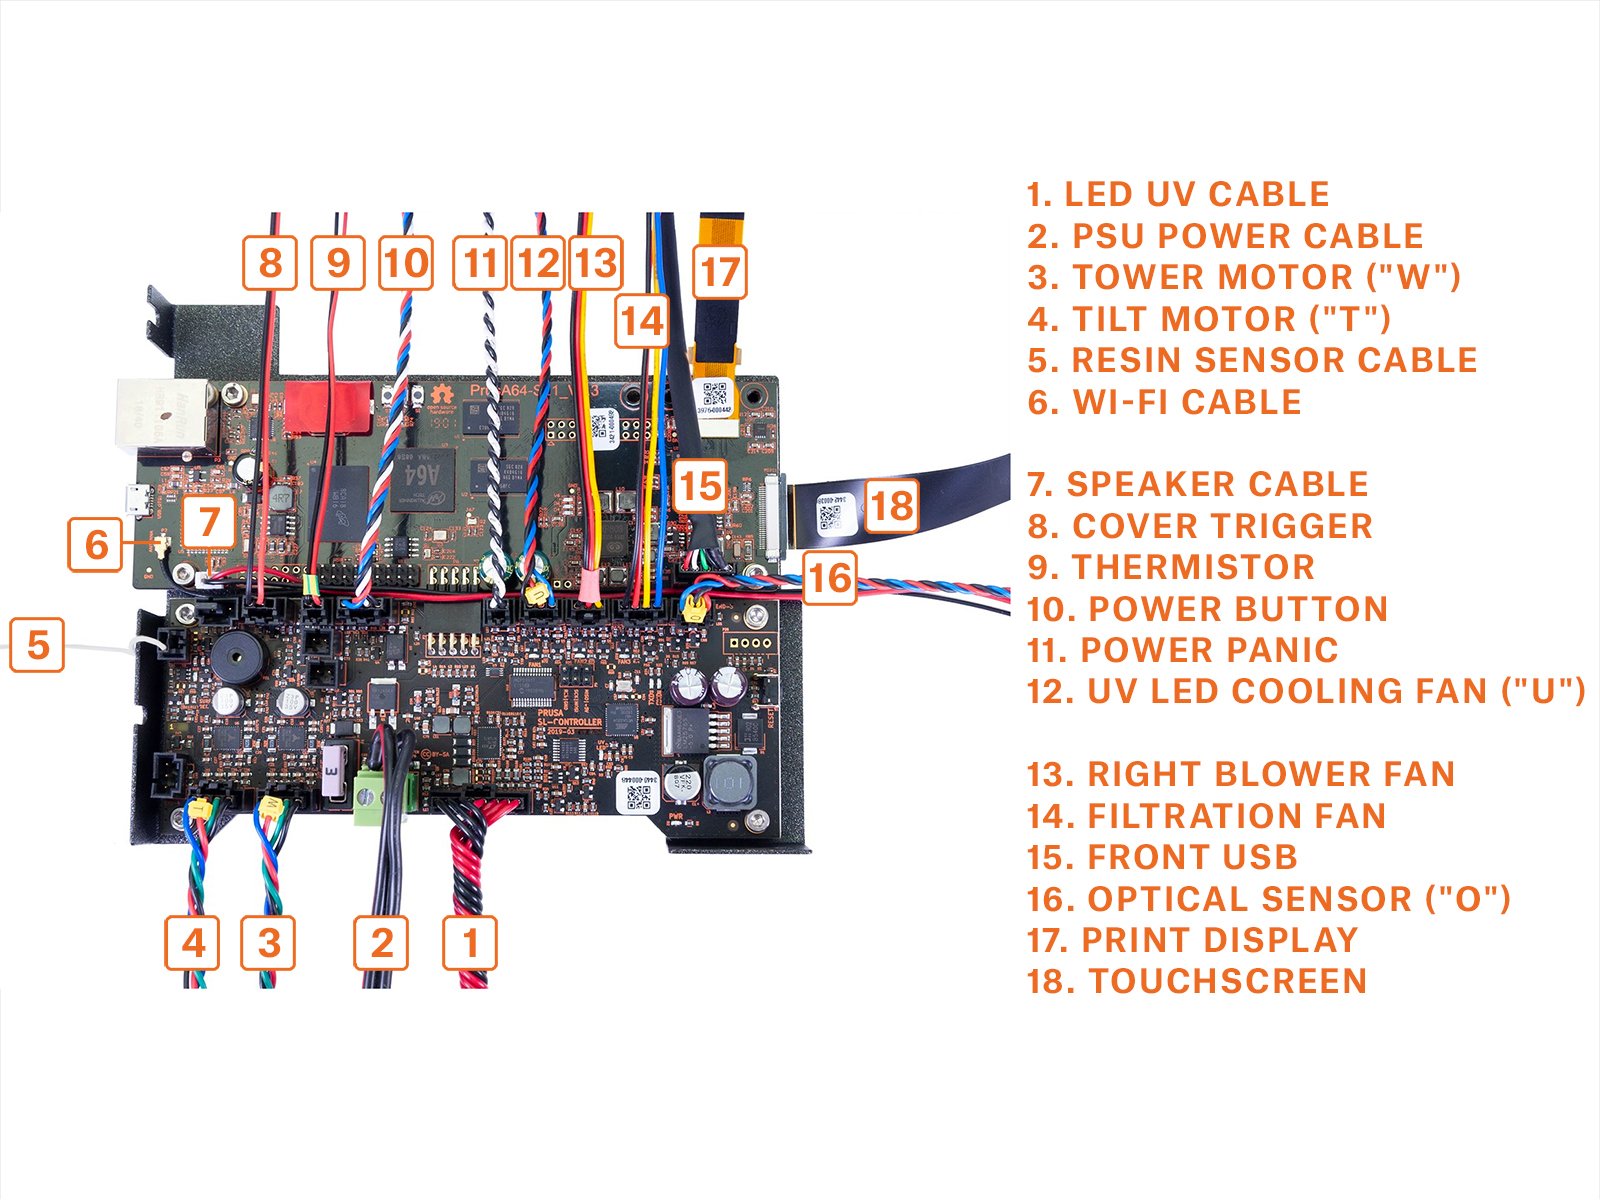
Accessing the mainboard
First, make sure the plug of the sensor has not detached from the A64 mainboard. To access the mainboard:
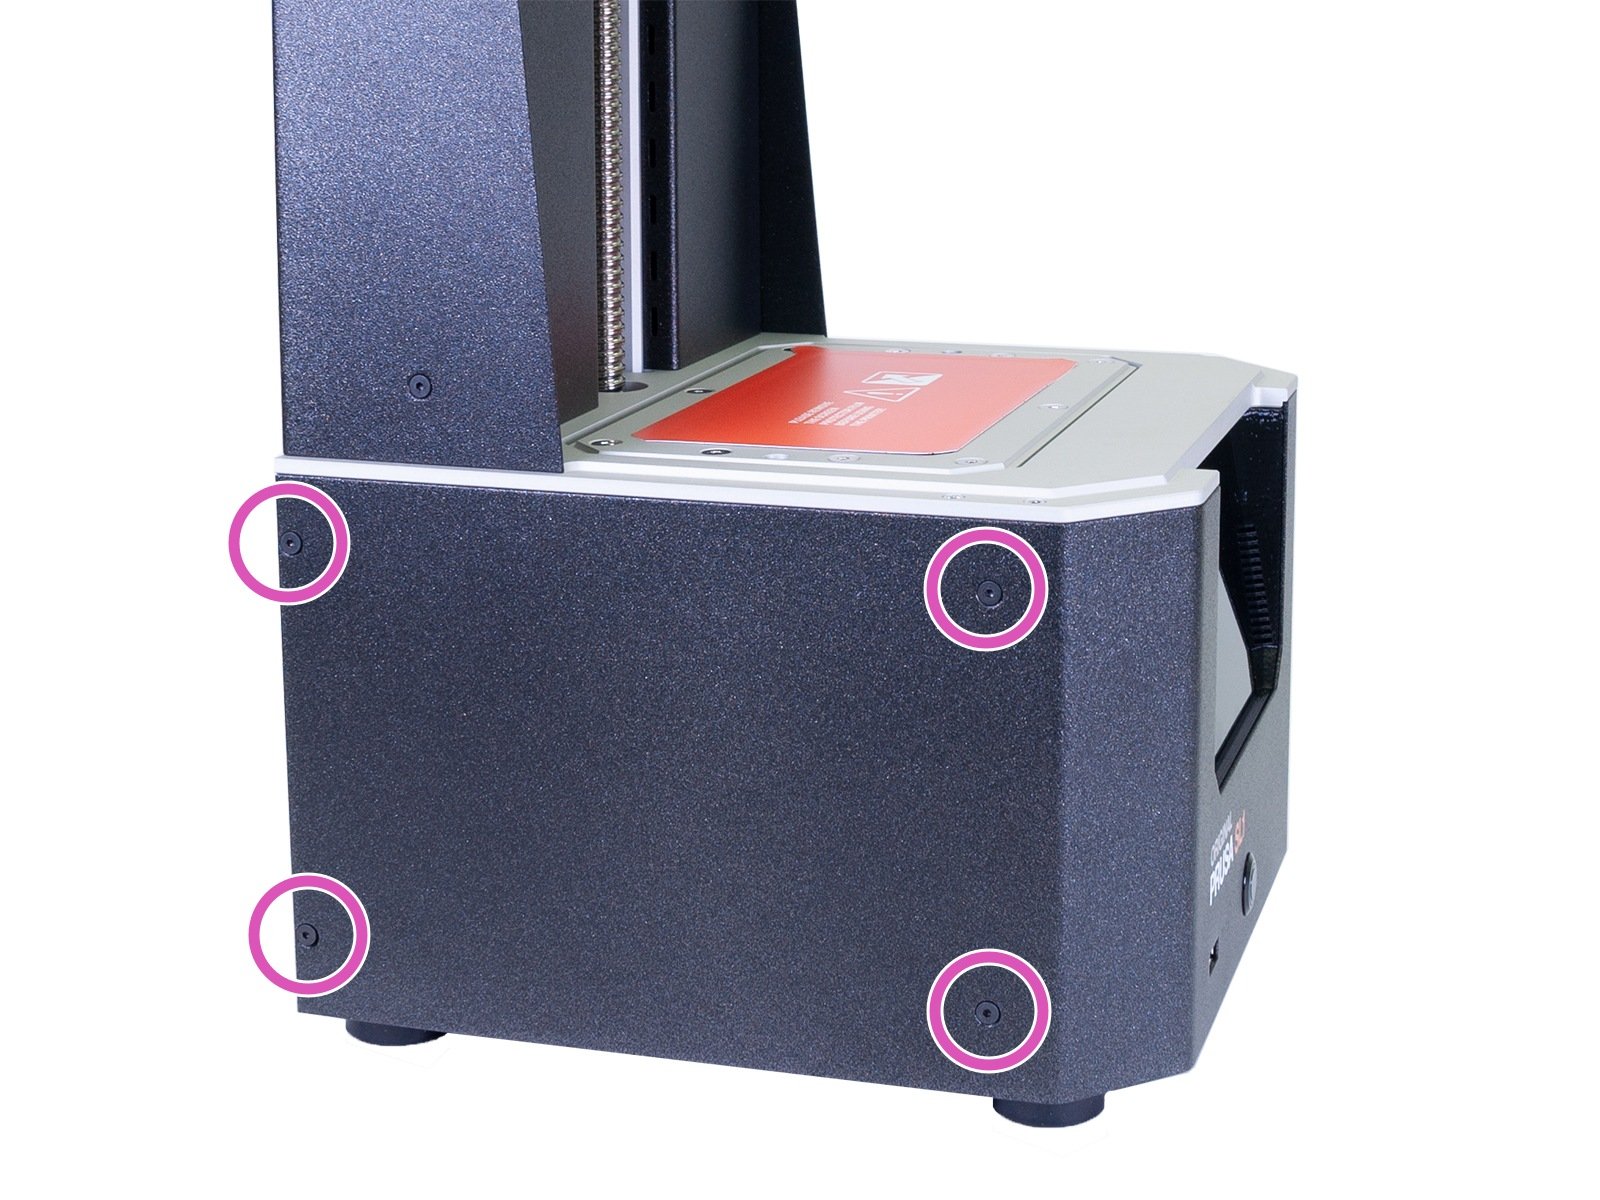
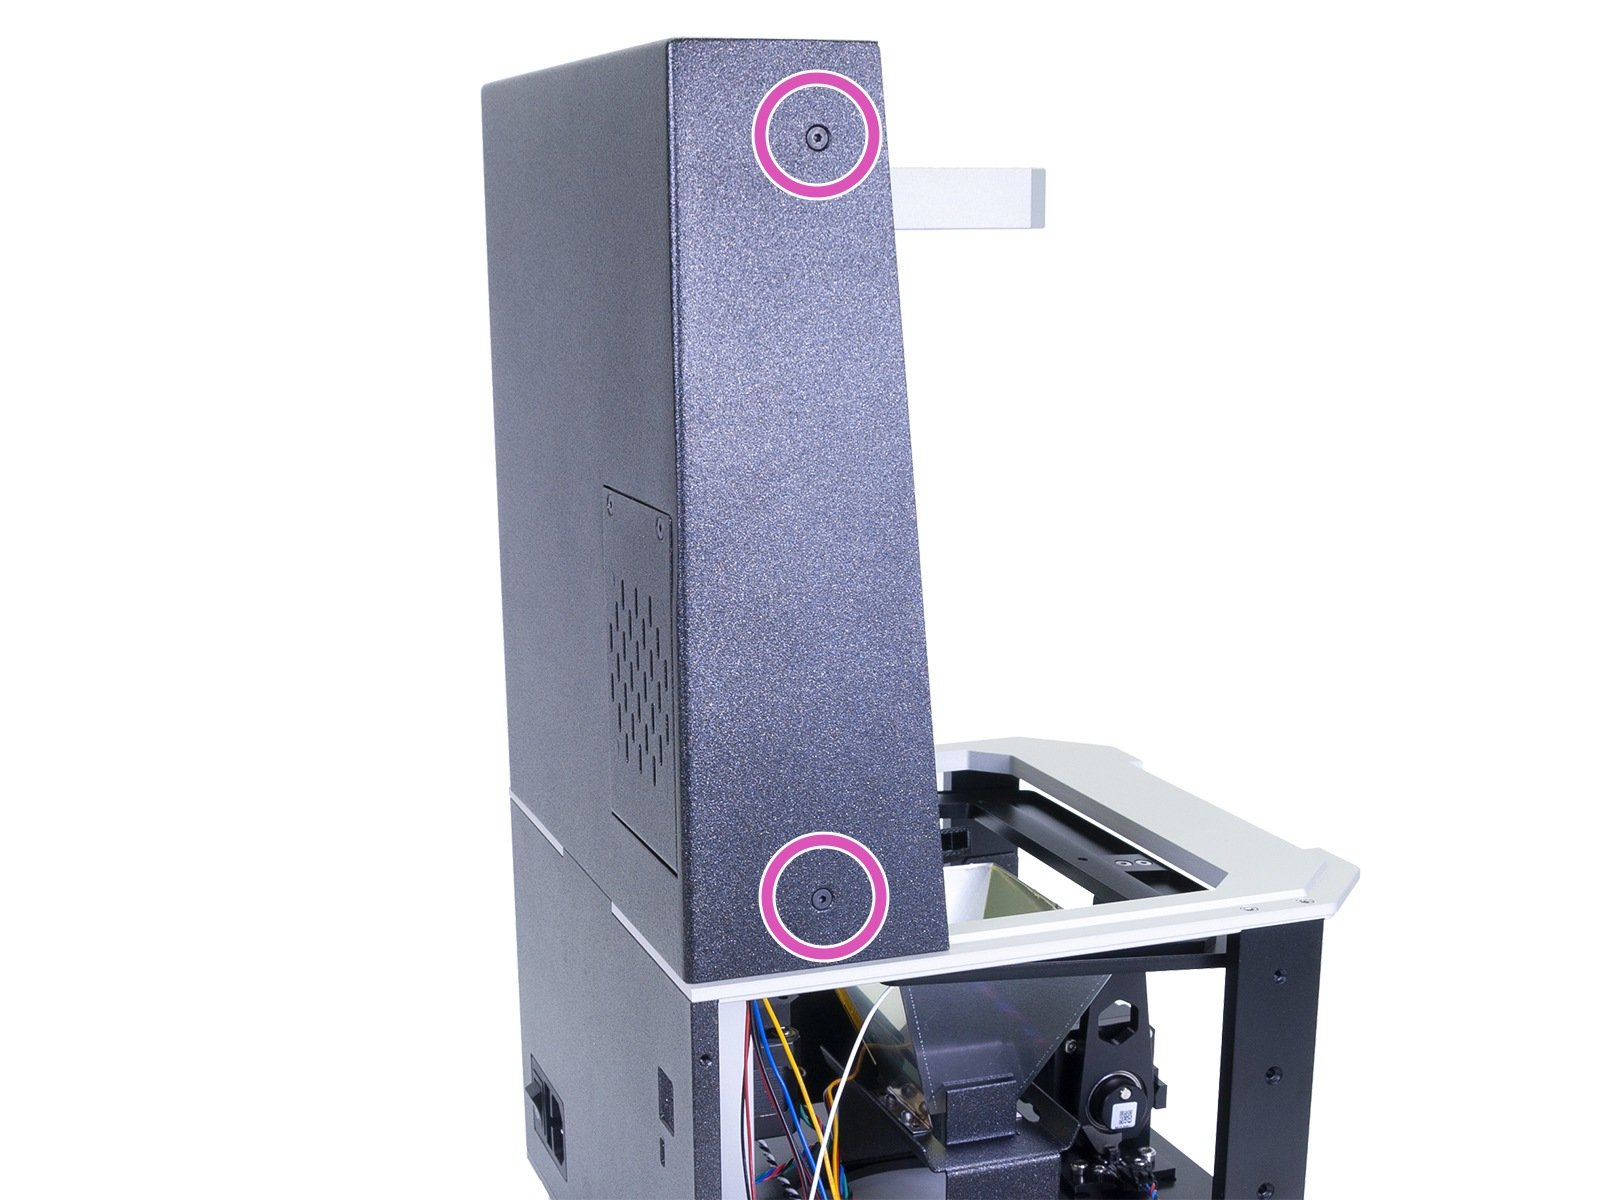
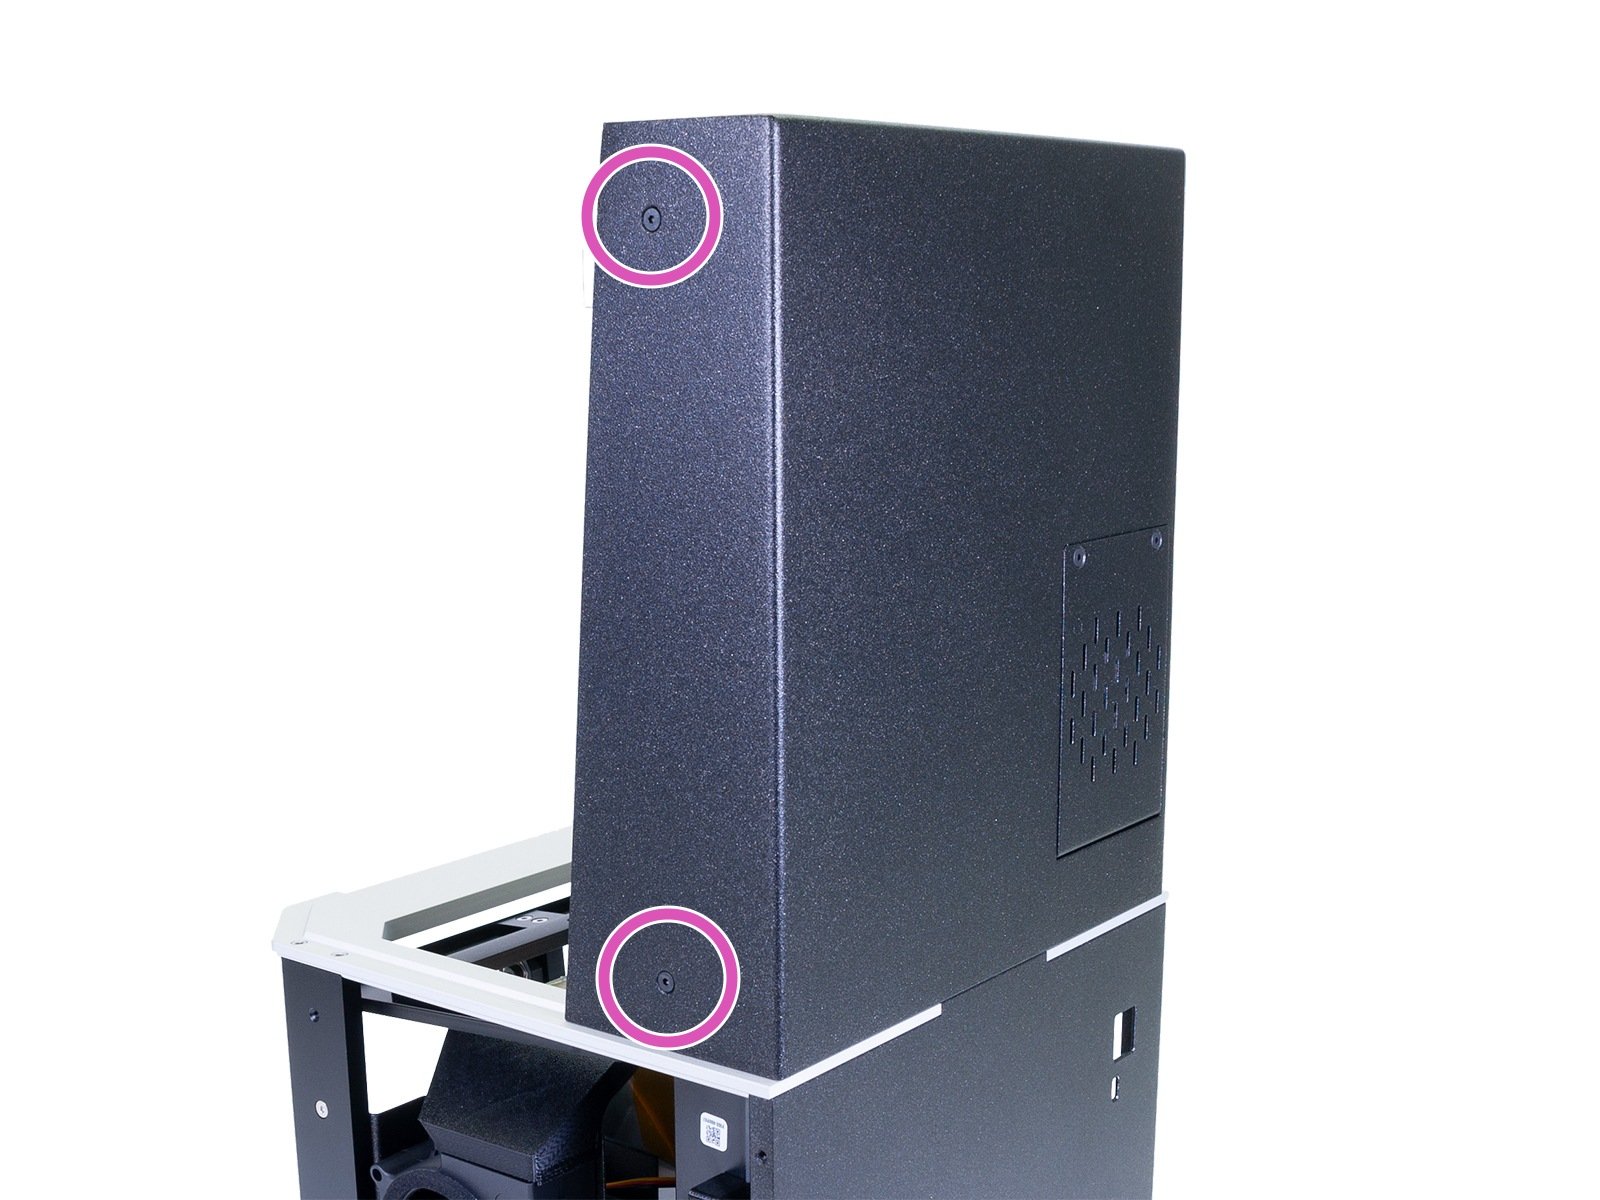
- Remove the 4 screws on the left and right-hand side of the printer.
 |  |
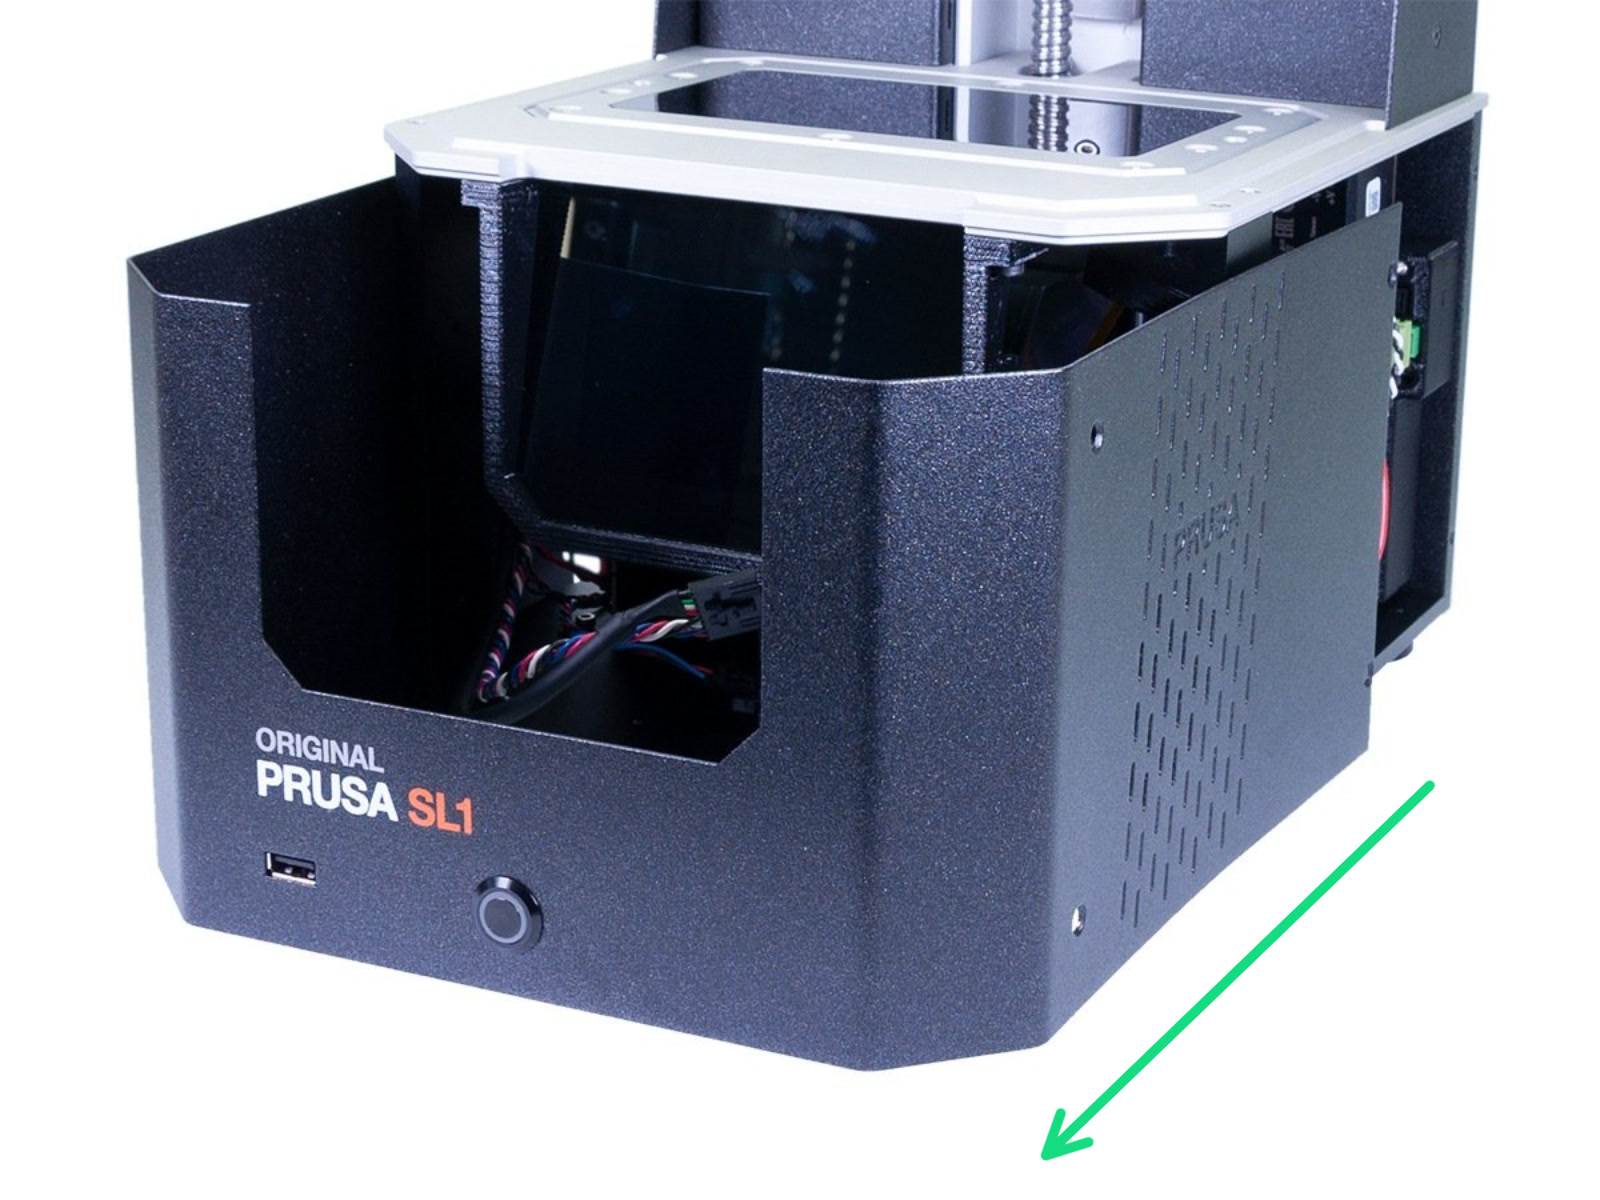
- Unplug the wire that goes to the front USB port, before sliding the front panel off.
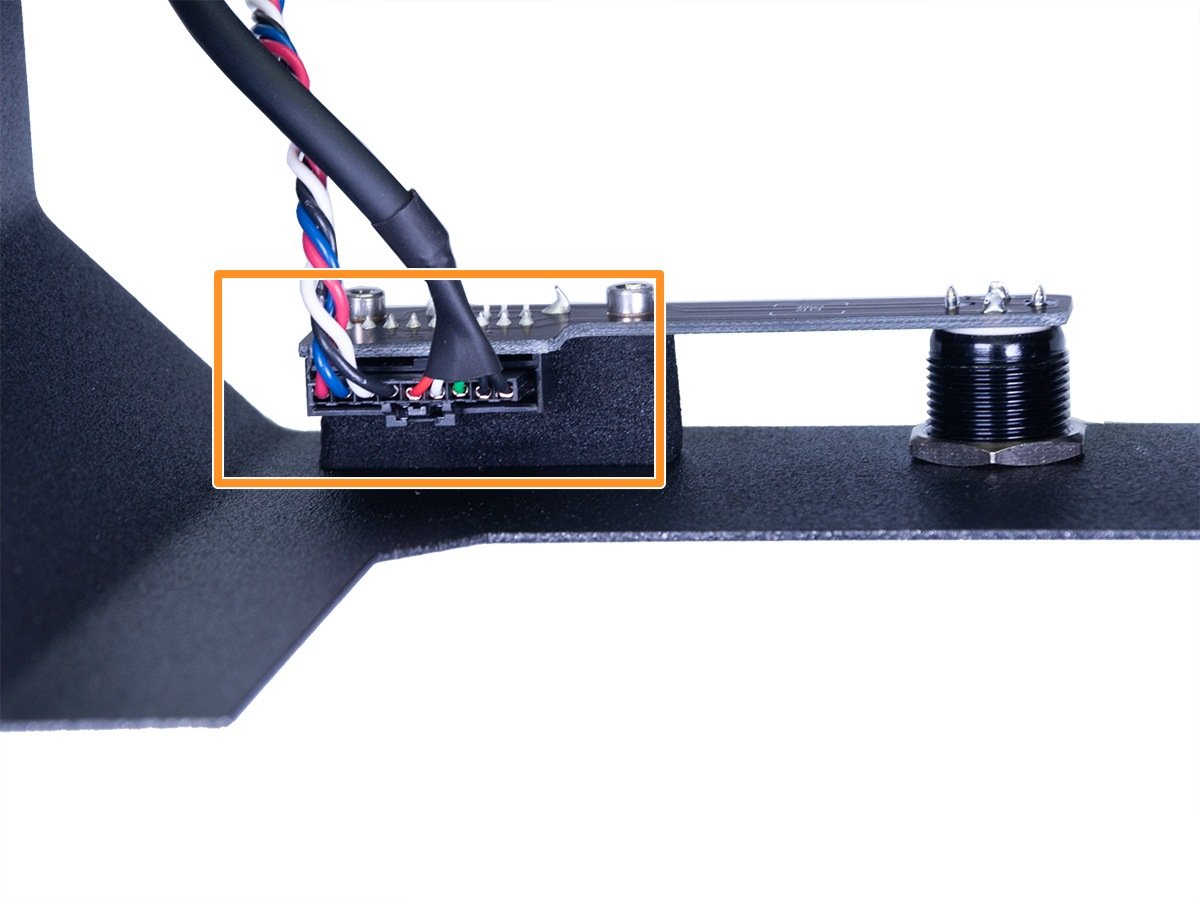 |  |
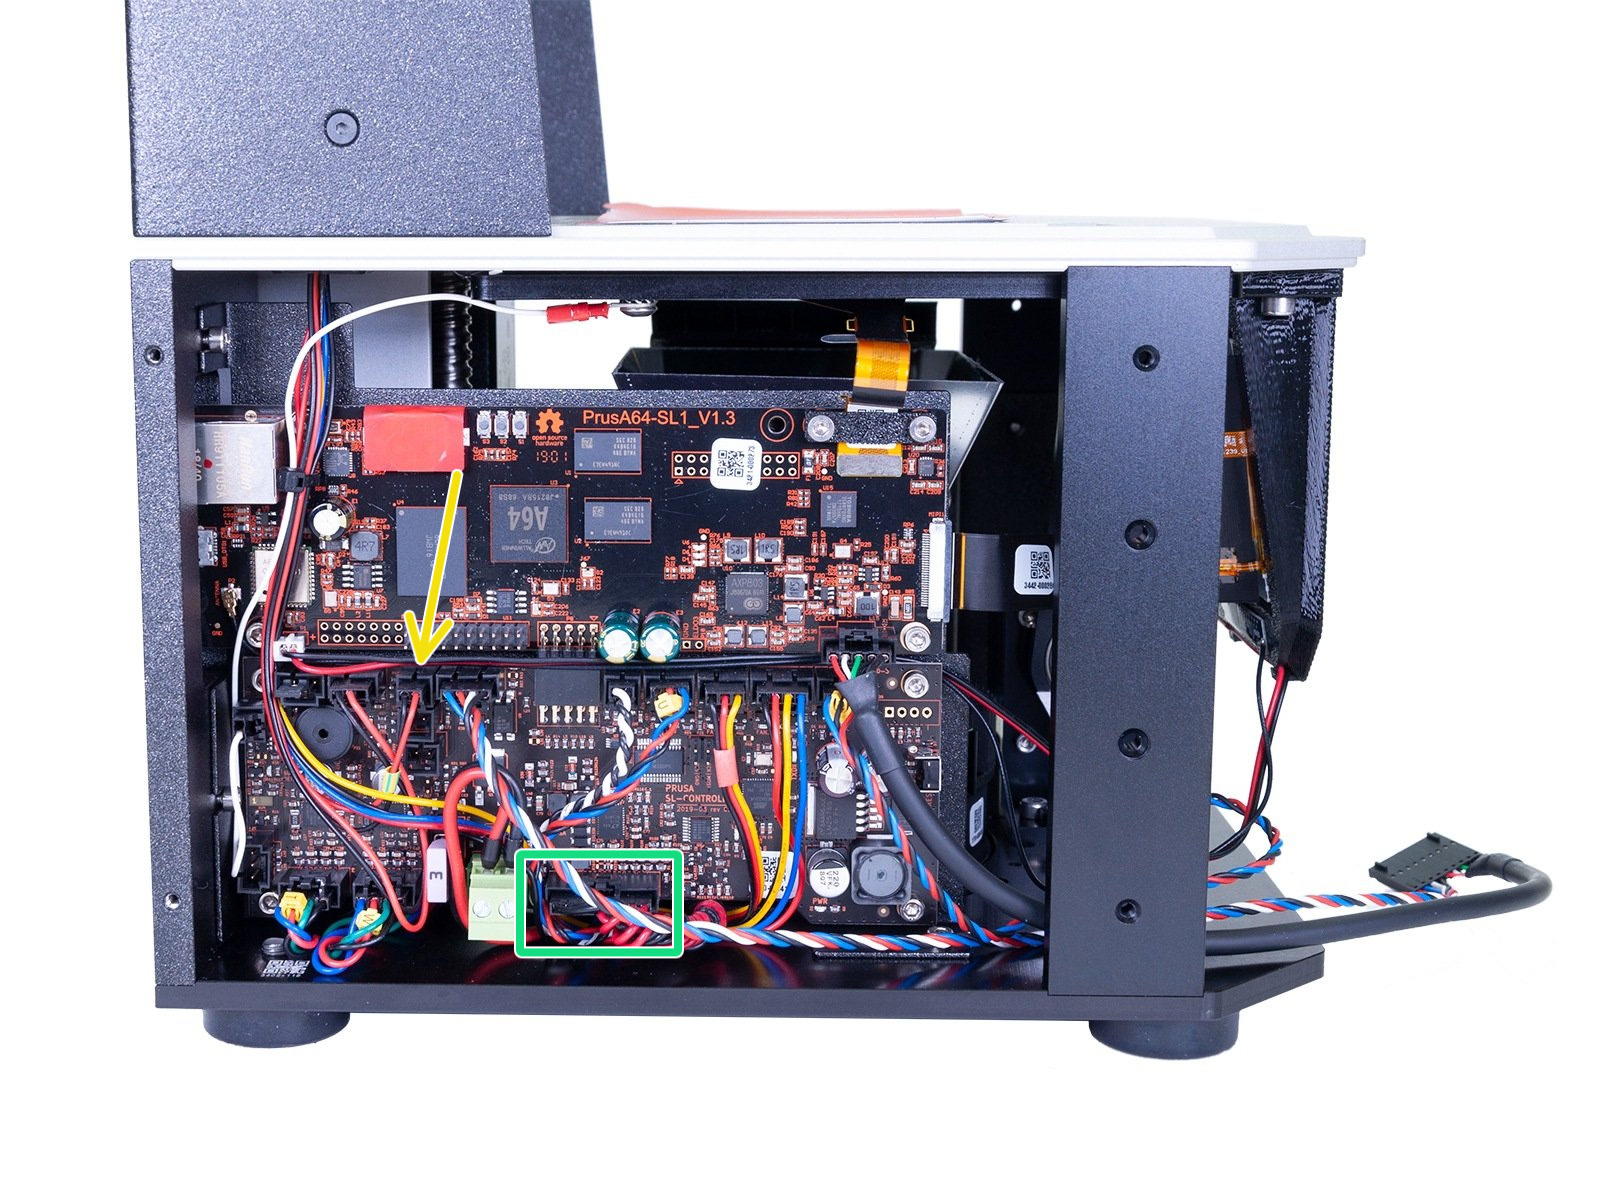
You will now have full access to the mainboard and its connections. On the left picture, you can see the Ambient temperature sensor (thermistor) indicated by the yellow arrow, and the LED temperature sensor is connected together with its power cables, indicated by the green square.
 |  |
Ambient temperature sensor
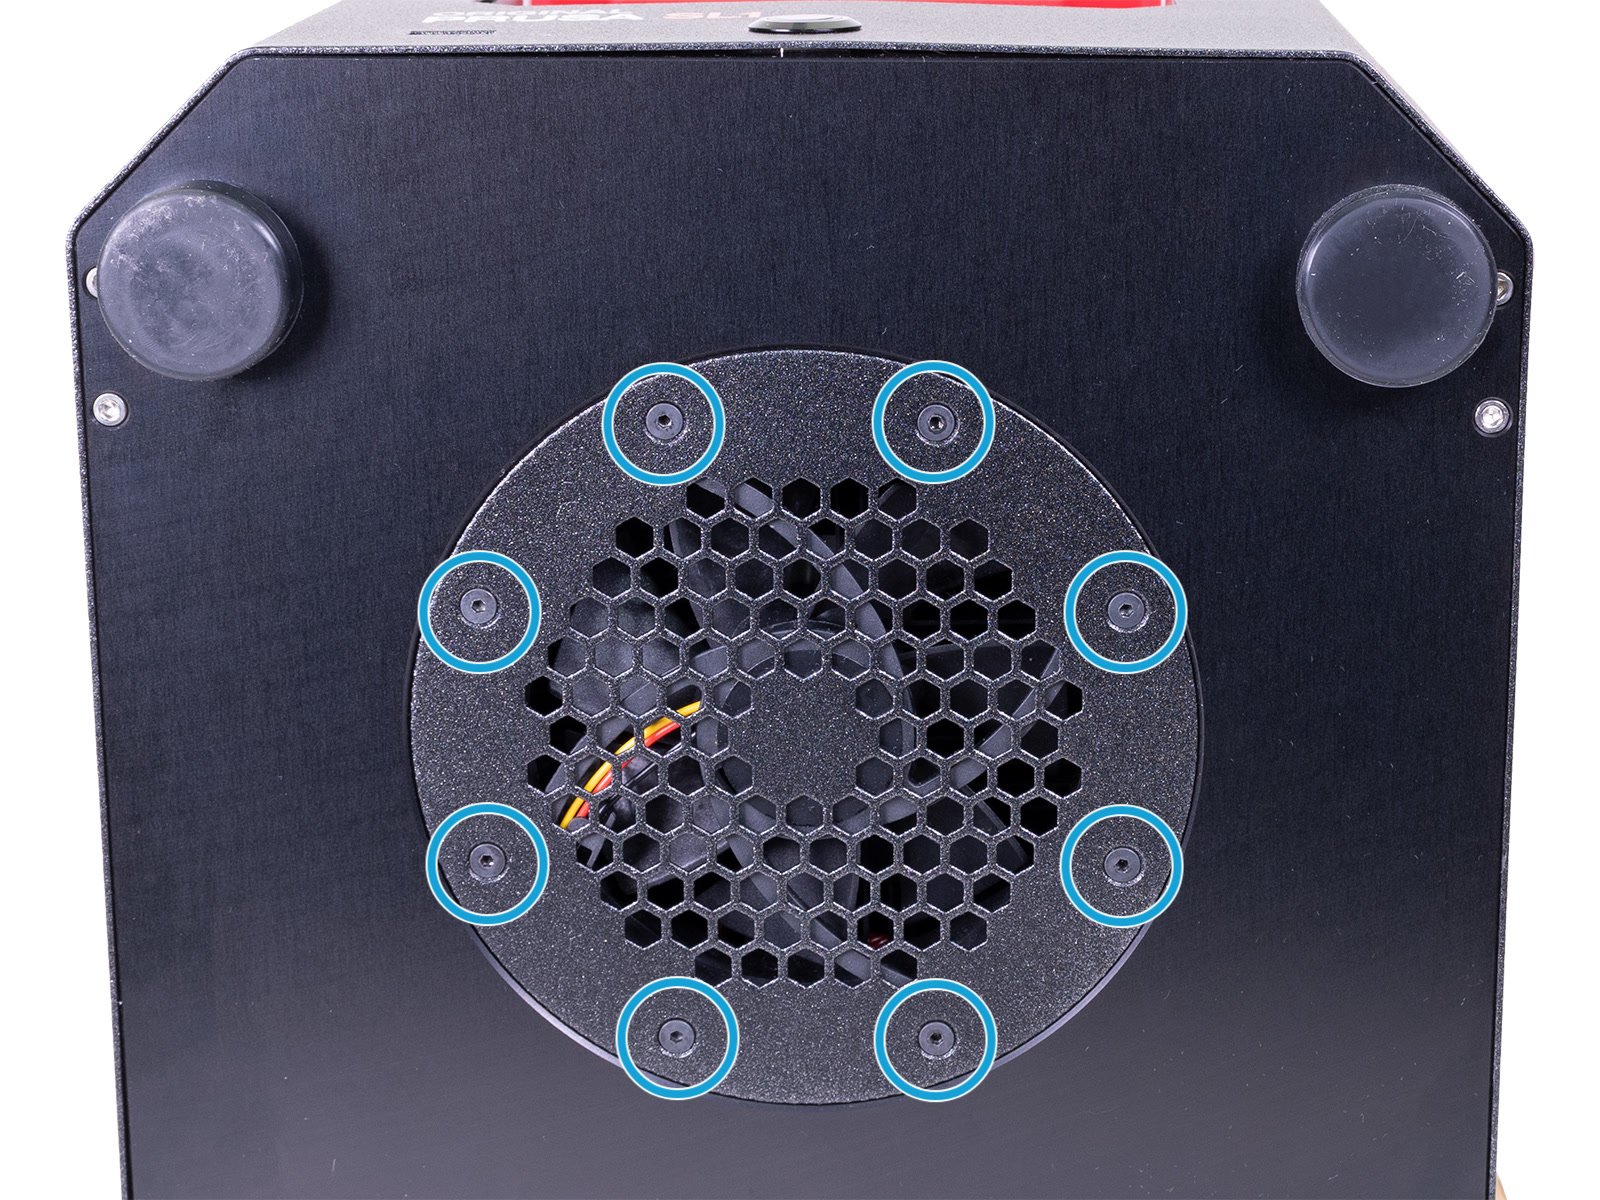
The sensor itself is found inside the tower, behind the back-plate. The sensor can be accessed by removing the screws on the sides
 |  |

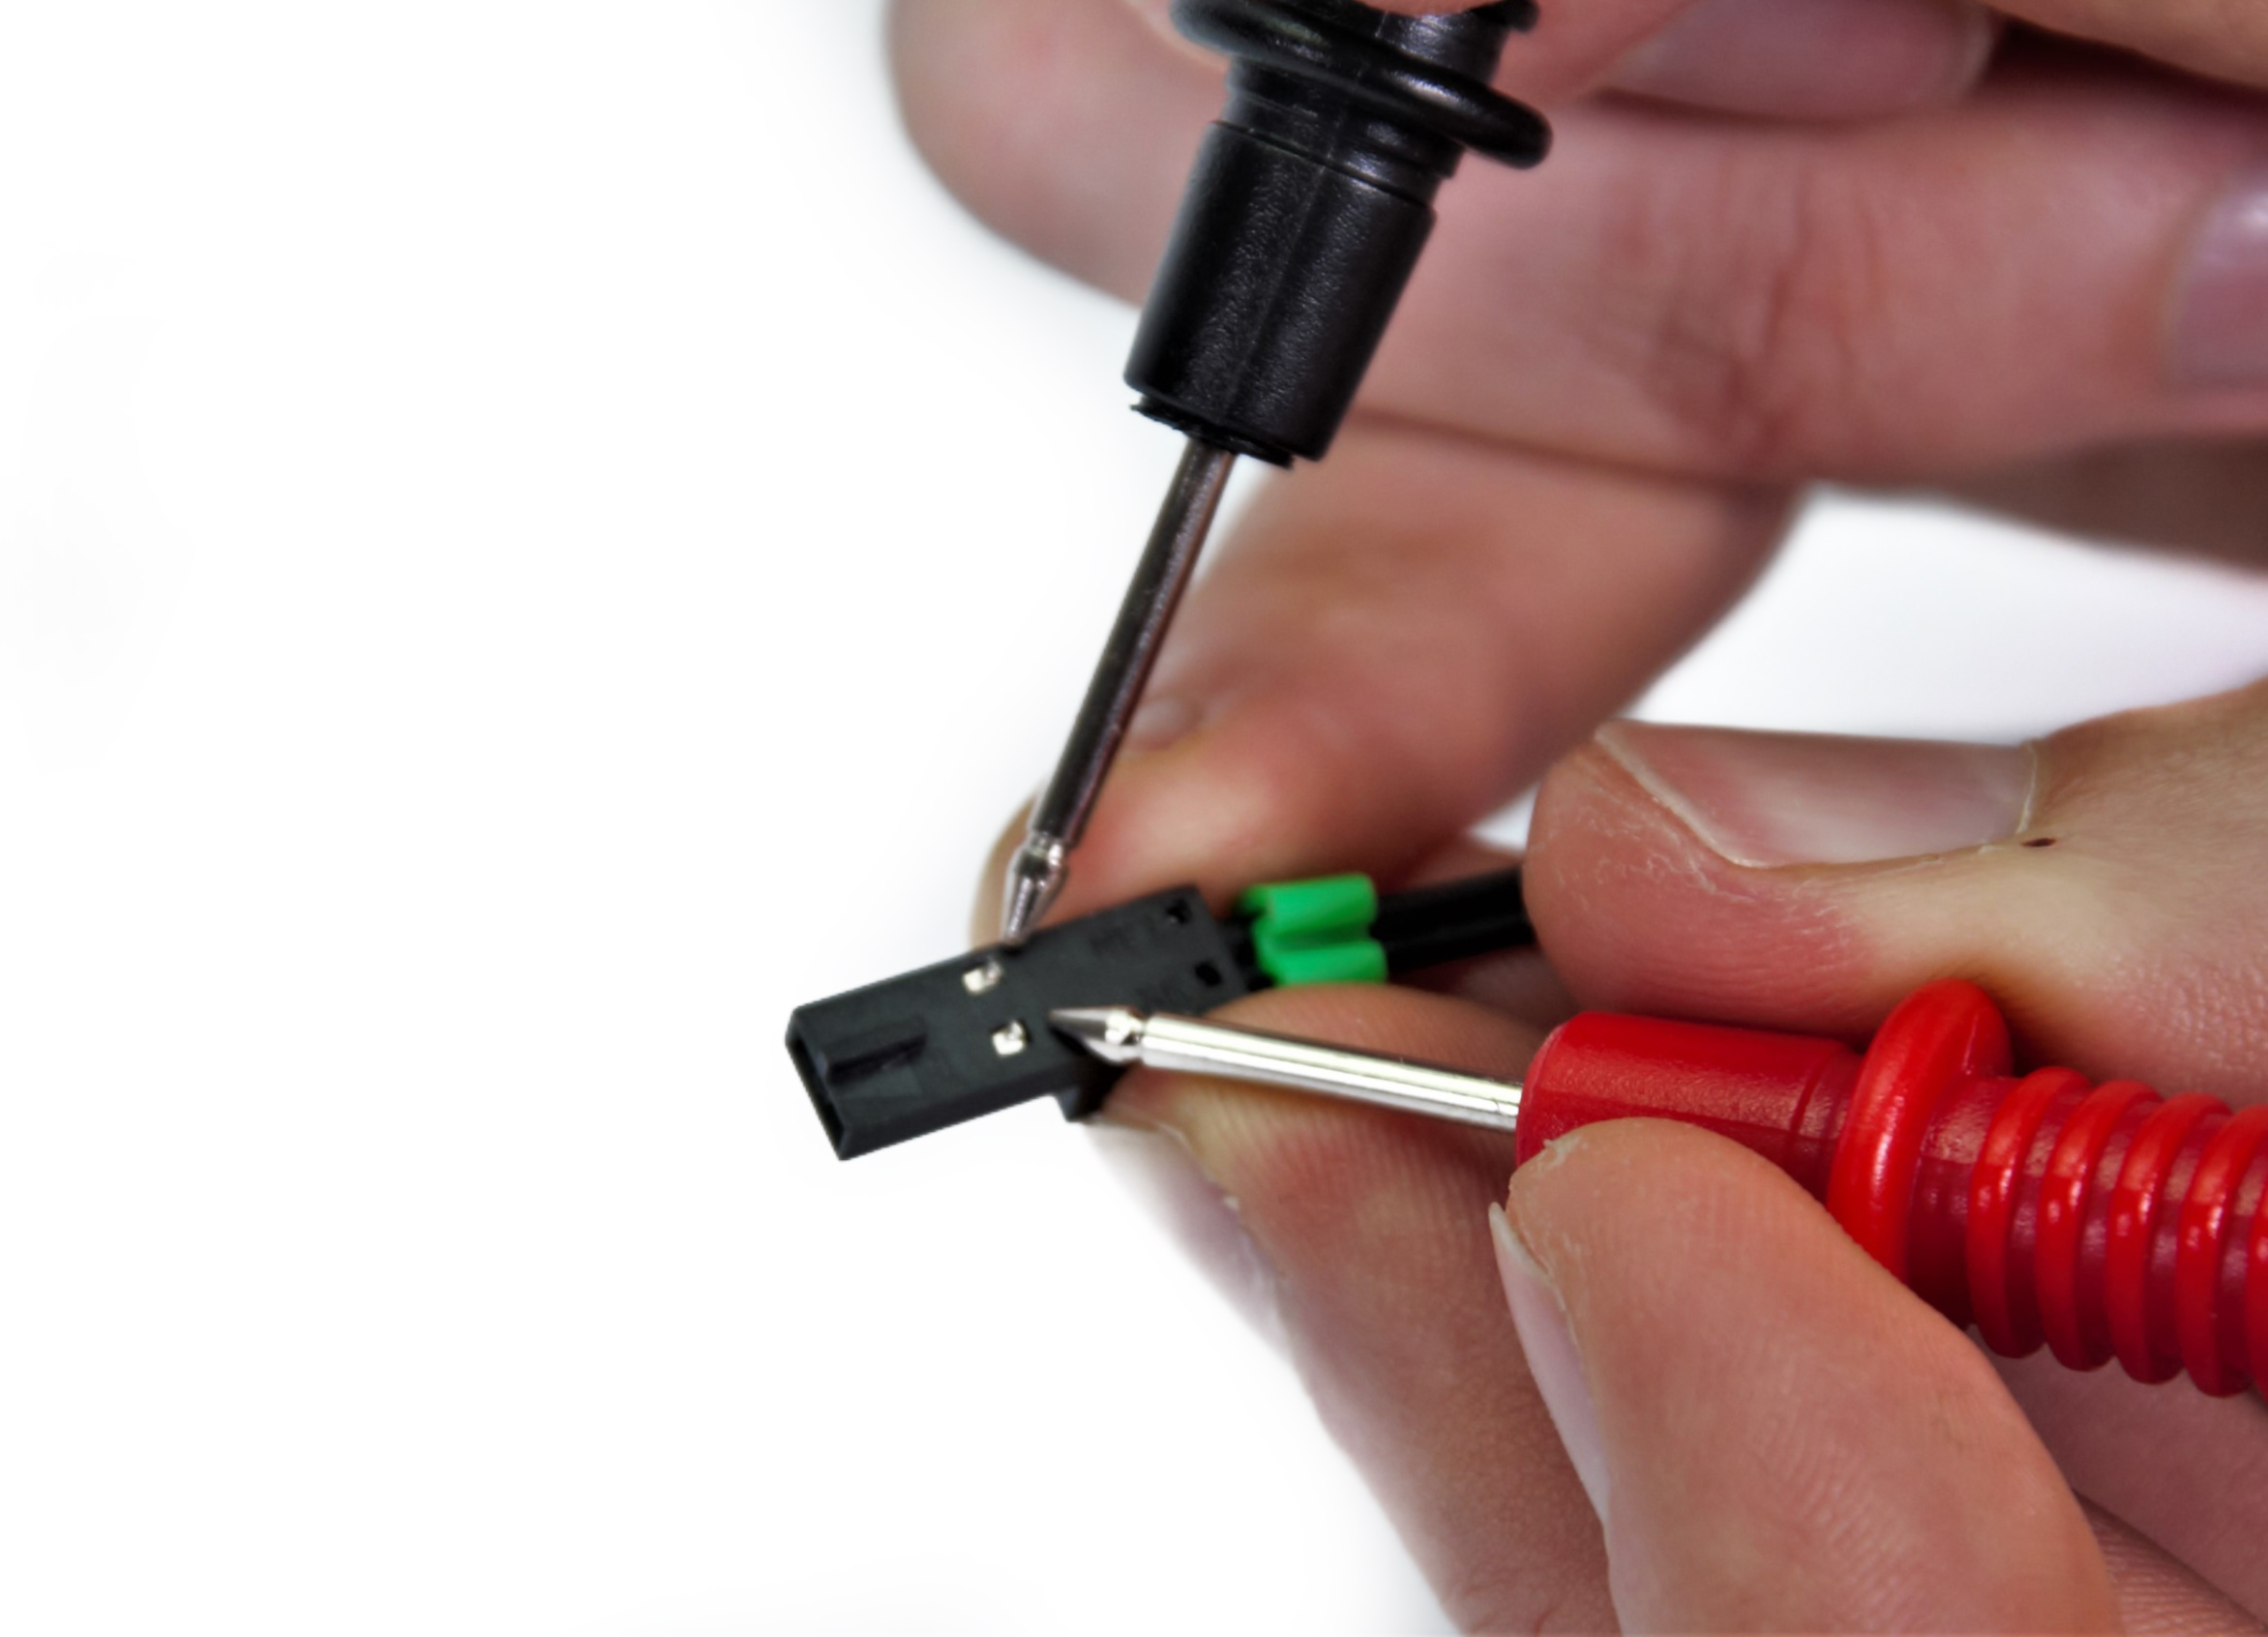
You can check the integrity of the ambient temperature sensor using a multimeter. Unplug it from the board and measure the resistance across the leads of the connector, as illustrated below. Set your meter to 200K to be within the correct range. More info in Multimeter usage [進行中の翻訳].
UV LED temperature sensor
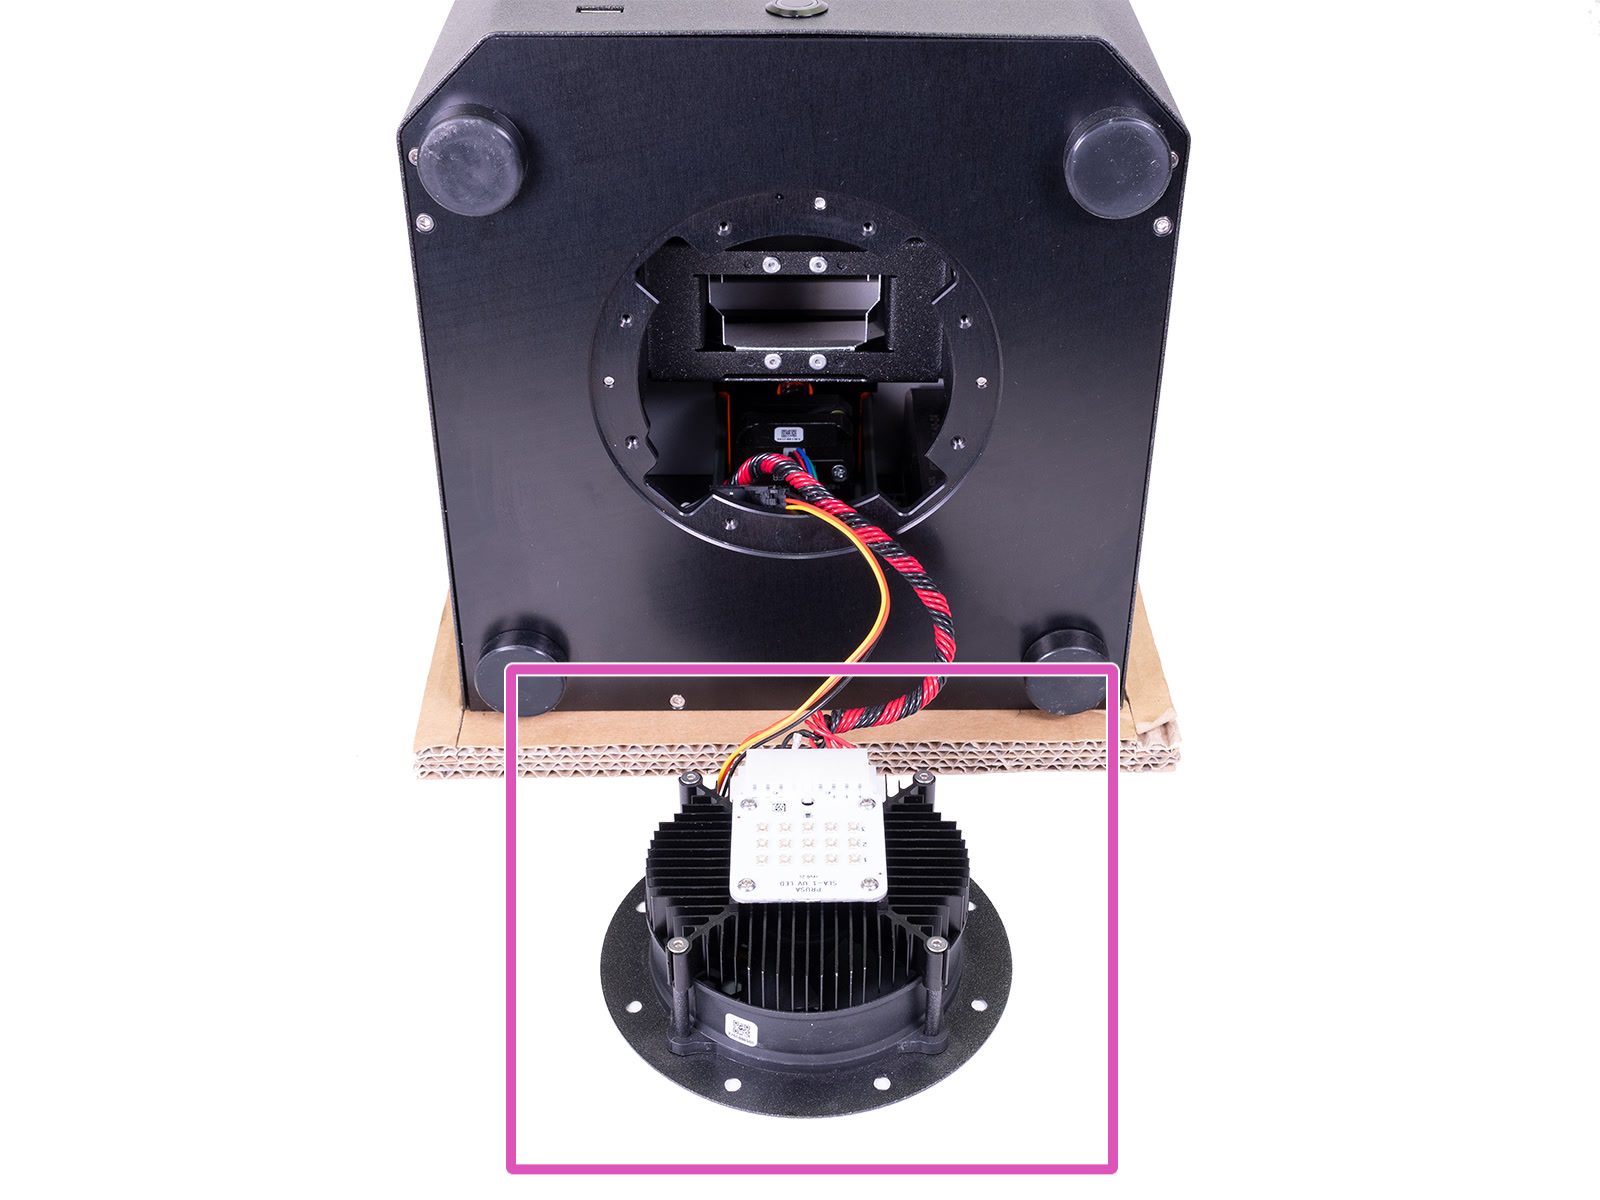
This sensor is integrated into the LED PCB. If you receive the error that this has failed, check and reseat the connections of the led panel, but it may have to be replaced. It is an assembly with a heatsink and fan and can be accessed from the bottom of the printer.
 |  |