What happened?
The Original Prusa XL is showing the message: "Check hotend heater and control electronics for possible damage".
Error name: Hotend Heater Overcurrent
Error code: #17322
The error is shown when there is a damaged cable on the hotend heater or any of its connections.
How to fix it?
On single-head XL, access the Dwarf board by rotating the dwarf-cover-door. On dual-head and five-head XL, with the tool in the parked position, loosen the M3x12 bolt to remove the dwarf-cover-door.
 | 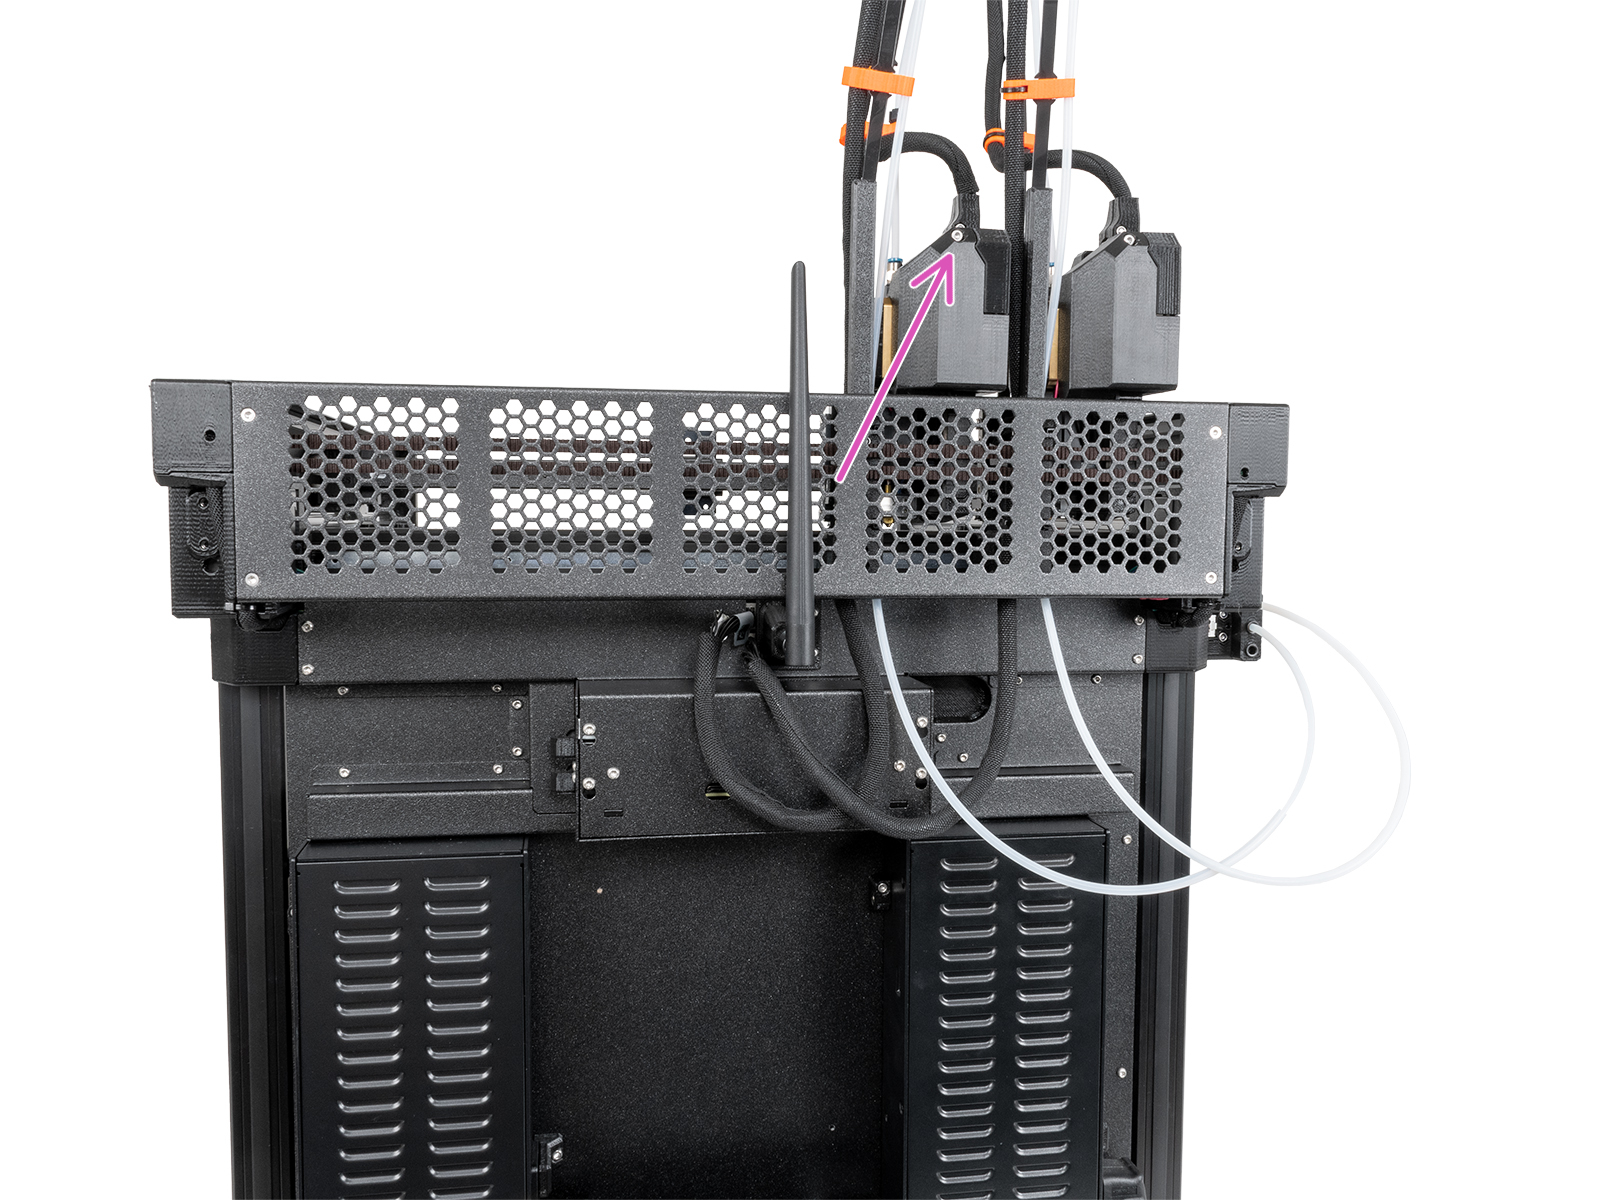 |
Check the path between the hotend heater and the Dwarf Board, and see if there are any parts that are broken or pinched.
In case there is no damage, check the cable connection to the Dwarf board. Try reconnecting the cable to its connector.
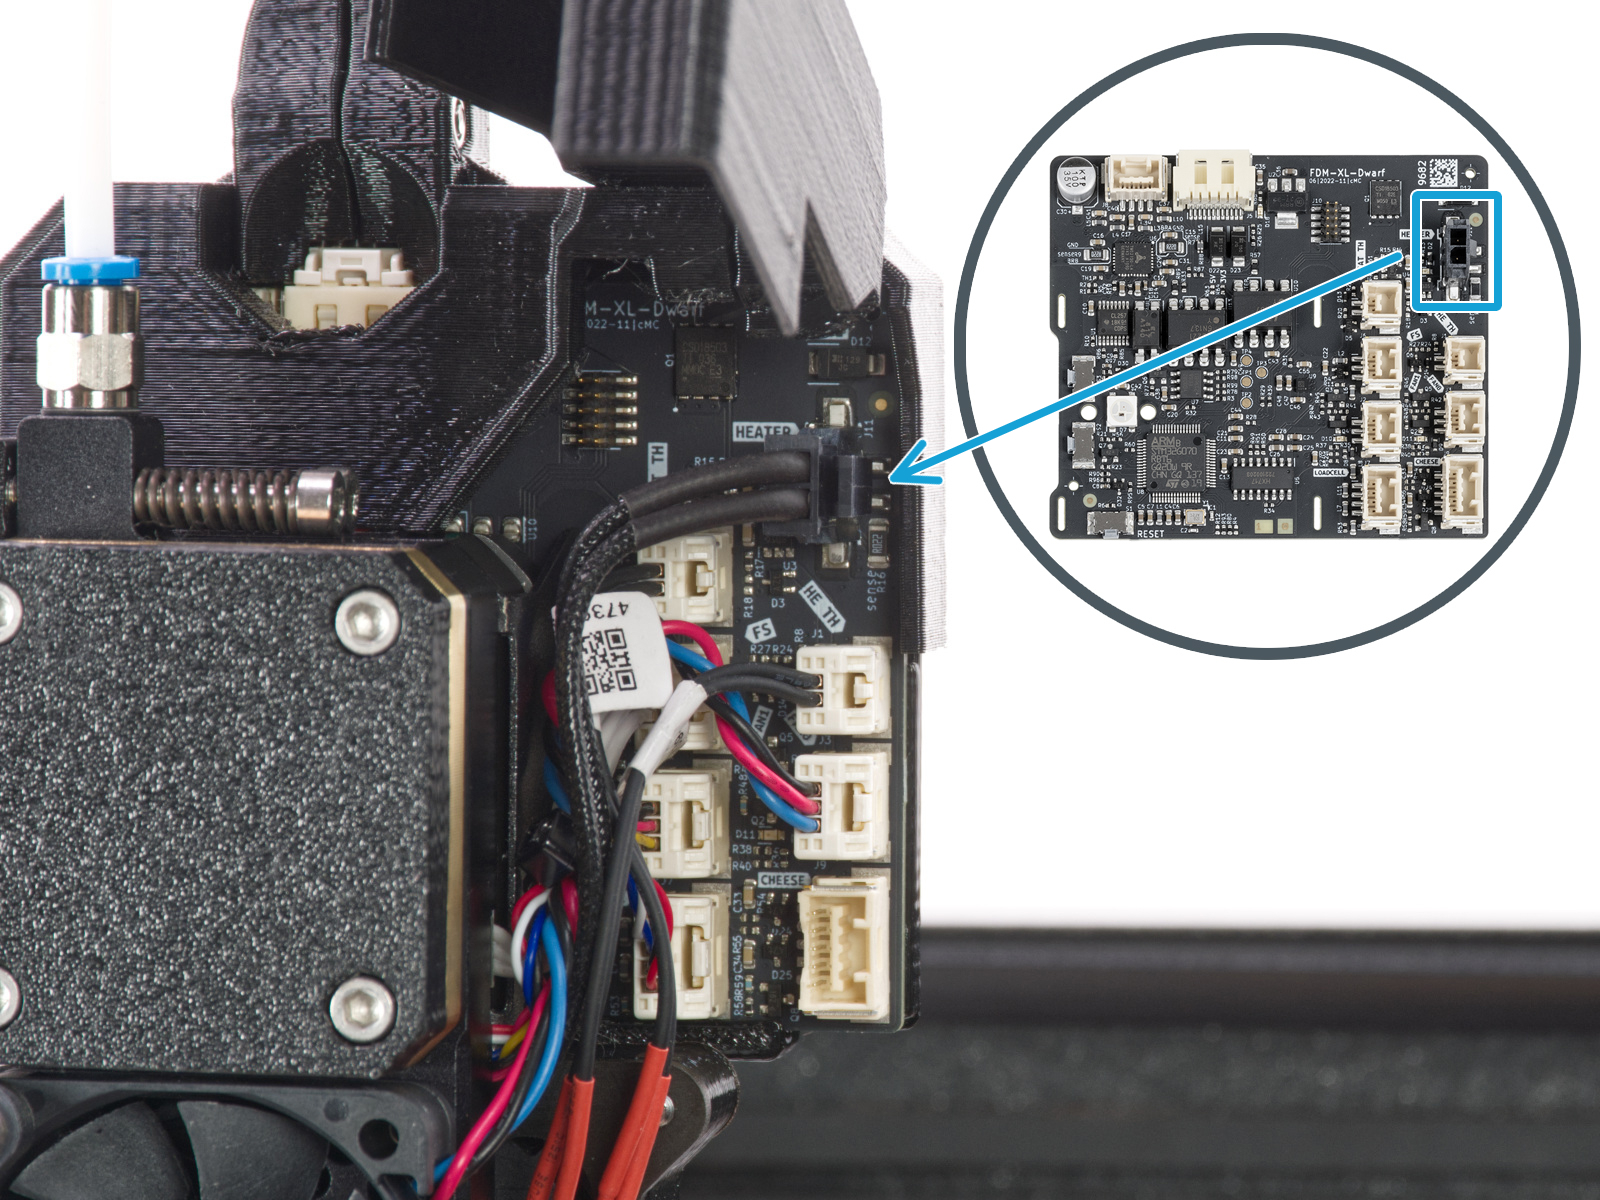
In rare cases, this error message can be shown in case of damage to the Dwarf board, or another of the electronic boards, such as XLBuddy and Sandwich boards. If the cables and connectors are intact, check the boards for any visible damage.
How to access the XLBuddy and Sandwich boards
From the rear of the printer, loosen the indicated four screws. It is not necessary to remove them completely. Then, slide up the electronics cover to remove it. This will expose the XLBuddy board, part of the Sandwich board, and if present, the XL-Splitter.
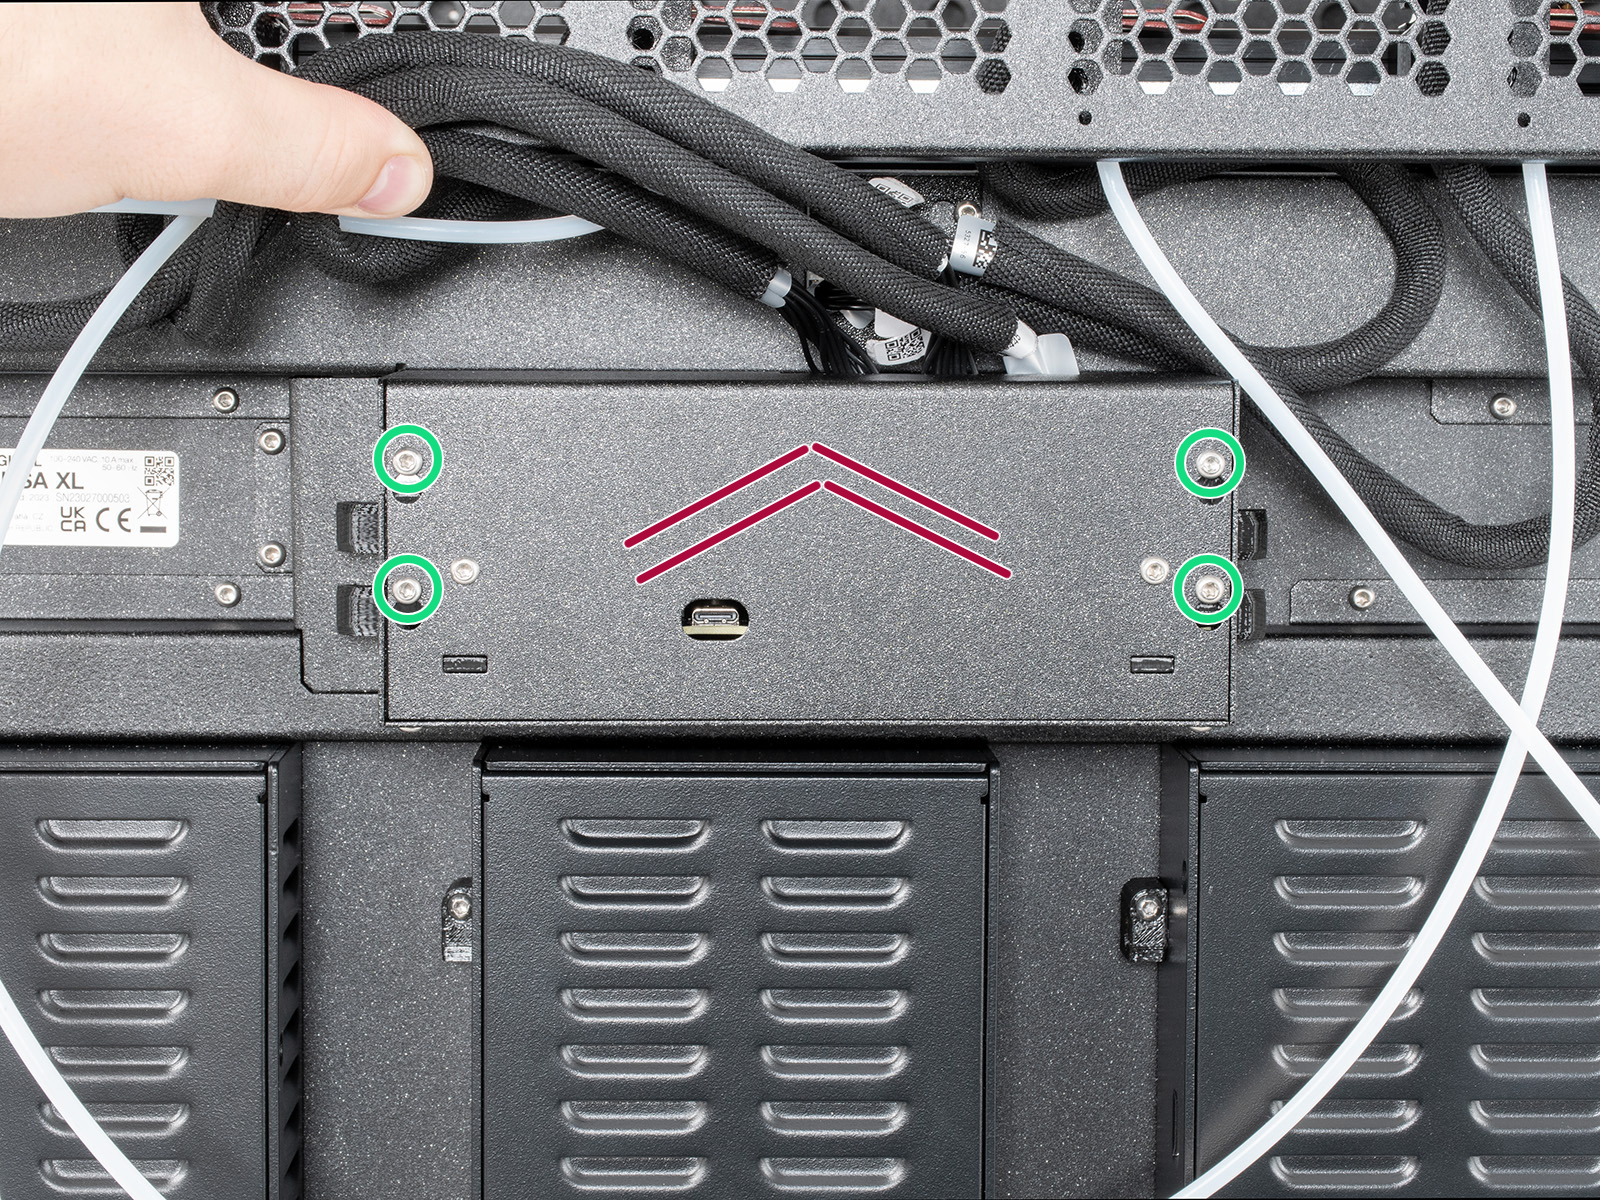 | 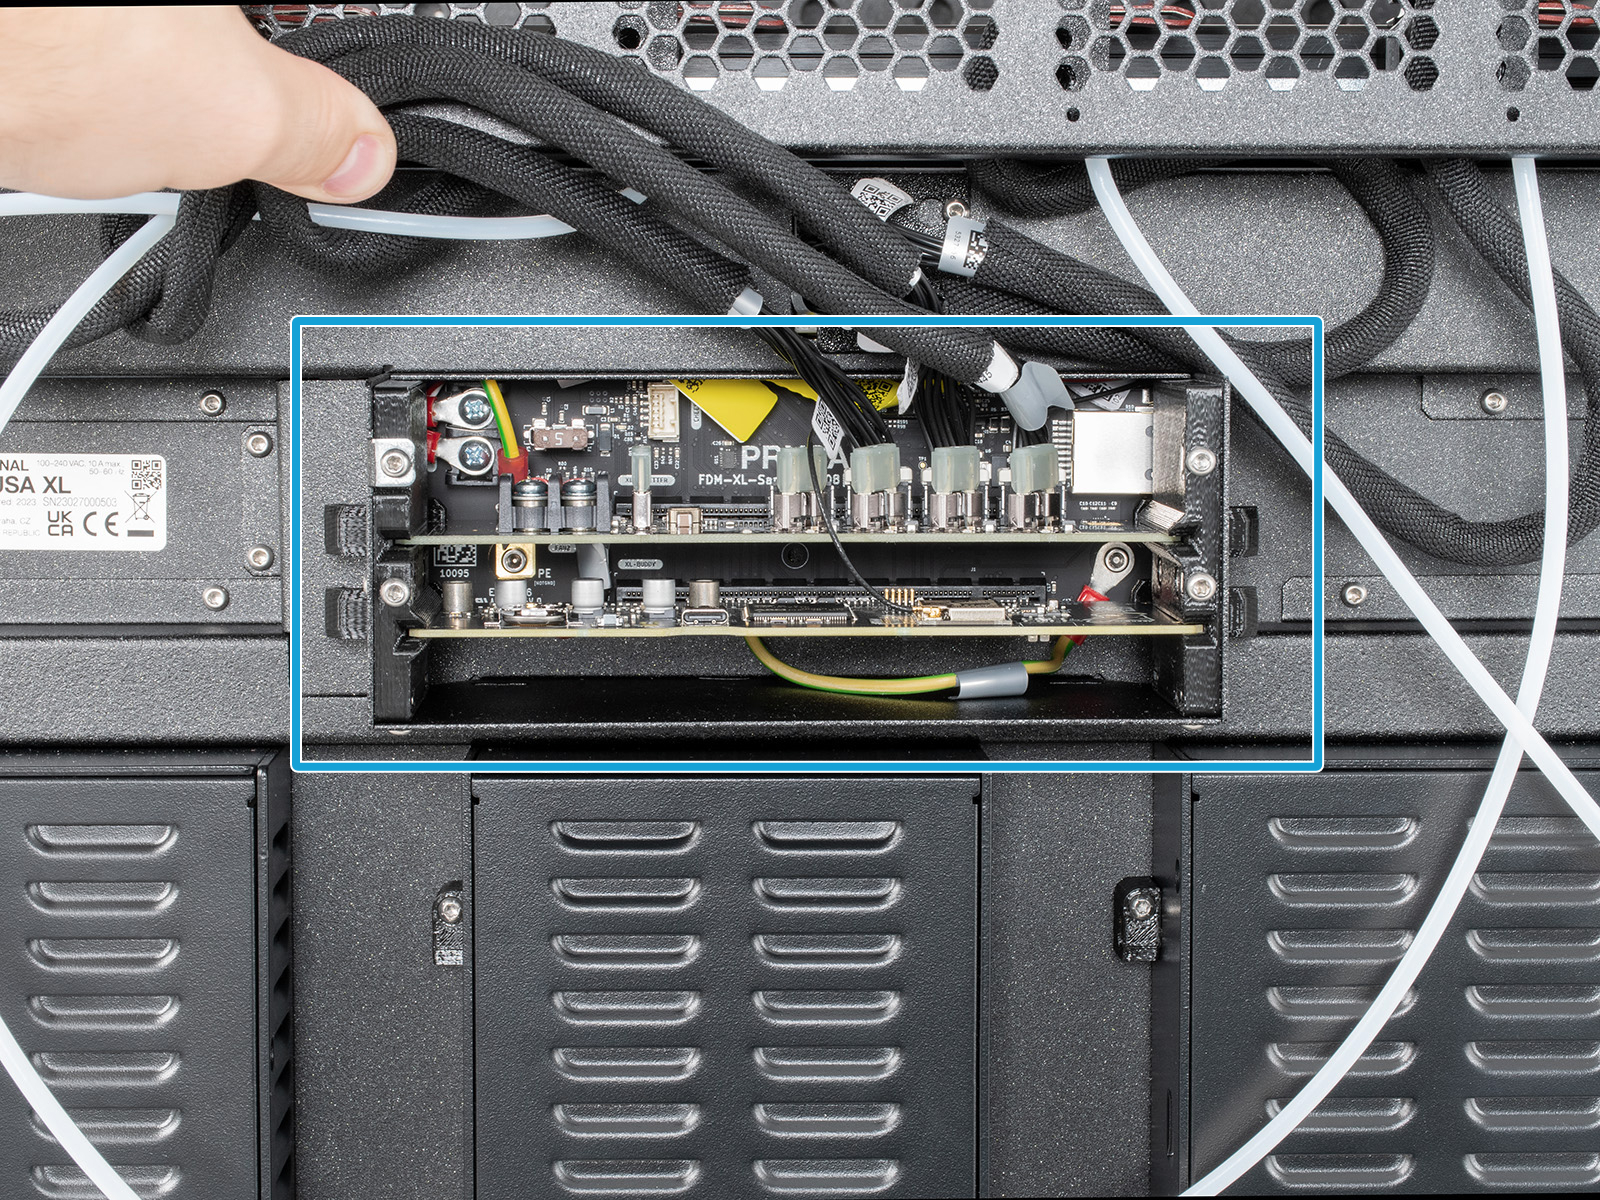 |
Inspect the boards, in particular the XLBuddy. Check for defects or damage on the surface, such as a detached component, or a visibly burnt spot.
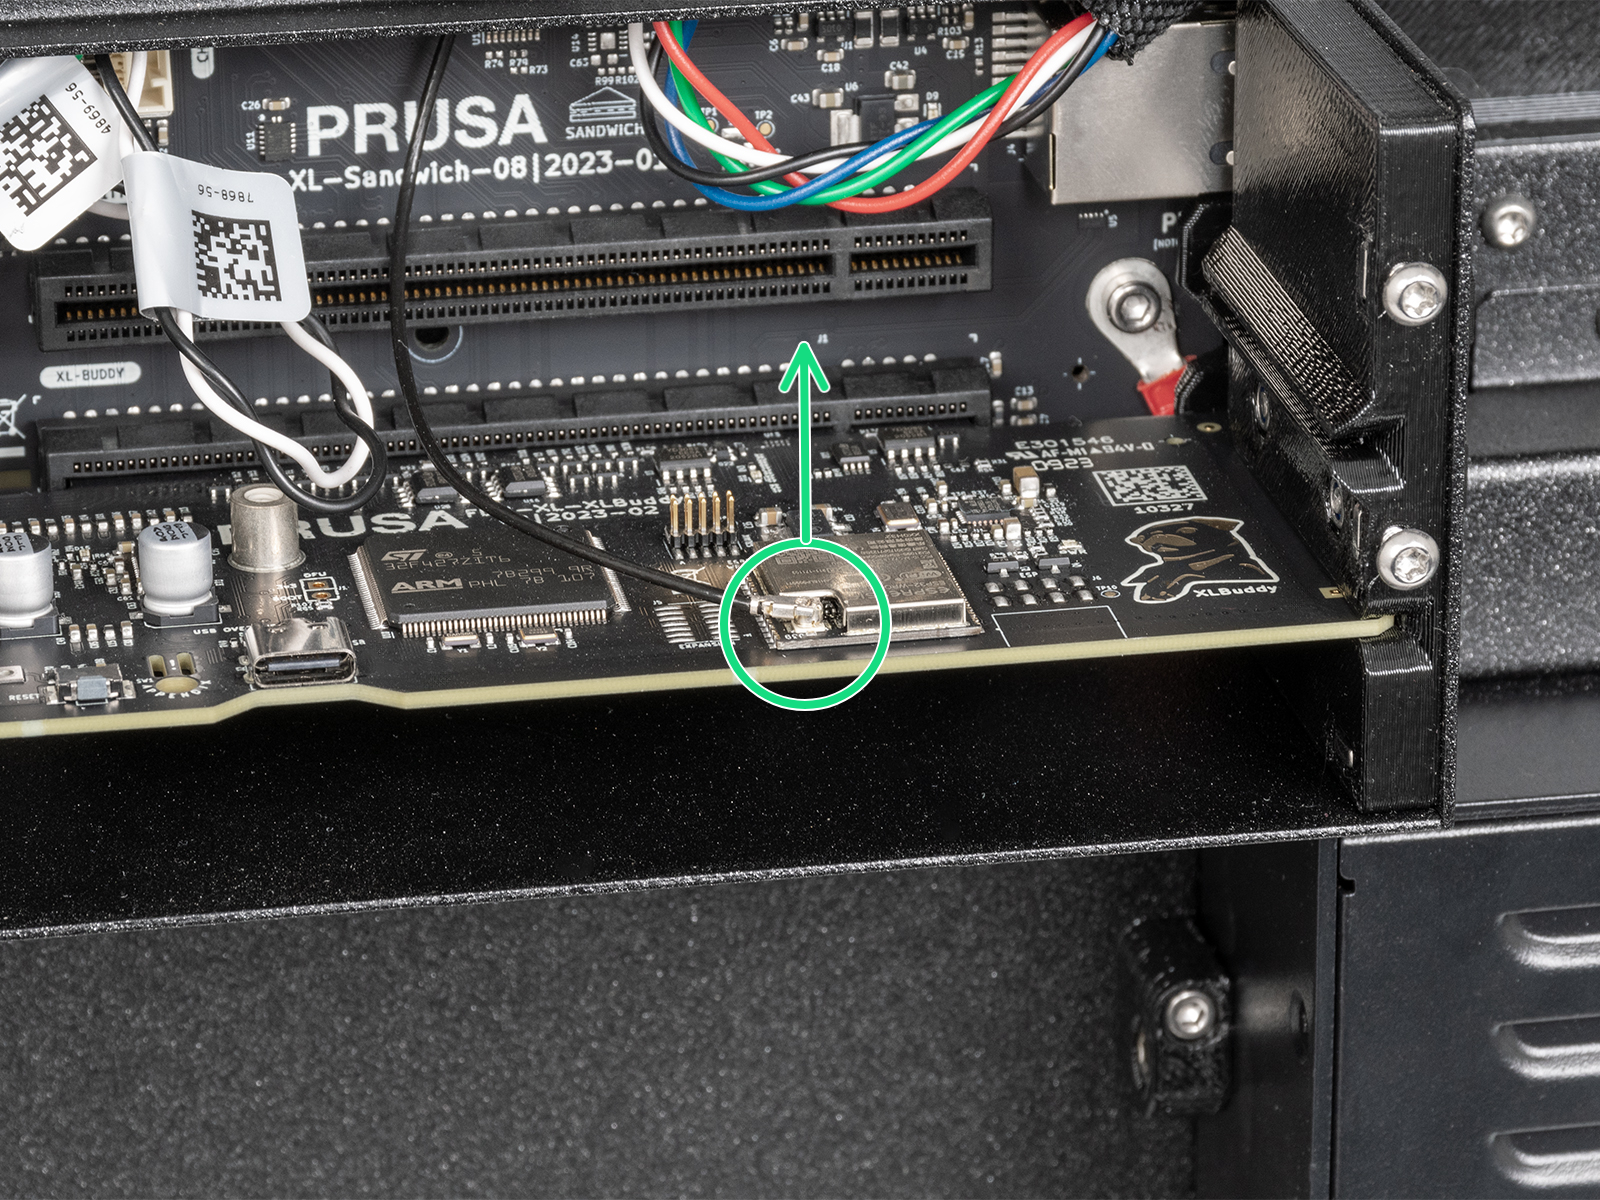
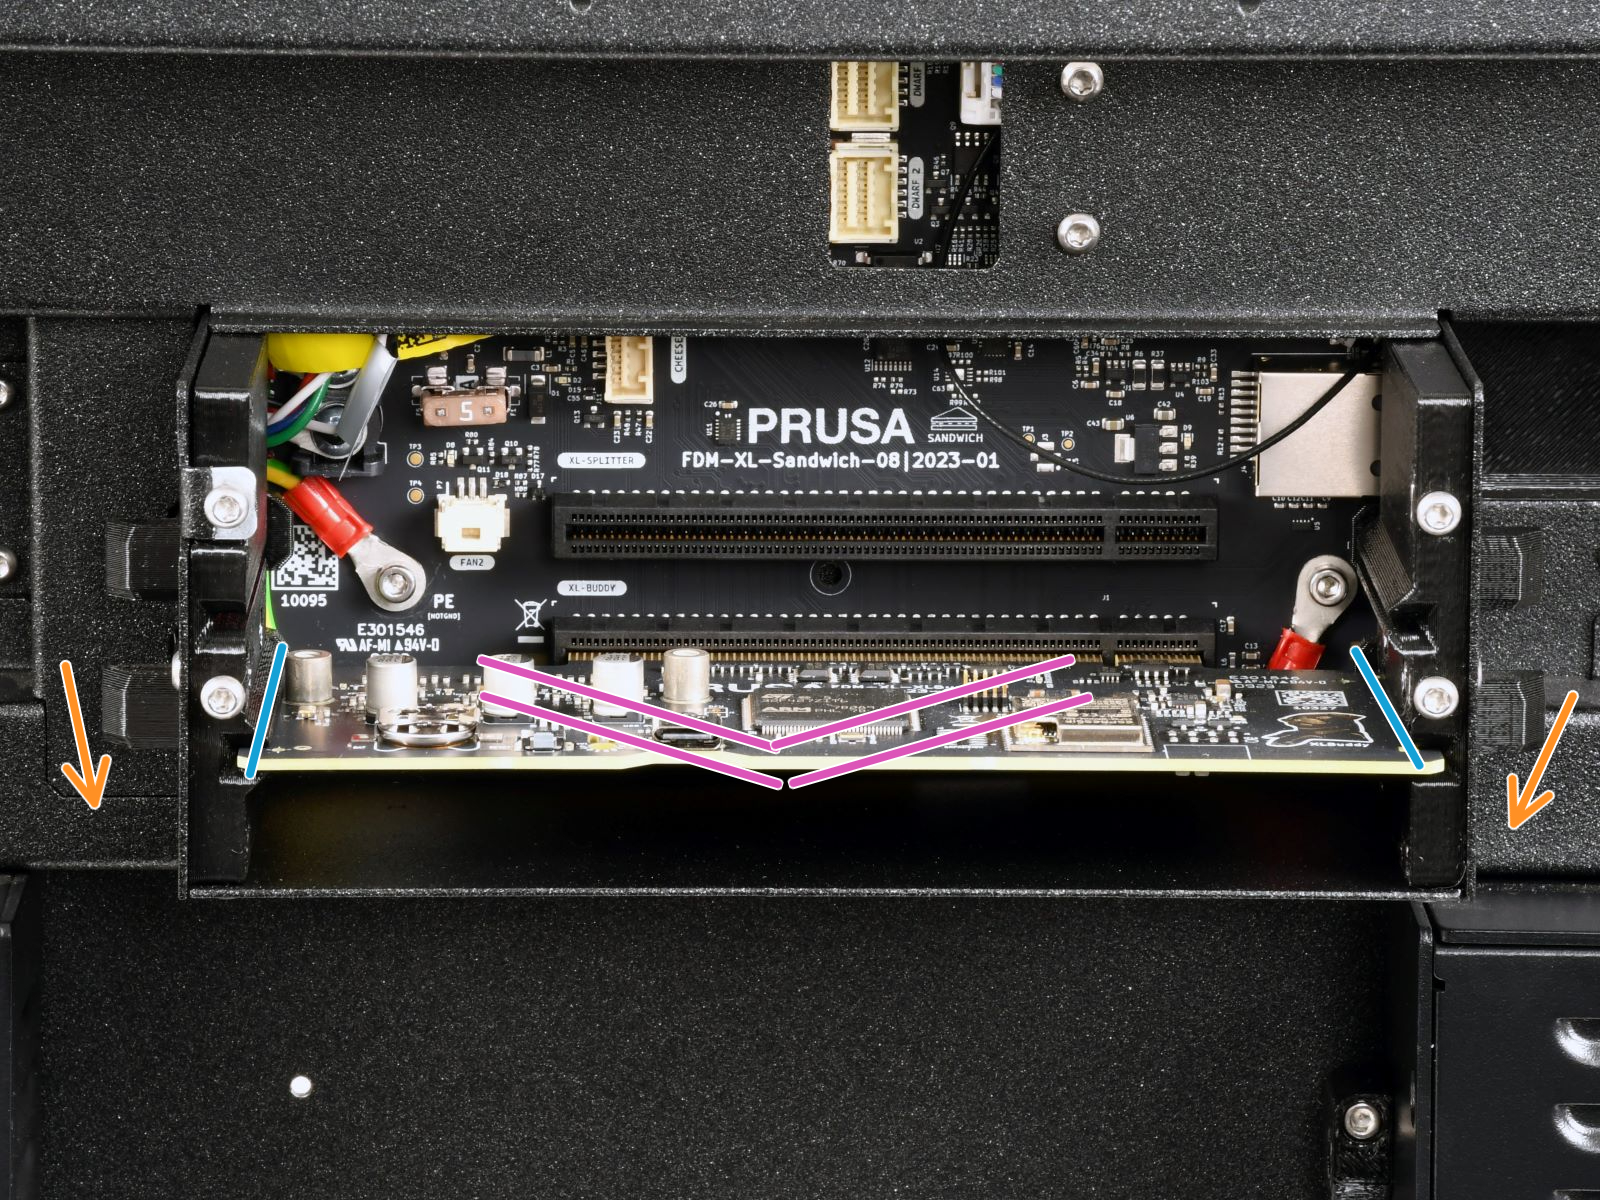
If needed, disconnect the antenna cable from the XLBuddy board, and extract the XLBuddy board, using the two lower ejectors. Touch any electronic board only from its edges to avoid damaging its components.
 |  |