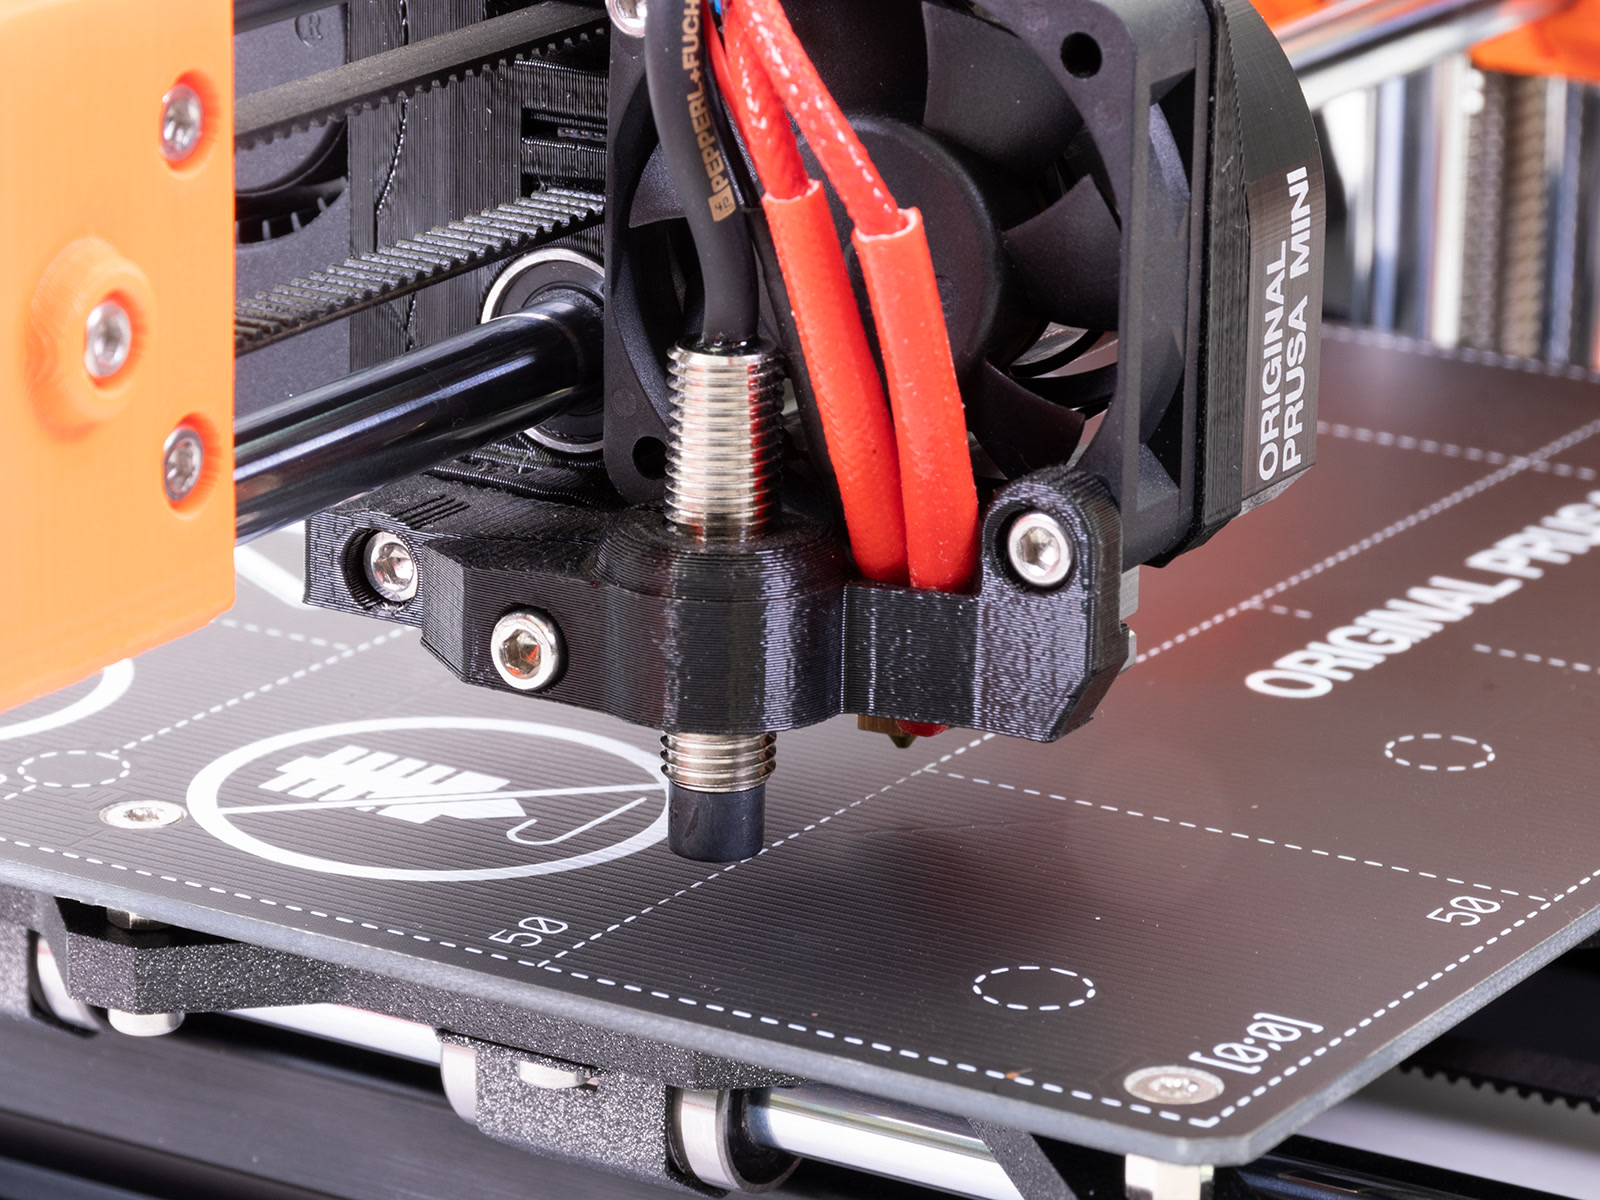

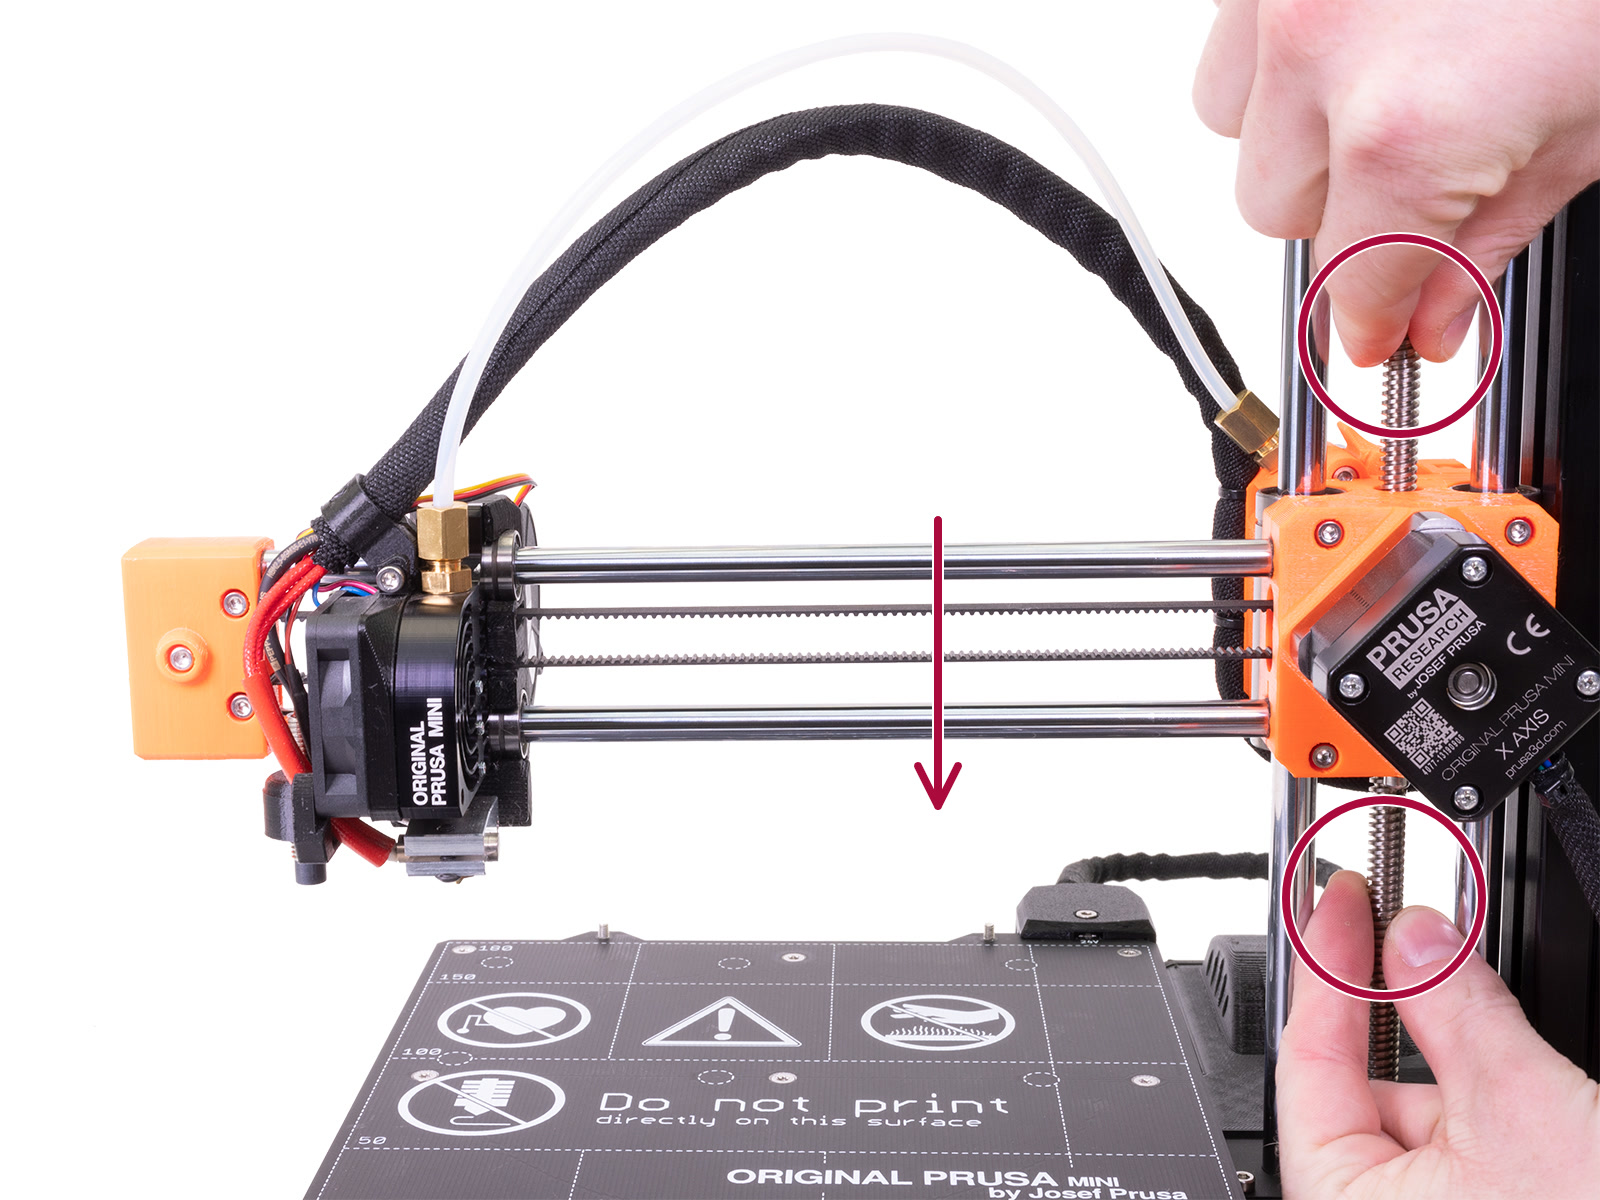

⬢Using your fingers turn the lead screw and move the entire X-axis down. Stop when the hotend touches the heatbed! Avoid bending the heatbed!
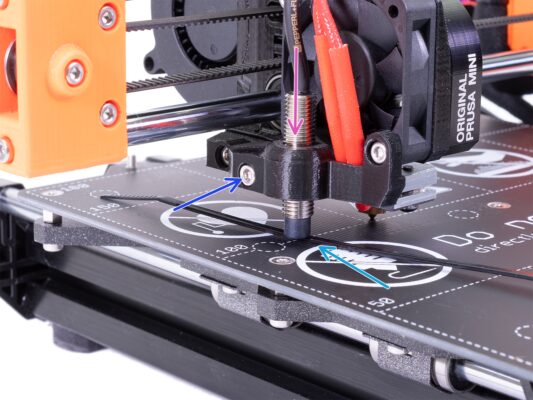
⬢Release slightly the screw on the MINI-minda-holder so you are able to adjust the position of the SuperPINDA sensor.
⬢Take a zip tie from the package and place it under the SuperPINDA sensor. Use the middle part of the zip tie, not the tip.
⬢Gently press the SuperPINDA sensor down against the zip tie.
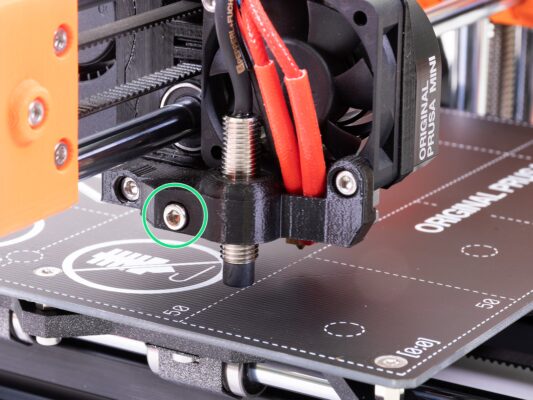
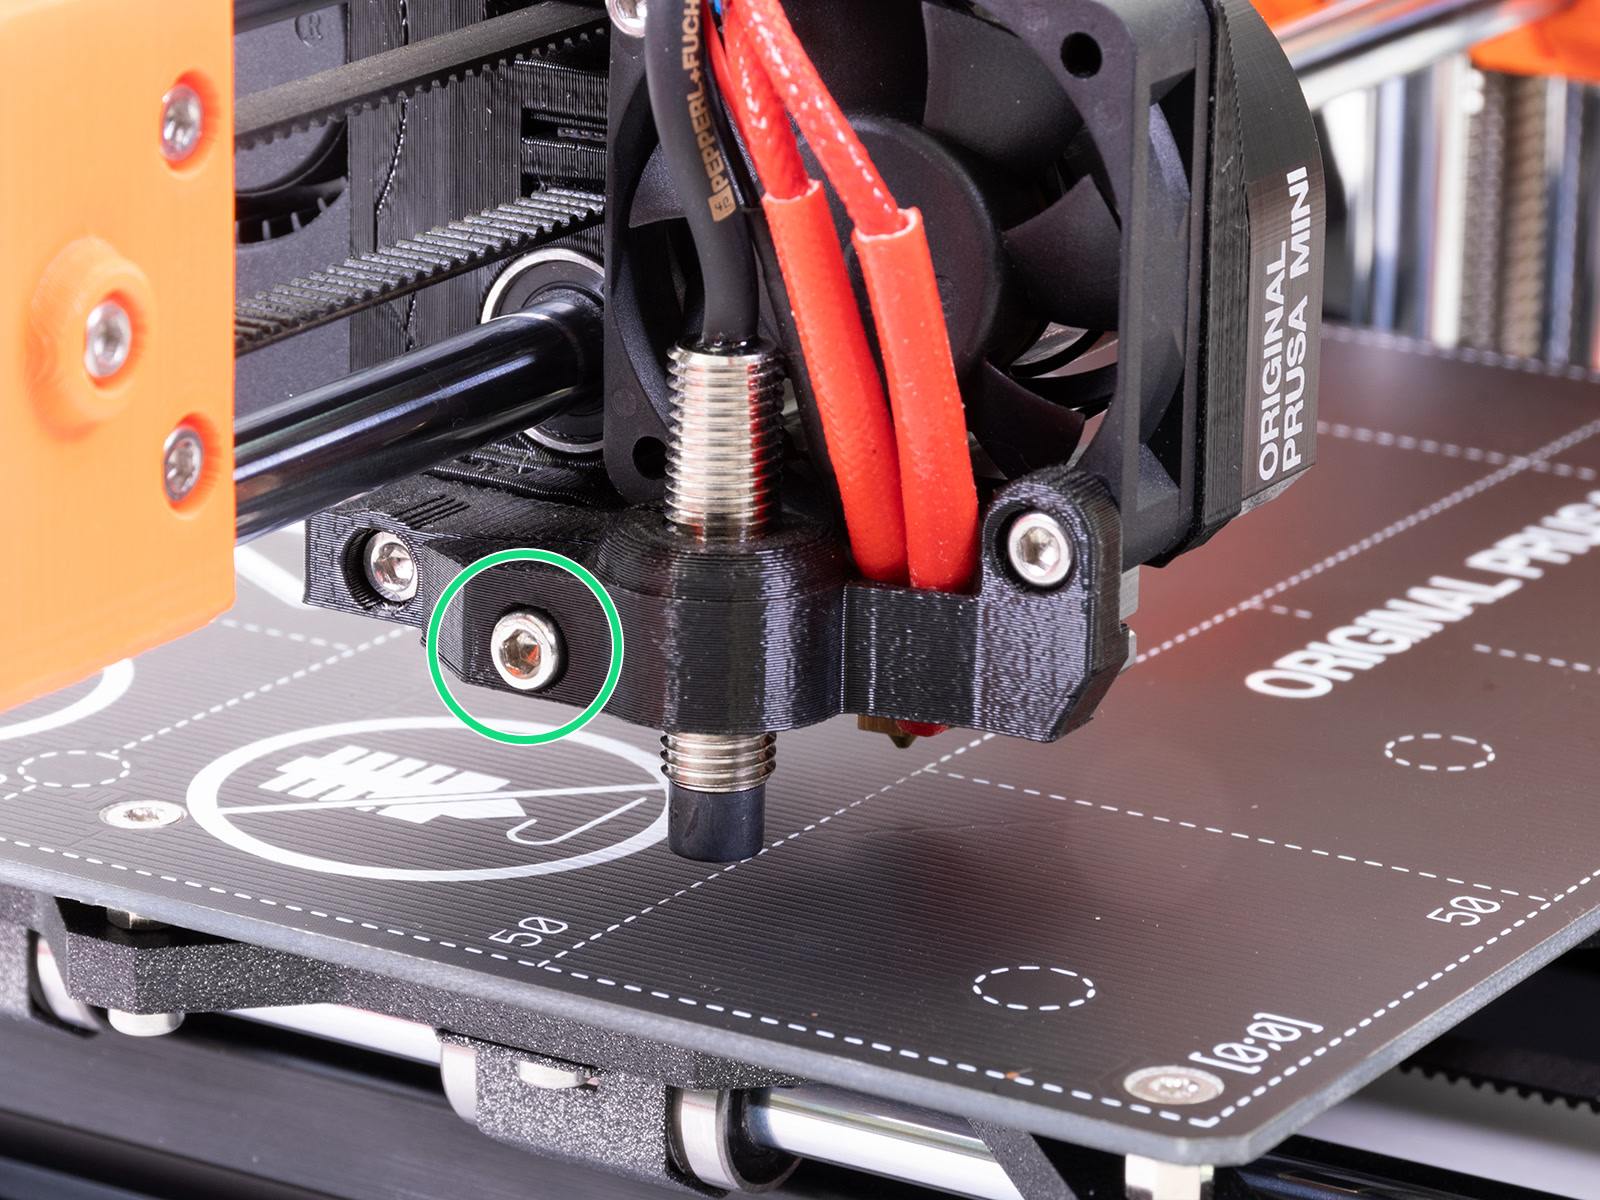
⬢Tighten the screw on the MINI-minda-holder. Do not use excessive force. Otherwise, you can break the printed part!
⬢Rotate the lead screw manually in the opposite direction to move the axis at least 5 mm up.