ES
  • English
  • Čeština
  • Italiano
  • Deutsch
  • Polski
  • Français
Iniciar sesión

1. Introducción

1. Introducción
Relevante para :
Ultima actualización 17 days ago
1. Introducción
 Dificultad
Fácil
 Pasos
8
 Idiomas disponibles
ENCSPLDEITFR
Important
Important
Important
Congratulations on your purchase of the assembled Original Prusa MK4S with MMU3!
This guide is dedicated only to the set of assembled MK4S with MMU3 from factory. If you ordered only assembled MMU3 unit and purchased the printer separately, please use this guide Original Prusa MMU3 Assembly
Even though this is an assembled version, there are still a few accessories to assemble before you can start printing:
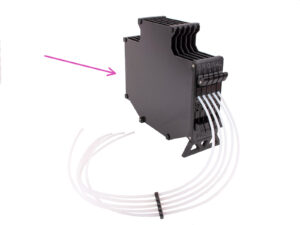
Cassette Buffer Assembly
Spool Holder Assembly (5x)
Follow the instructions carefully, and proceed with the assembly.
Tools required
Tools required
Tools required
The following chapters require:
2.5mm Allen key
Side cutters
Ver imágenes de alta resolución
Cuando utilizes el manual en la web help.prusa3d.com, puedes ver las imágenes originales en mayor resolución para mejor claridad.
Just hover your cursor over the image and click the Magnifier icon ("View original") in the top left corner.
Labels guide
Labels guide
Labels guide
Labels guide
All the boxes and bags containing the parts for the build are labeled.
Most of the part drawings on the labels are scaled 1:1 and can be used to identify a part.
You can download and 2D print a Prusa Cheatsheet with the 1:1 scaled fastener drawings. help.prusa3d.com/cheatsheet. Print it at 100 %, don't rescale it, otherwise, it won't work.
Prusa Nozzle info
Prusa Nozzle info
There are two variants of the Prusa Nozzle that we ship with the printers:
Prusa Nozzle brass CHT high flow (marked CHT)
Prusa Nozzle brass (marked PR)
Your MK4S came equipped with the Prusa Nozzle brass by default.
While it is possible to print with the Prusa Nozzle CHT, please note that specific settings are required for high quality prints.
La Prusa Nozzle CHT también está incluido en tu paquete MMU3.
To replace the nozzle on the MK4S, please follow the instructions provided in the dedicated manual How to replace the Prusa Nozzle (MK4S/MK3.9S).
¡Estamos aquí para atenderte!
¿Estás perdido en las instrucciones, falta el tornillo o la pieza impresa está rota? ¡Háznoslo saber!
Puedes contactar con nosotros empleando los siguientes medios:
Using our 24/7 live chat
Or by writing an email to [email protected]
Or, you can use the comments under each step.
Prepare your desk
Prepare your desk
¡Ordena tu escritorio! Ordenar disminuye la probabilidad de perder piezas pequeñas.
Clear your workspace. Make sure you have enough room. A nice clear flat workbench will get you the results you are aiming for.
¡Que haya luz! Asegúrate de que estás en un entorno bien iluminado. Otra lámpara o incluso una linterna adicional probablemente te resulten útiles.
Prepara algo para guardar las bolsas de plástico y los materiales de embalaje retirados para poder reciclarlos después. Asegúrate de que no se desecha ninguna pieza importante.
Preparing the printer
Carefully remove the test print from the printing plate.
Remove the steel sheet and put it aside for a while.
All set? Let's move on to the next chapter: 2. Cassete Buffer Assembly
¿Fue útil esta guía?

Comentarios

¿Todavía tienes preguntas?

¿Todavía tienes preguntas?

Si tienes alguna pregunta sobre algo que no se ha tratado aquí, comprueba nuestros recursos adicionales.
Y si eso no lo soluciona, puedes enviar una petición a [email protected] o mediante el botón que hay más abajo.

Contacta con nosotros