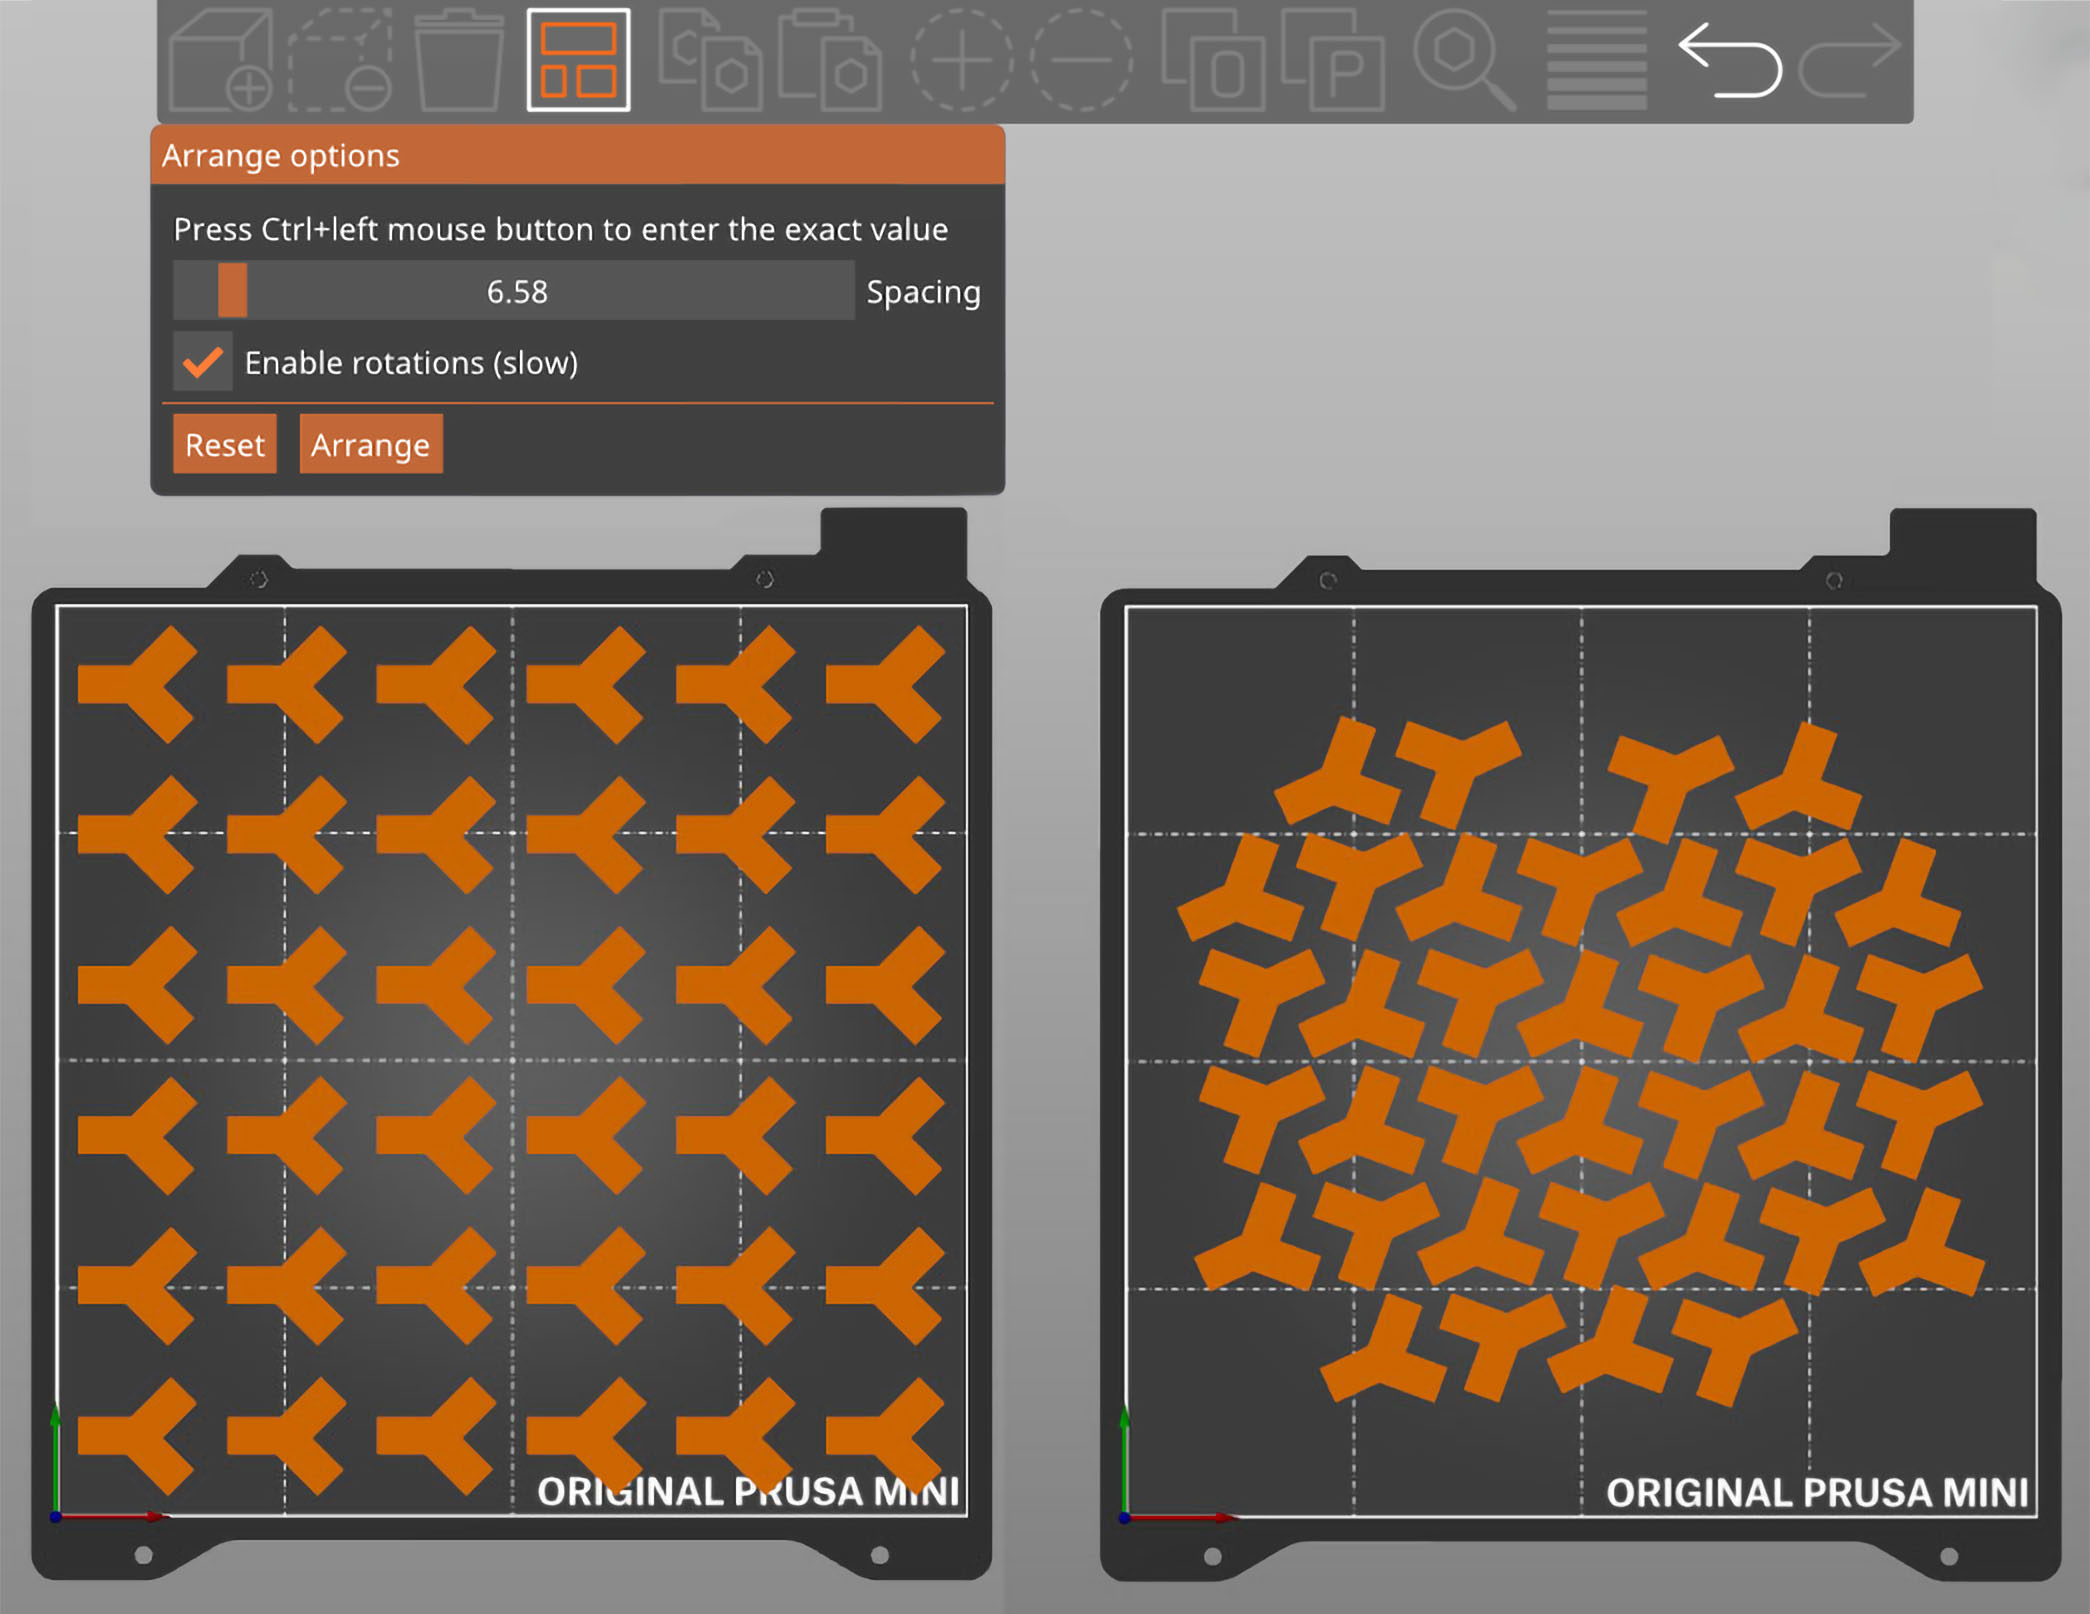
When you import multiple models or create many instances of the same model, arranging them on the print bed could be very time-consuming. PrusaSlicer features an auto-arrange tool that distributes the objects over the entire Print bed with a reasonable gap between them. Auto-arrange can be initiated either by hitting the A key or by picking the Auto-arrange from the top toolbar.
Partial arrangement
The Auto-arrange tool can be used to arrange only a subset of the objects on the bed while keeping the position of unselected objects unchanged. This can be achieved by selecting the set of objects and hitting the Arrange button while holding down the Shift key, or pressing the Shift + A hotkey.
Customizable gap and automatic rotation
Starting with PrusaSlicer 2.3, right-clicking the Auto-arrange icon in the top toolbar opens a dialog to tune the distance between objects and to allow rotation of objects around their Z-axis during the arrangement. As a result, you’ll be able to fit more parts on the build plate.
You can either use the slider to set the spacing or enter an exact value by Ctrl+Left mouse button clicking into the text field.
The current spacing and rotation settings also affect the Fill bed with instances function.
