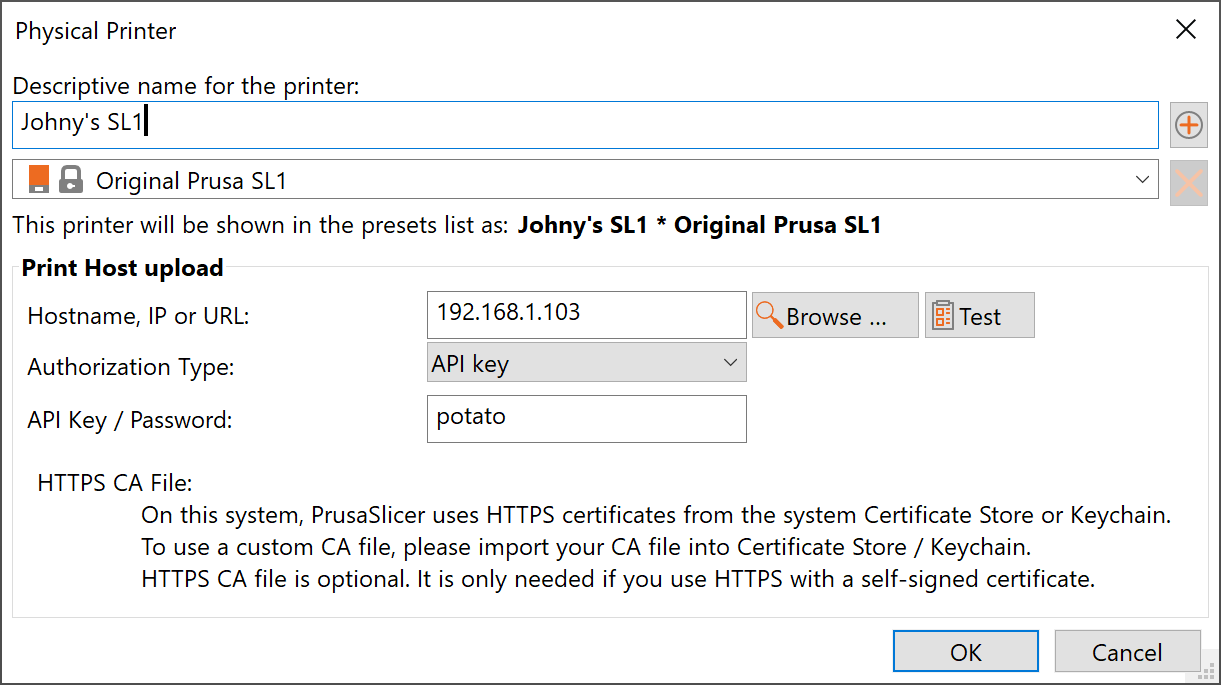
PrusaSlicer separates the printer connection settings from the Printer profile into a Physical printer profile.
You can create a new Physical profile by clicking Add printer in the printer profile select box or by clicking the cog icon and picking Add physical printer.

In the Physical printer dialog, you can name the printer and assign it one or more printer profiles. If you're using, for example, the MMU2S upgrade, you only have to set one physical printer, but you can have both Single mode and MMU profiles linked to it.

If you have a Physical printer with network info filled out selected as your current printer, you can send generated G-codes directly to your device.
PrusaConnect
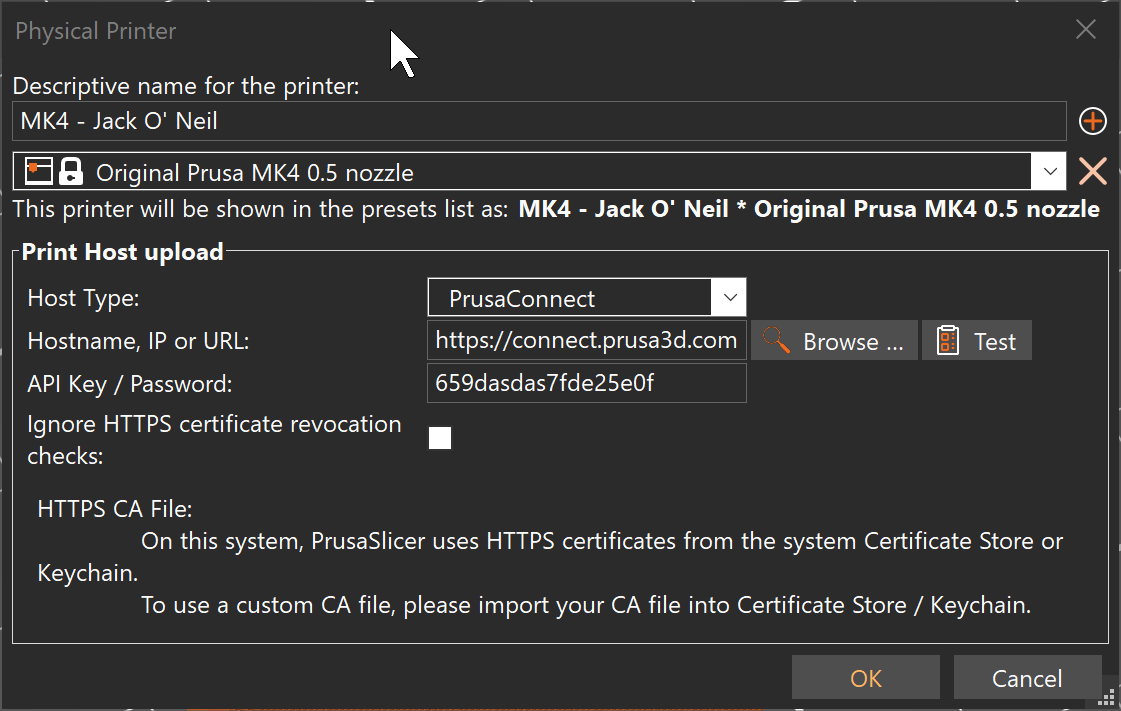
If you'd like to send files to your printer via PrusaConnect, add a Physical printer or Edit an existing one.
Select PrusaConnect from the select box as the Host type. The hostname/IP will be automatically filled, you don't have to change it.

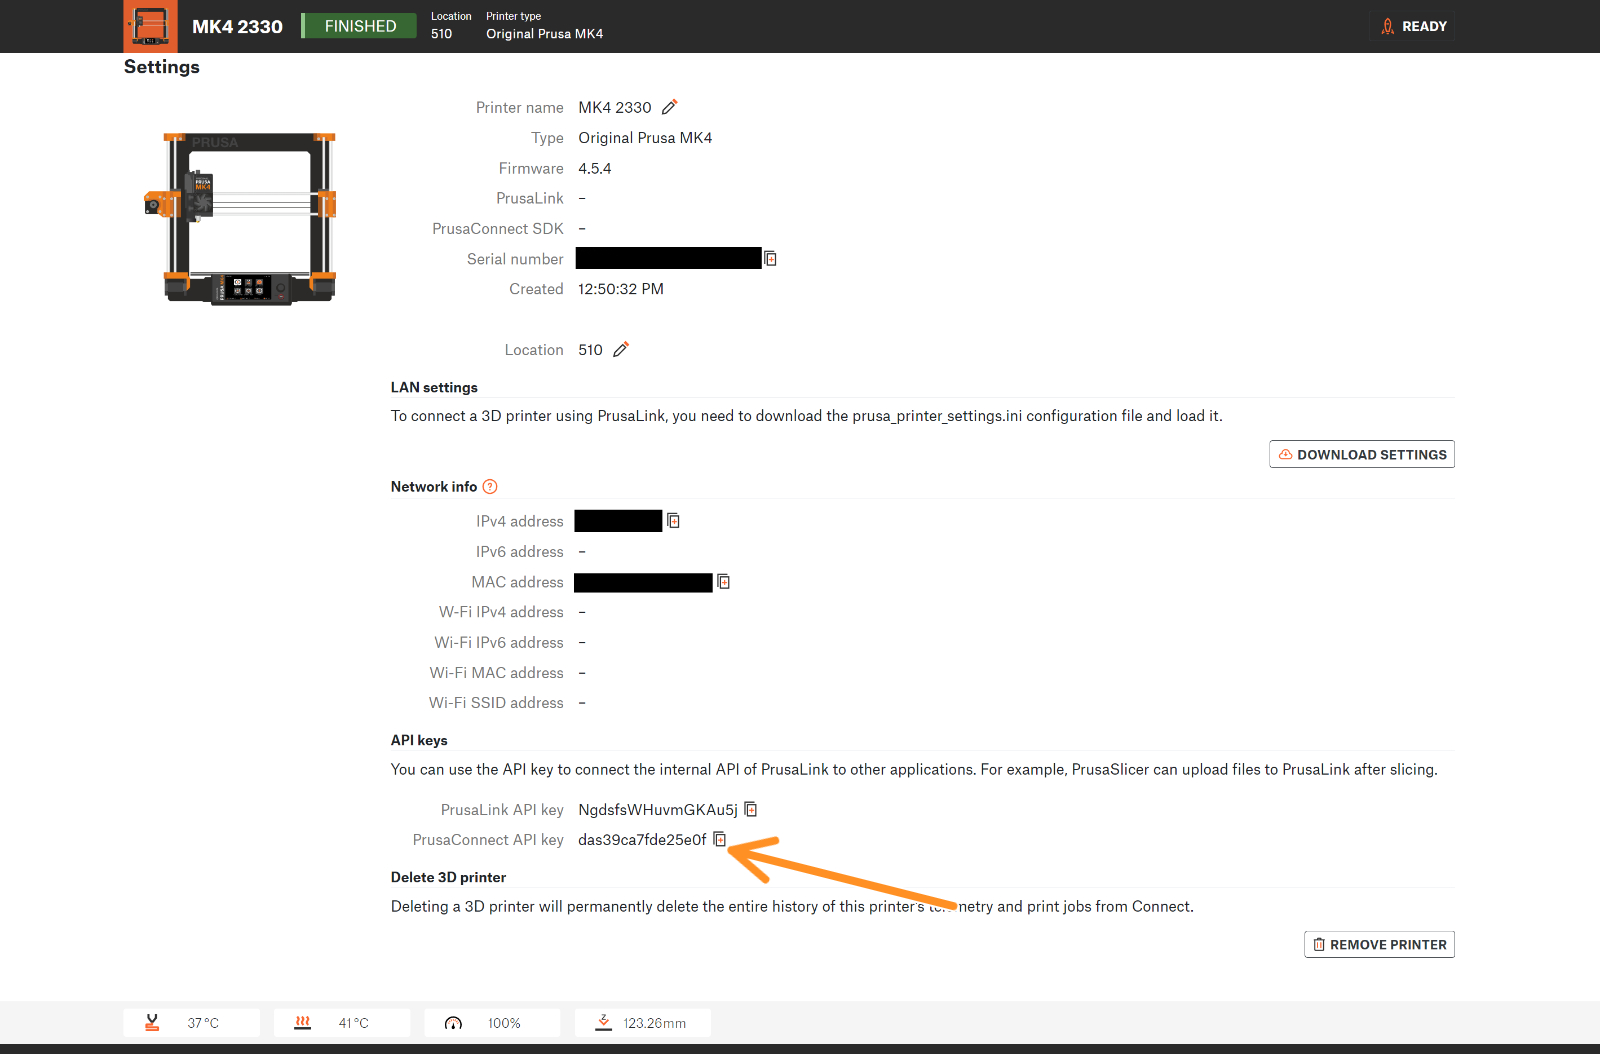
To find your API key, go to PrusaConnect, select the printer you want to send the files to, go to the Settings tab and scroll down to he API keys section. Copy PrusaConnect API key to the Physical printer window and confirm with OK.
