English
Login

Nextruder filament sensor

(CORE One, MK4/S, MK3.9/S, XL)

Relevant for

XL
MK4
MK3.9
MK4S
MK3.9S
+
14 comments
Article is also available in following languages
English
Čeština
Polski
Deutsch
Français
Español
Italiano
日本語

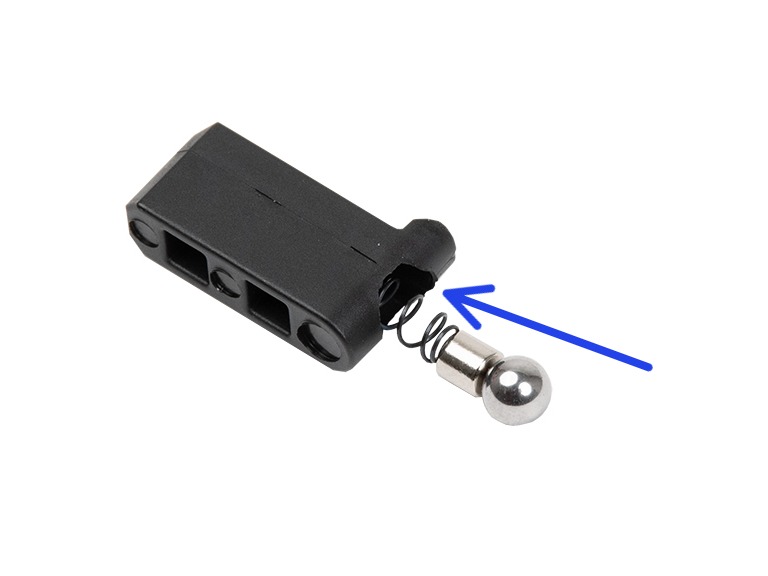
The Nextruder filament sensor equipped on the Prusa CORE One, Original Prusa MK4/S, Original Prusa MK3.9/S, and each tool of Original Prusa XL detects the presence of a filament and filament run-out. The sensor is a Hall sensor, triggered by a mechanism composed of a spring, a magnet, and a ball. 

On an MK4/S or MK3.9/S upgraded to the Original Prusa MMU3, some of the Nextruder components are modified, including the mechanism that triggers the filament sensor. In these printer versions, the mechanism does not rely on a system of spring, magnet, and ball, but is based on the idler tension bolt. 

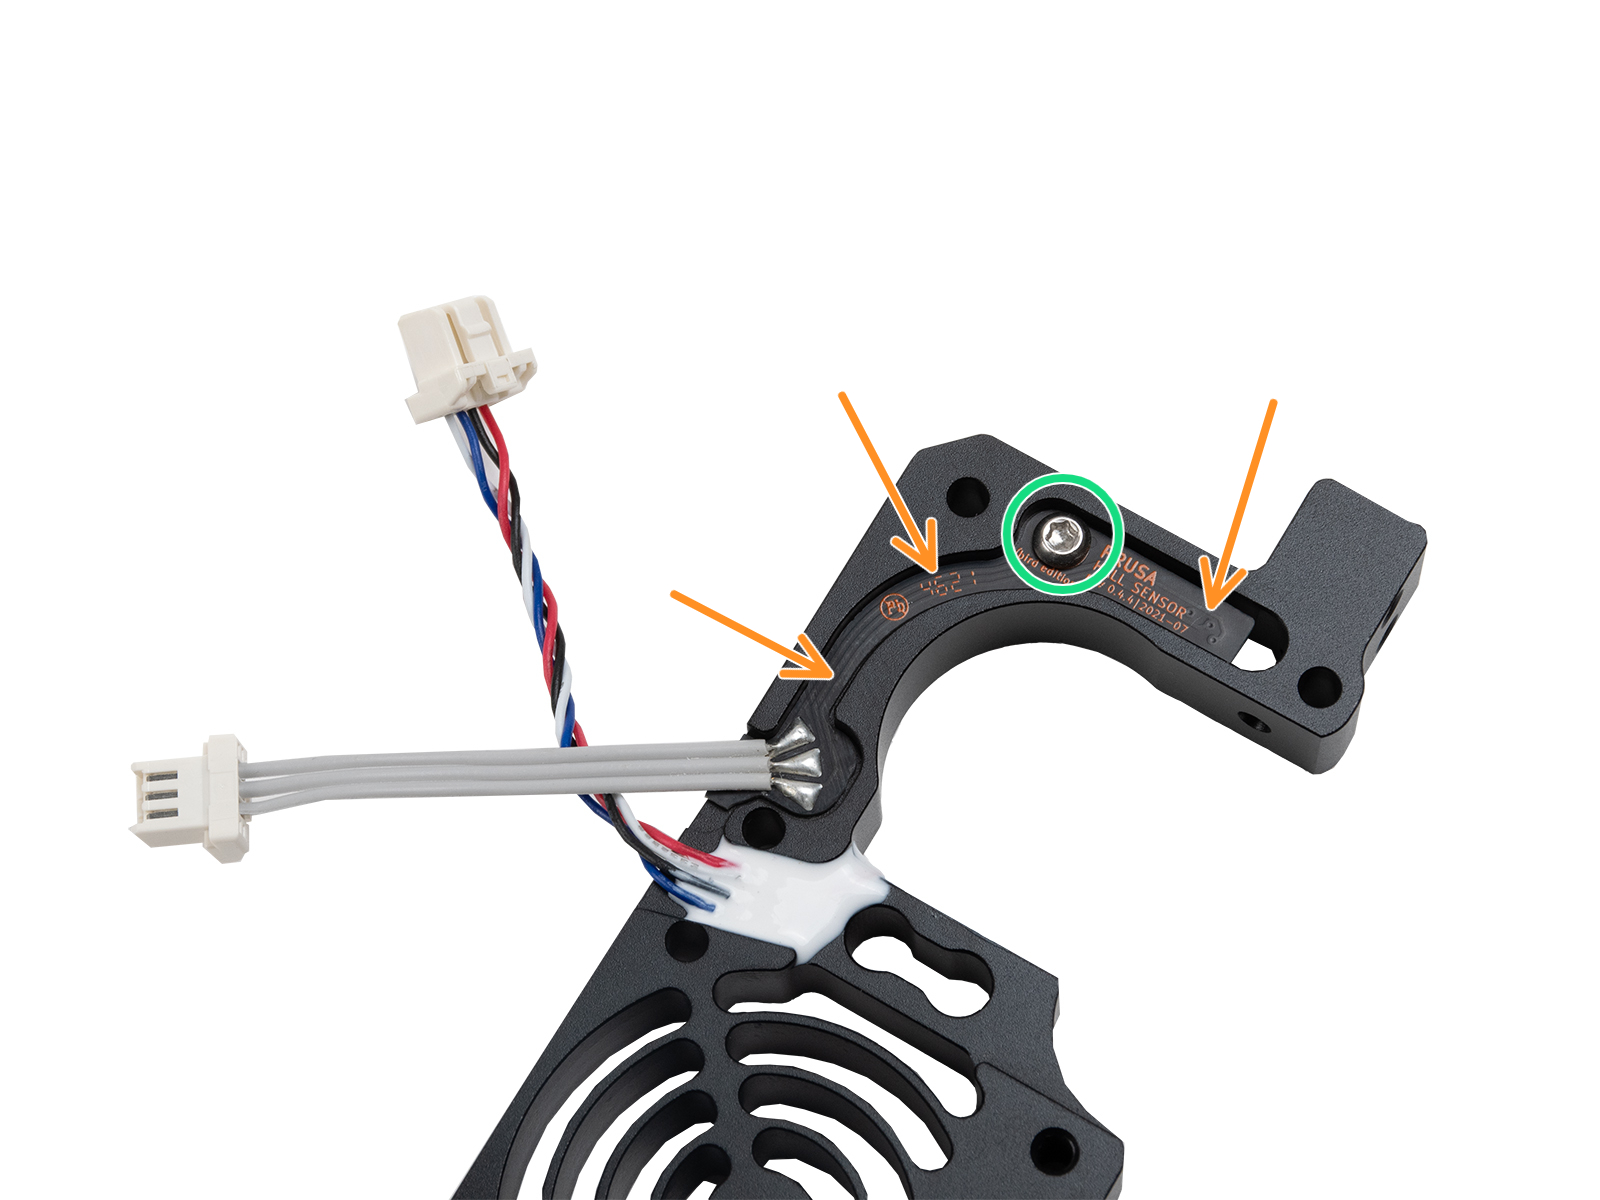
Check assembly (MK4, MK3.9)

If your printer is an MK4 or MK3.9, you have received a package with magnets for the assembly. On MK4S and MK3.9S, as well as CORE One and XL, this subcomponent comes pre-assembled in the heatsink.

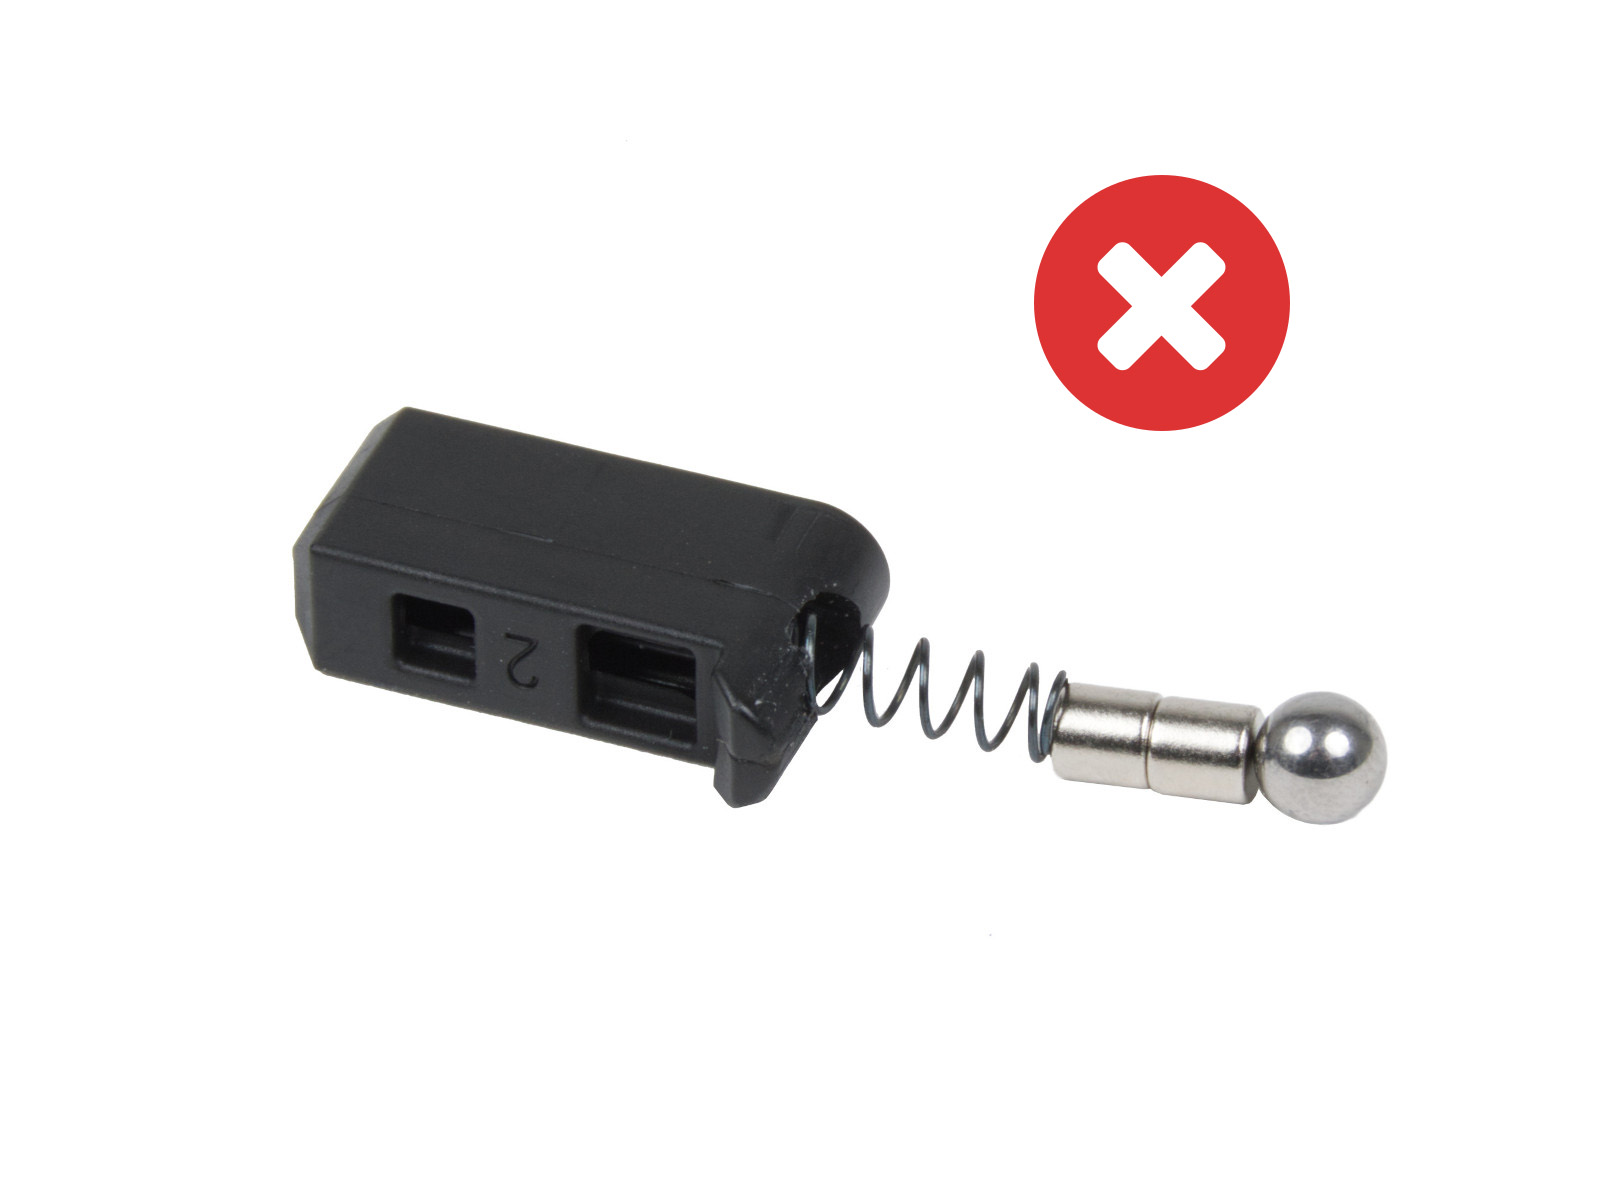
Note that two magnets are sent, but one is meant to be used in the assembly, and the other is a spare. If your filament sensor does not work, check if two magnets have not been added by accident.

How to clean the filament sensor

During usage, filament residue might build up around the sensor or its mechanism, possibly causing false readings and thus malfunctioning.

1) Compressed air

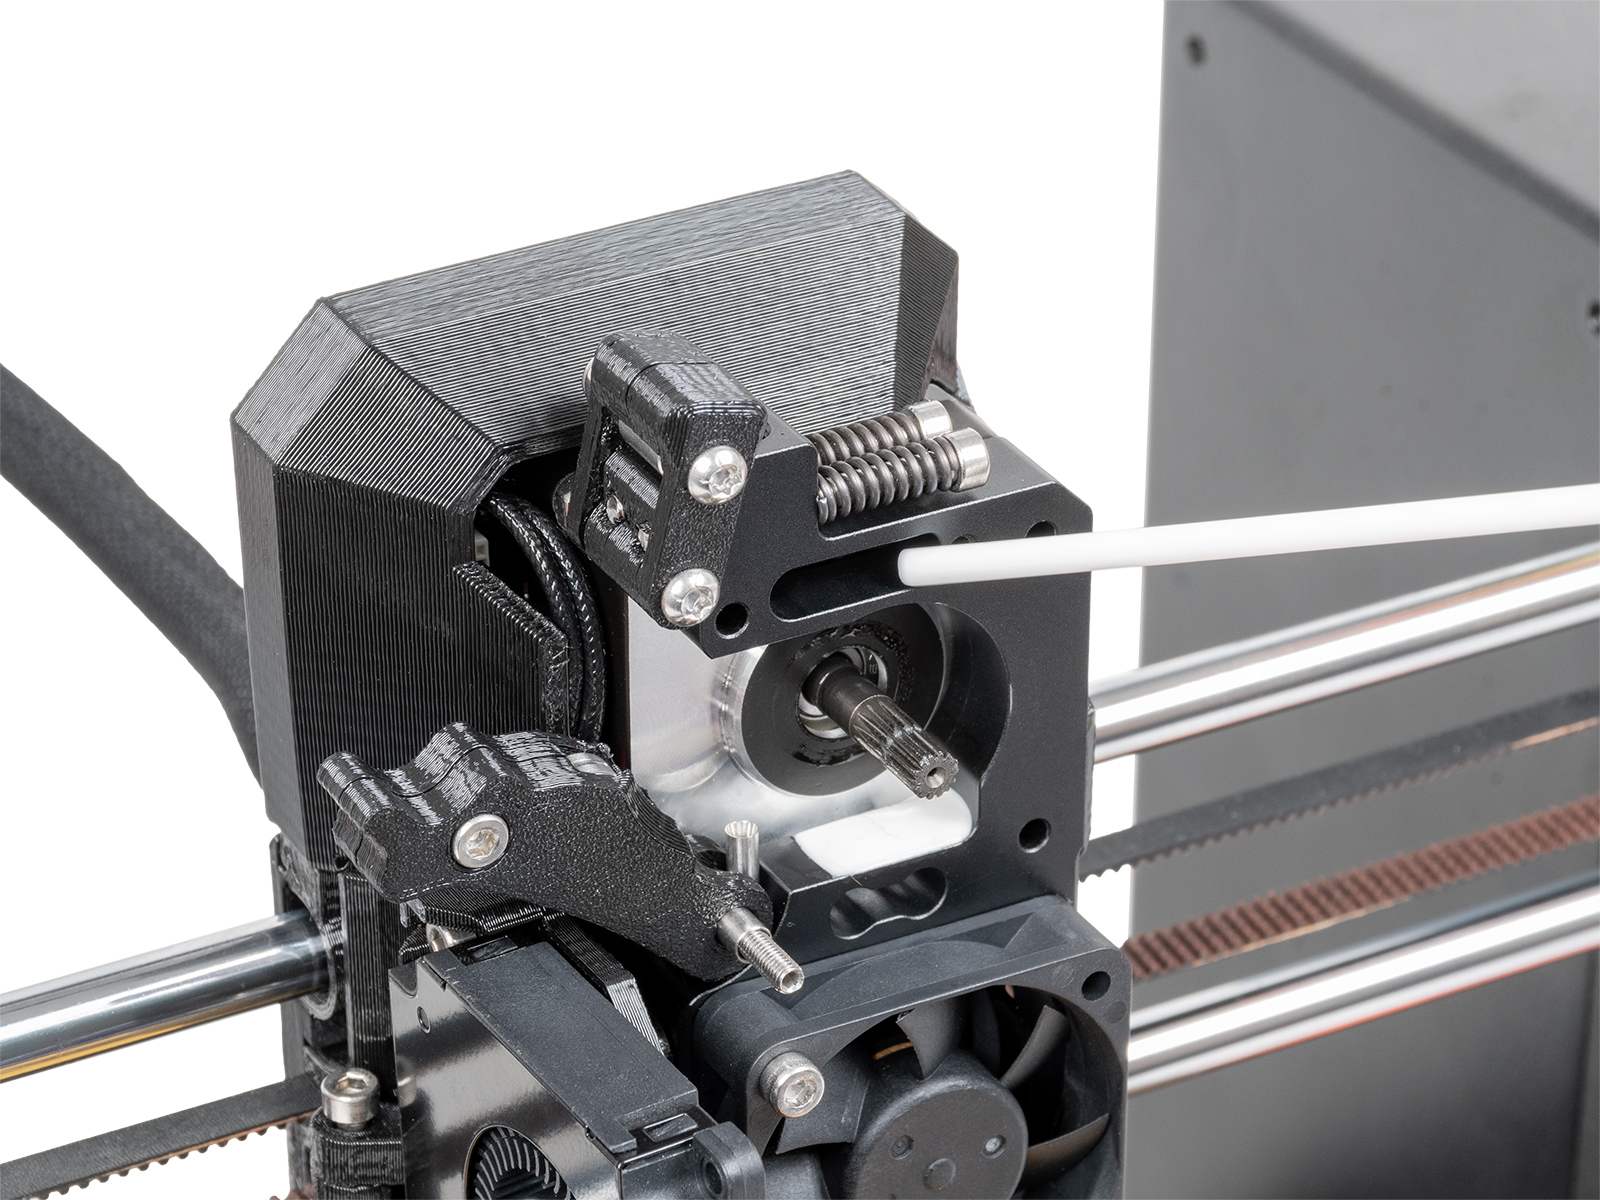
At the top of the extruder is a small hole, insert the tip of a compressed air can in the hole. With your free hand, prepare a bit of filament with a non-stringy tip. Repeatedly insert and remove the filament from the extruder, while blowing the compressed air. This will dislodge the build-up debris. 

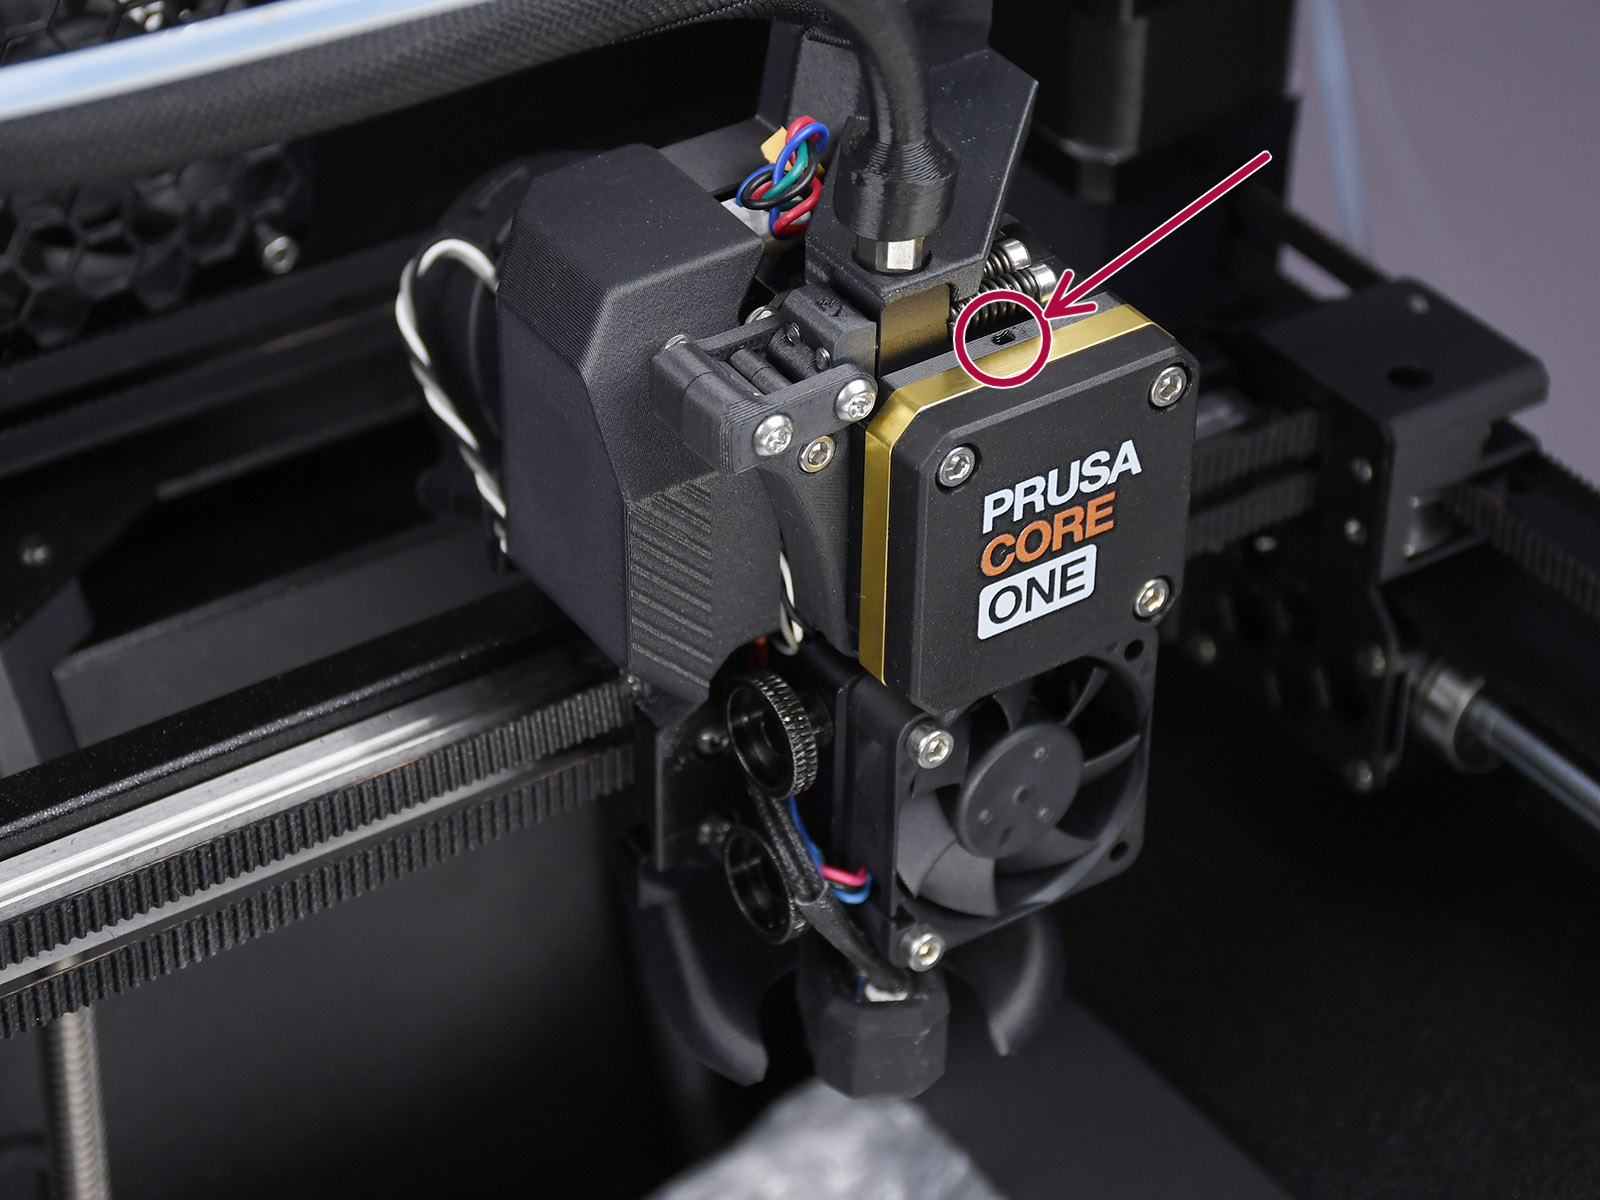
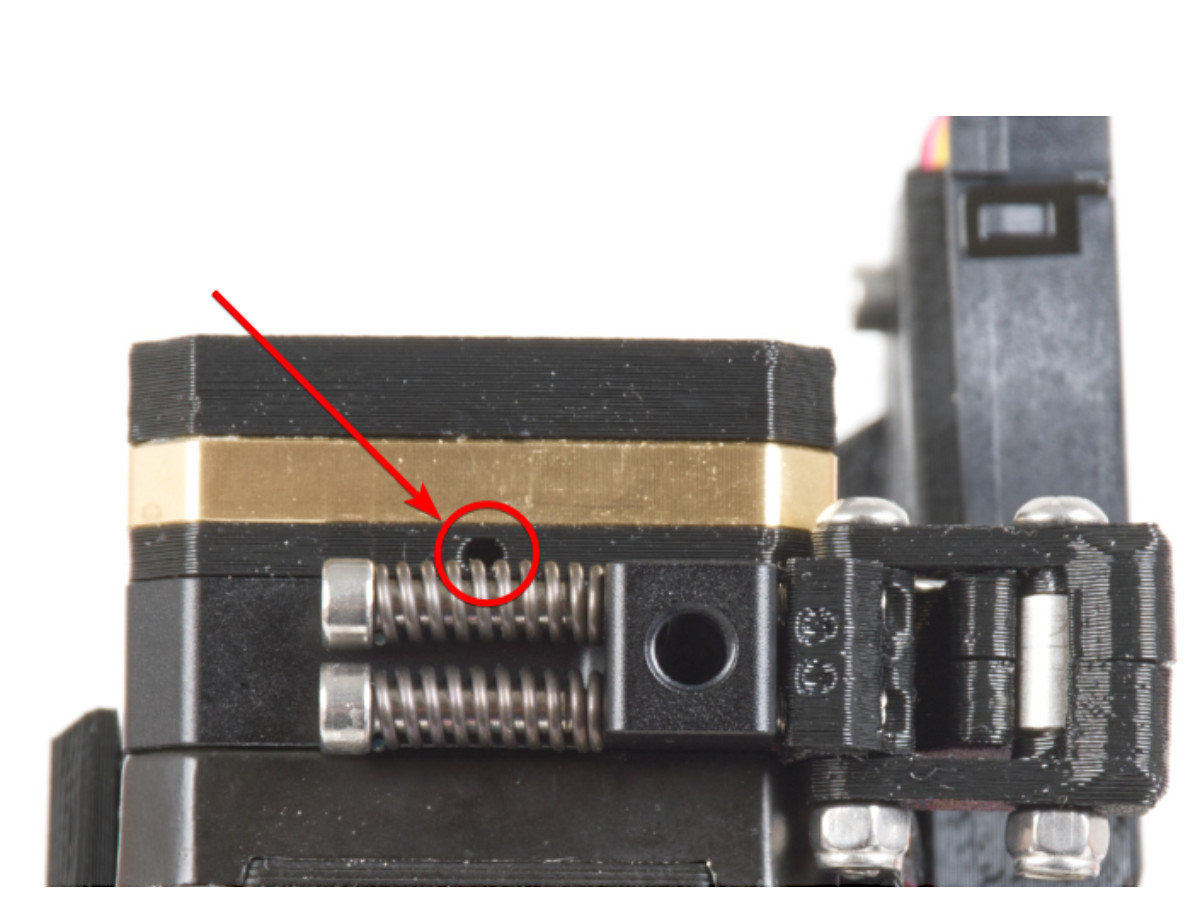
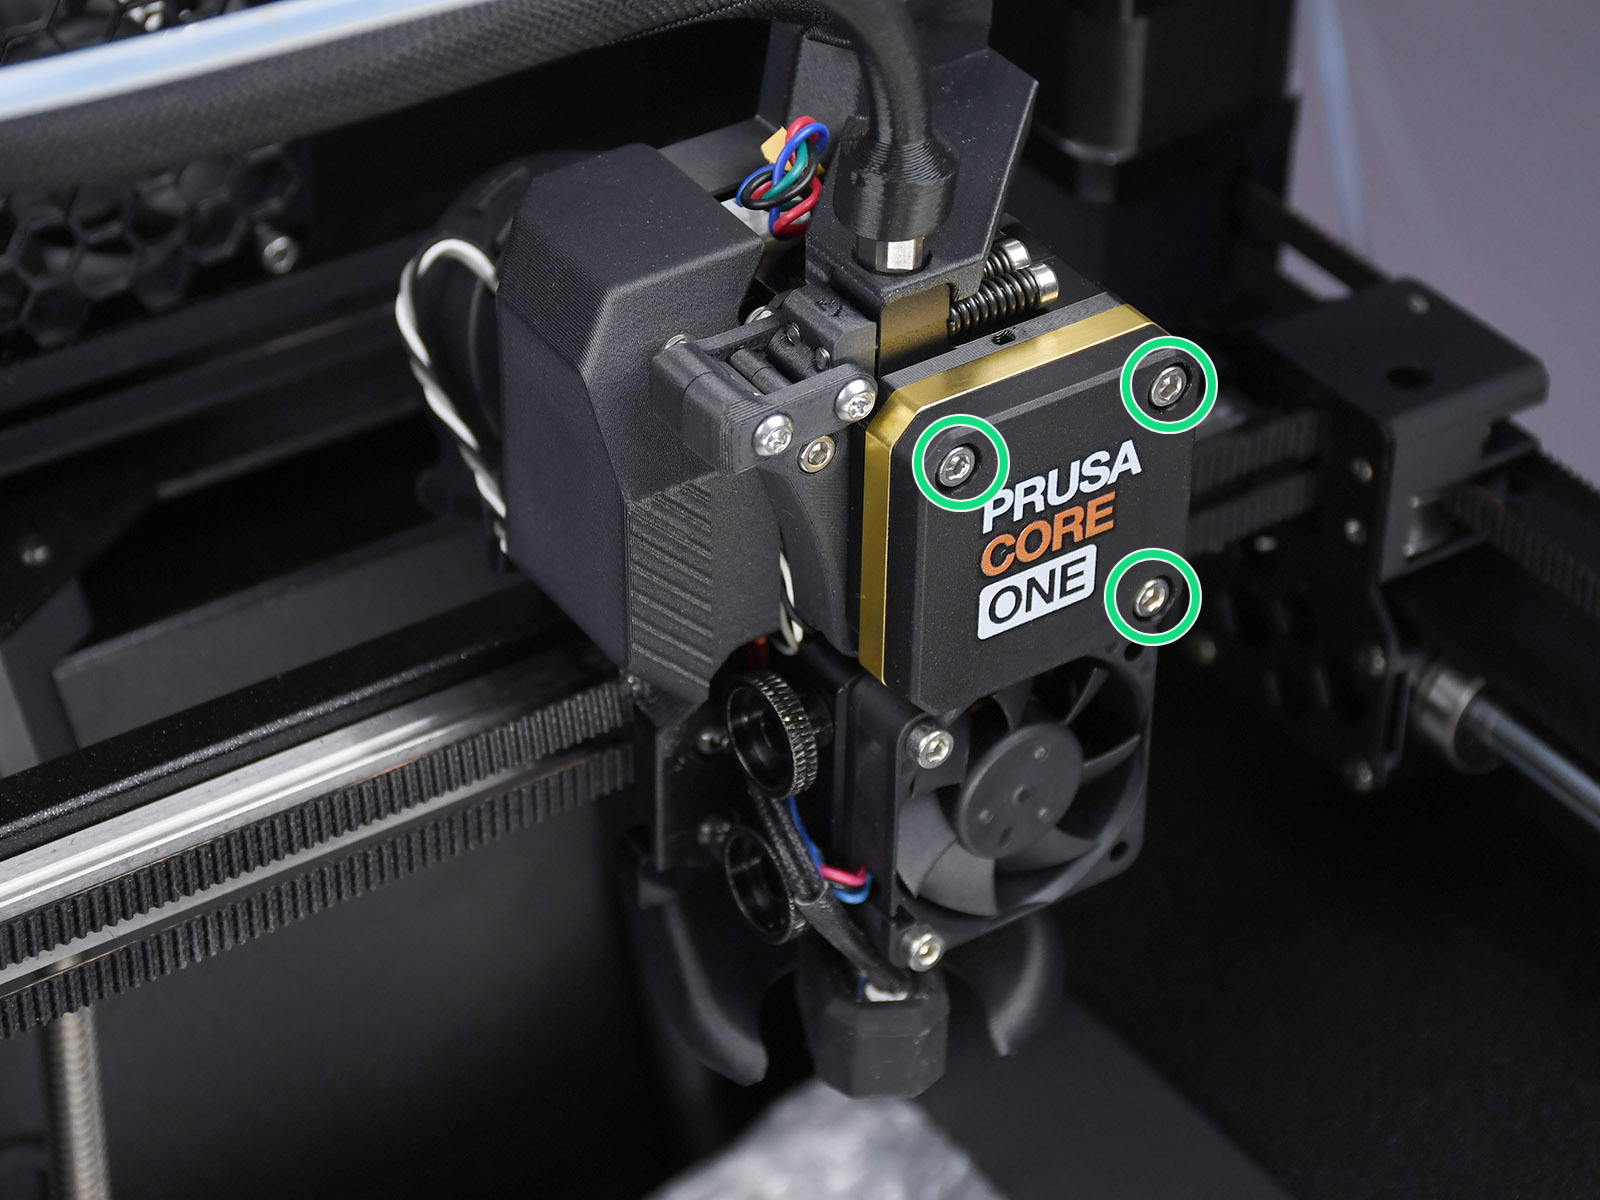
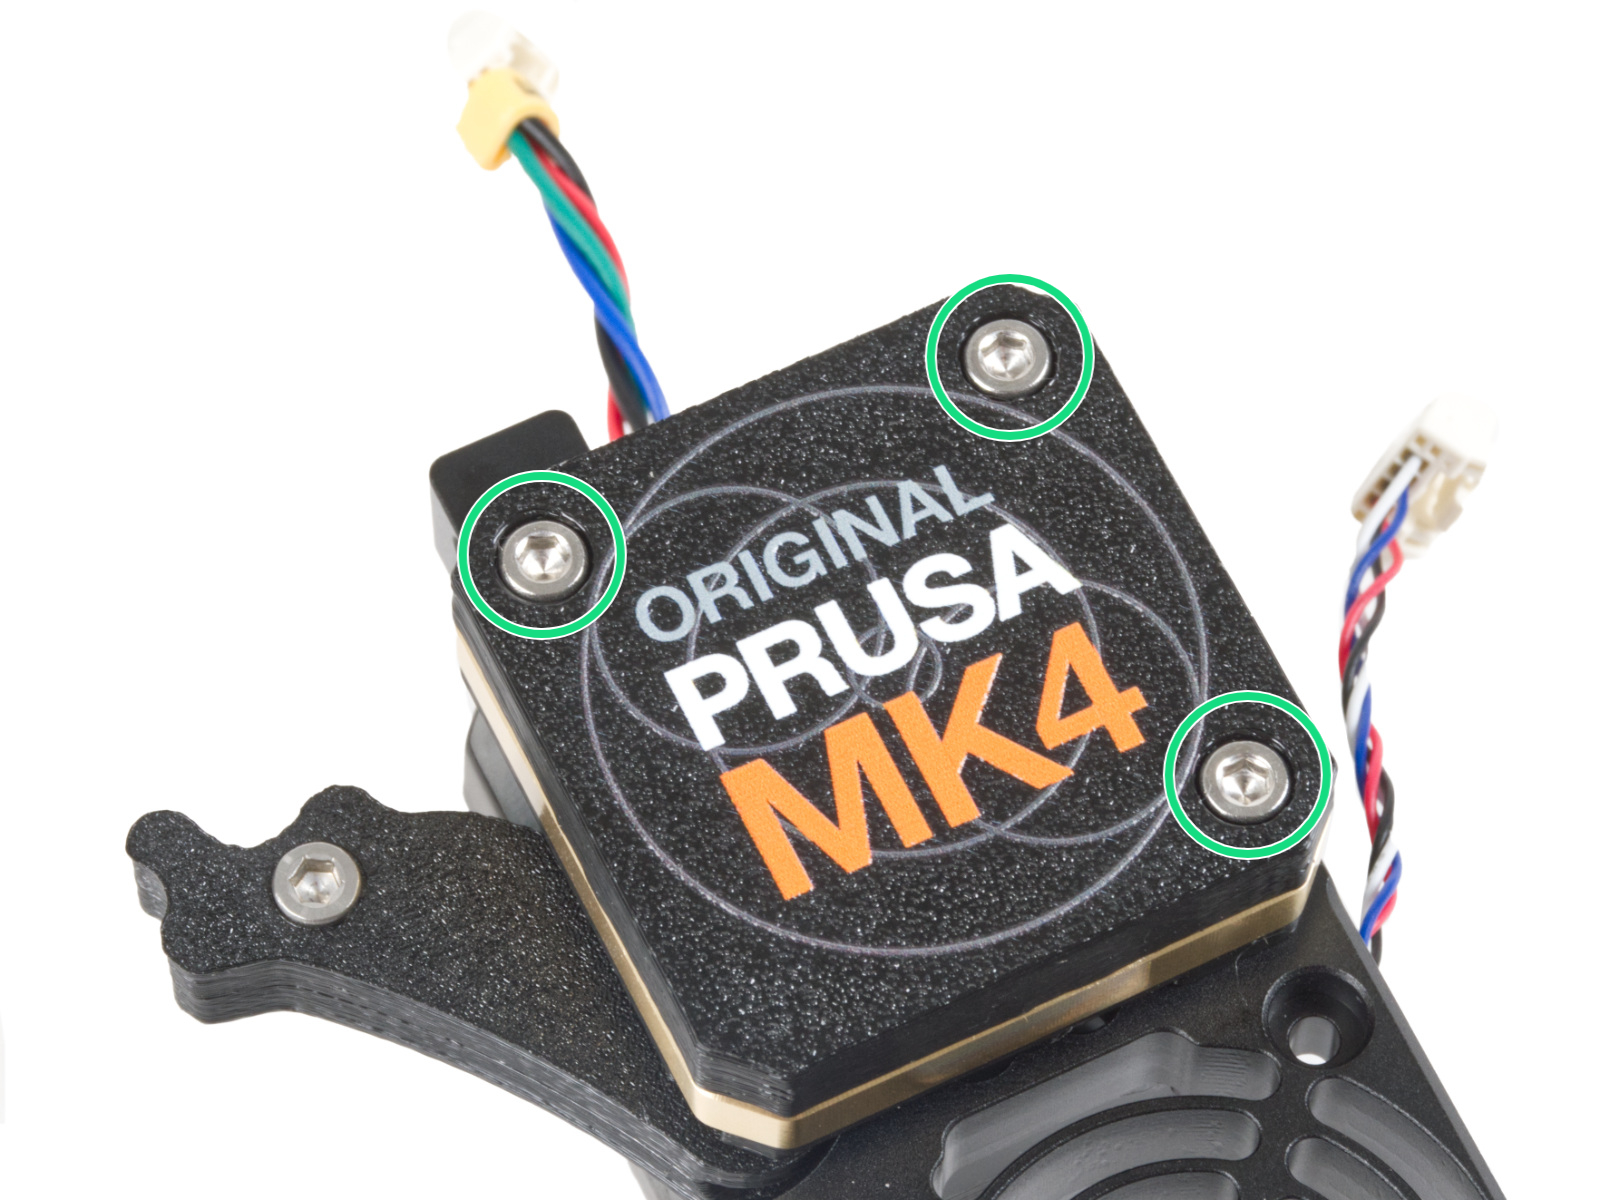
Top view of the CORE One (left) and MK4 (right) print head. The XL print head has a similarly positioned small hole. 

2) Filament tip insertion

In case you don't have compressed air at hand, a similar procedure to the one above can be attempted.

Prepare a bit of filament with a non-stringy tip. Repeatedly insert and remove the filament from the extruder. It will be necessary to insert and remove the bit of filament several times to achieve good cleaning, and the technique might not always be effective. 

3) Removing the sensor (MK4/S, MK3.9/S)

The following procedure is NOT recommended on Original Prusa XL. If you are experiencing issues with the tool filament sensor readings, and the previous methods did not work, please contact our technical support, and we will guide you through the procedure in more detail. 
If the previous techniques do not work, the filament sensor can be removed to be manually cleaned. This procedure requires partial disassembly of the E-axis. 

Ensure to have the PG-assembly-adapter before continuing with the following procedure. If you do not have it, you can purchase it from our e-shop, or you can print it using the below files, depending on the printer you will use. 
PG-assembly-adapter e-shop page
PG-assembly-adapter printed with CORE One, MK4/S, MK3.9/S
PG-assembly-adapter printed with MK3/S/+, MK3.5/S

  1. Unload the filament, then wait for the printer to fully cool down. After that, turn the printer off.
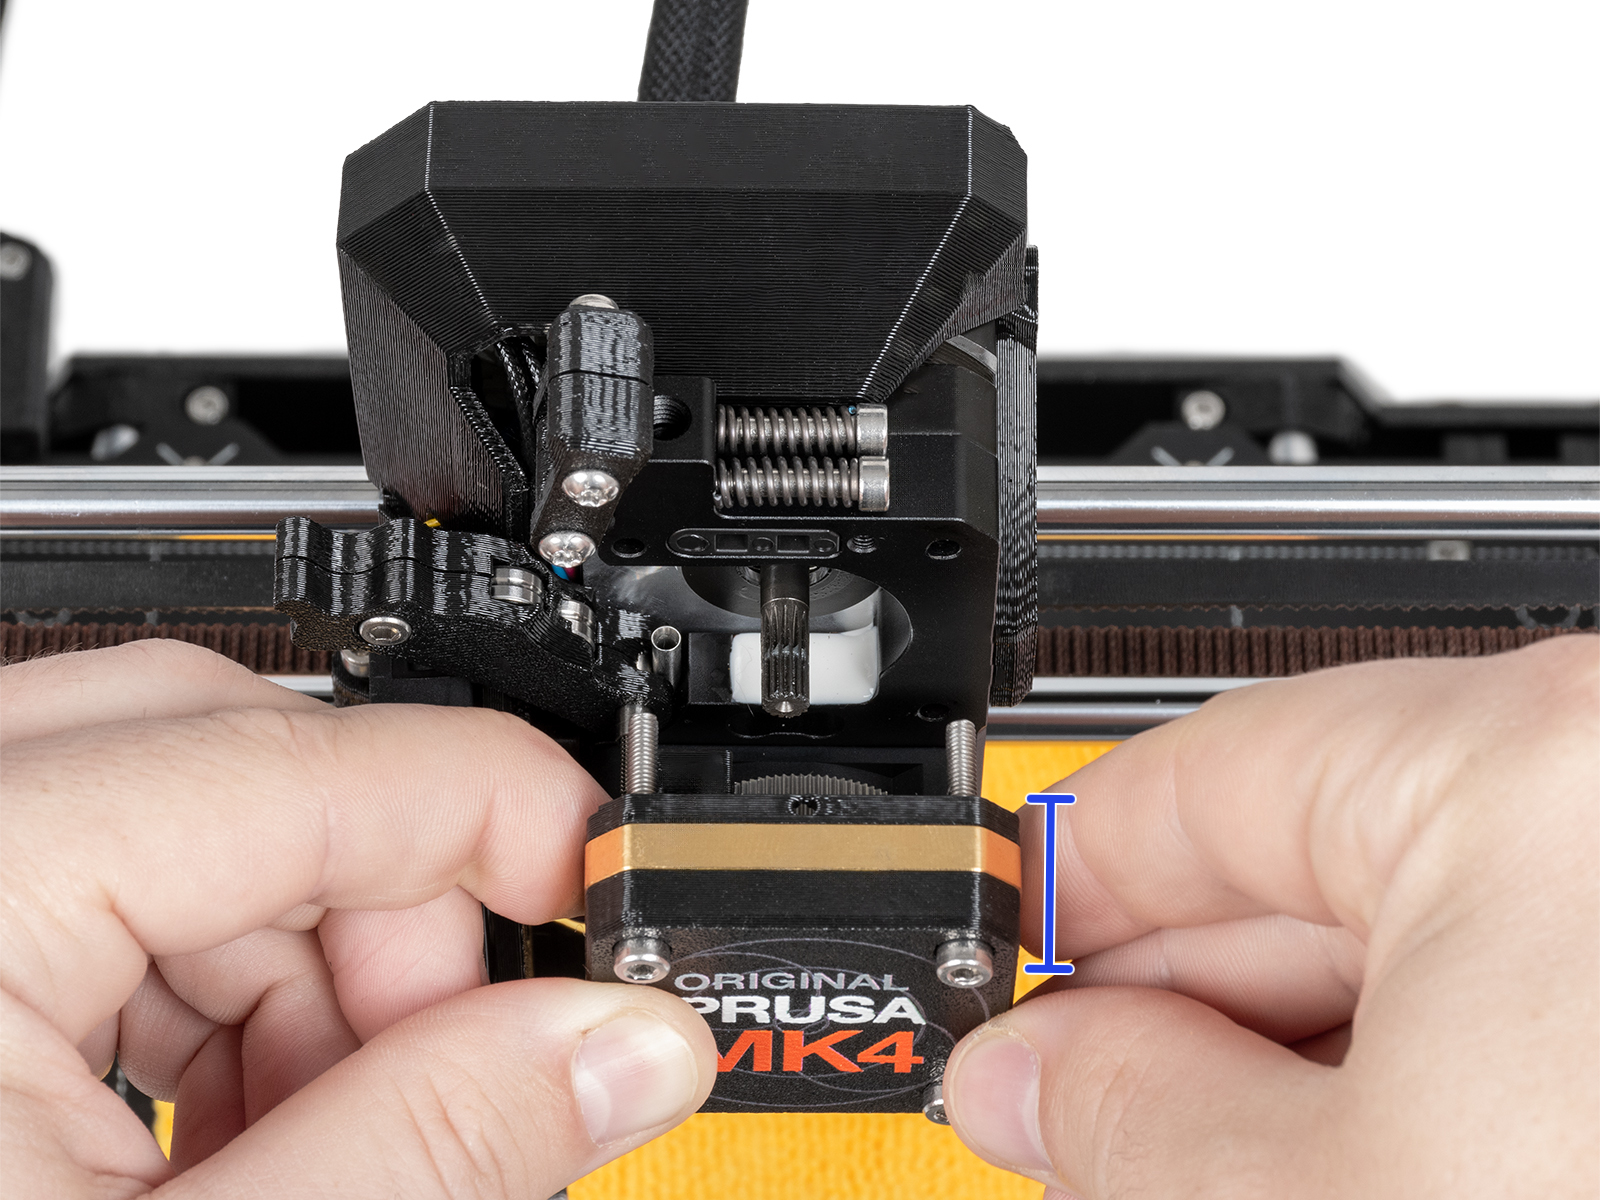
  2. Remove the PG-case, together with the PG-ring, gearbox, and main plate. Remove all of these parts in one piece.

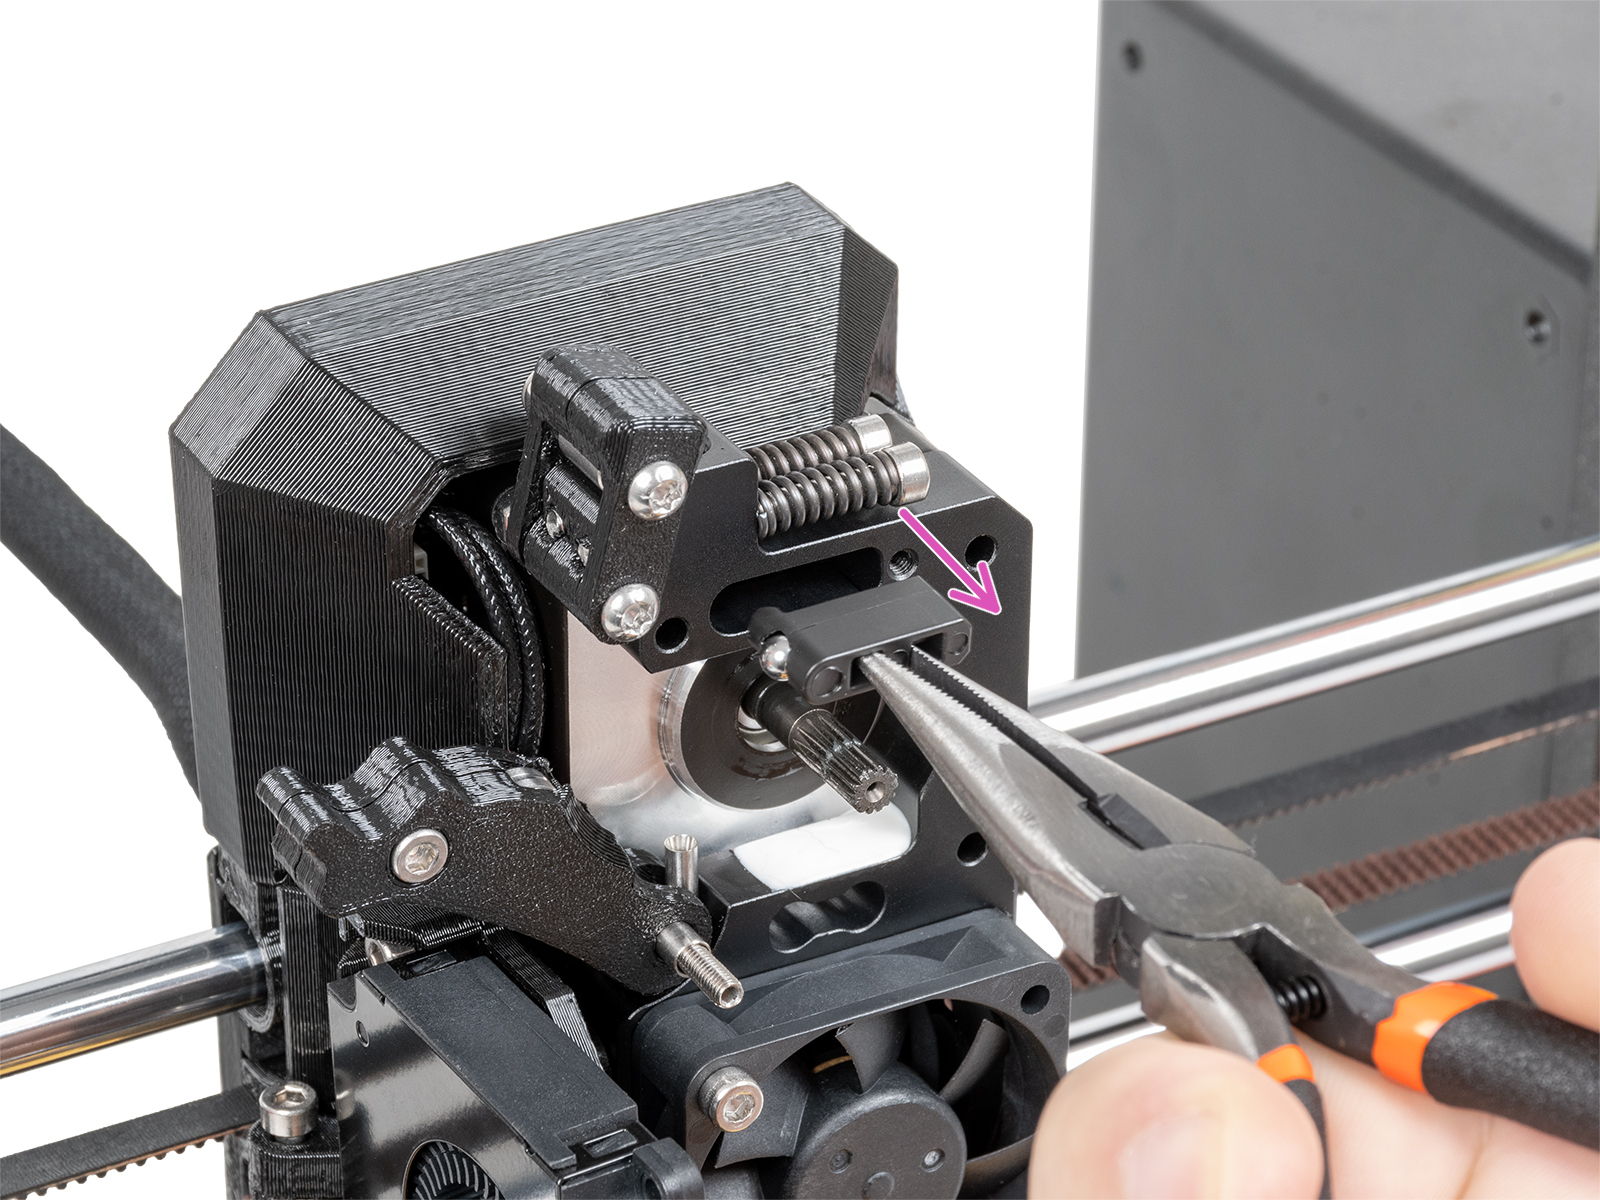
  1. Remove the Prusa-ball-holder using pliers.

  1. Carefully remove the ball-magnet-spring combo from the Prusa-ball-holder and clean any debris out of it. Clean also the slot on the heatsink.
  1. Reassemble the Prusa-ball-holder in the following order: steel ball, magnet, and spring. Then, insert the assembled Prusa-ball-holder in the Nextruder.
  1. Reassemble the block with PG-case, PG-ring, gearbox, and main plate. 

In case the disassembled parts in step 6 are not in one block, refer to the Nextruder chapter of the assembly guide of your printer model. 
 

12 comments

Log in  to post a comment
runlvl
I´m using a Mk4s with a lightly damaged Ball Holder for the filament sensor.  It came wrong assembled, so I had to correct the orientation. The problem is that I checked this too late, so the holder is already a little bit malformed but still working. What can I do to replace this ball holder when it breaks completely? Its not a printable part and it´s not listed at the store to buy.I already contacted the helpdesk but they sent me just the heatsink without the ballholder...
Leon
In the steps above, you are telling us we need the "PG Assembly Adapter", but nowhere in the steps do you tell us what to do with it and no pictures of it being used.
BorisUK
Hi Prusa, in step 6, where you say "In case the disassembled parts in step 6 are not in one block", you wanted to say "in step 2".
amoose136
Unfortunately I had this happen in the middle of a print and compressed air wasn't clearing the problem so I had to do the disassembly step. That worked and it's back to printing now but unfortunately there was no way to run a gearbox realignment like I would think you'd want to do without killing the in-progress print. For now I just did my best to get it aligned and continued the print but ugh I wish there was one of:
1.) a way temporarily disable the filament sensor so the print complete without it
2.) a way to be able to rerun the gearbox alignment while paused in the middle of a filament reload
3.) a revision to the filament sensor design for one that isn't bothered by a little bit of dust
Corey Brown
Somehow I managed to print for > 1,200 hours with the "double magnet" installed. Symptoms started when I used a glow in the dark filament that was a bit "rough" and perhaps a bit larger than my usual filament. It was difficult to insert through the filament sensor, but otherwise printed fine. The issue would be with my regular PETG filament, which was slightly smaller. The issue manifested itself with random filament changes, as if I had added color changes in the slicer or had run out of filament. These changes sometimes happened mid-layer, sometimes at the start of the print, and sometimes in the middle of the print. Very annoying. Cleaning did not help, and finally I discovered the doubled up magnets when I disassembled the filament sensor. I carefully didn't mess with the orientation of any gears, and reassembly was possible without having to recalibrate the gears. I did have to re-calibrate the filament sensor after removing the second magnet, and it's now functioning normally again.