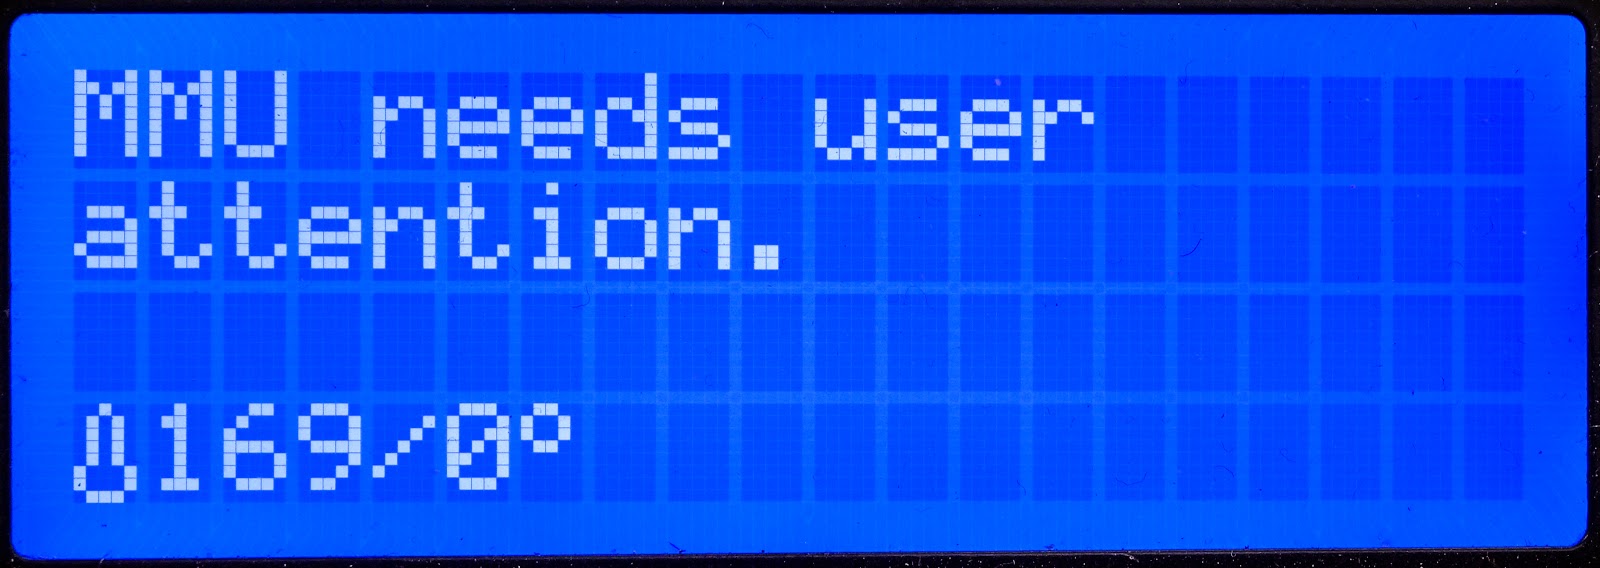
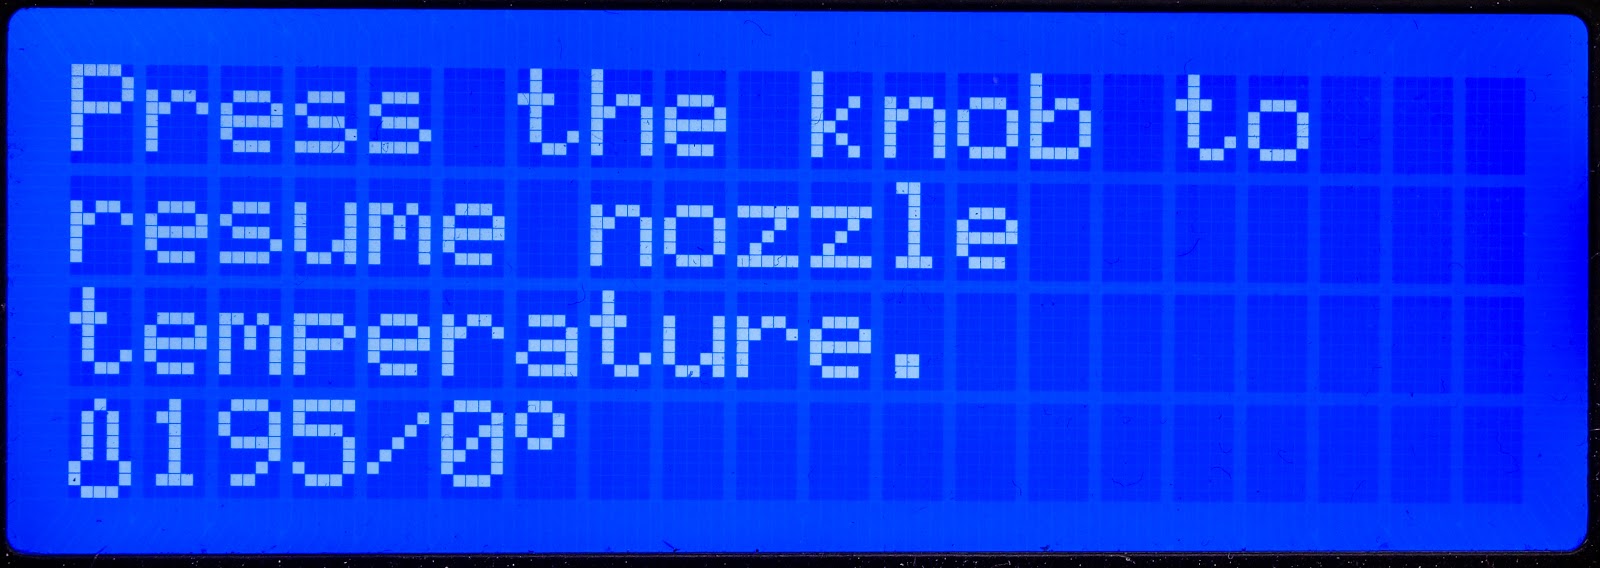
If your MMU2S print encounters an issue it will stop mid-print and one or more of the LEDs will be blinking red. The following message will be displayed on the LCD: “MMU needs user attention.” followed by “Press the knob to resume nozzle temperature.” The print is paused until the problem is resolved.
 |  |
Green lights
As you would guess, the green light means that everything works as it should.
- Stable green light (not flashing) - selector moved to the current position and ready.
- Stable green light after loading - filament successfully loaded.
- Rapid green flashing light (after pressing the middle button) - The filament loading sequence is in progress.
Red lights
Based on the speed of the blinking, you can tell whether the filament got stuck during the loading or unloading phase.
- Slow flashing (~once every second) - a problem during filament loading (Filament sensor did not trigger as expected)
- Fast flashing (~4 times per second) - a problem during filament unloading (Filament sensor remained triggered after the unloading procedure)
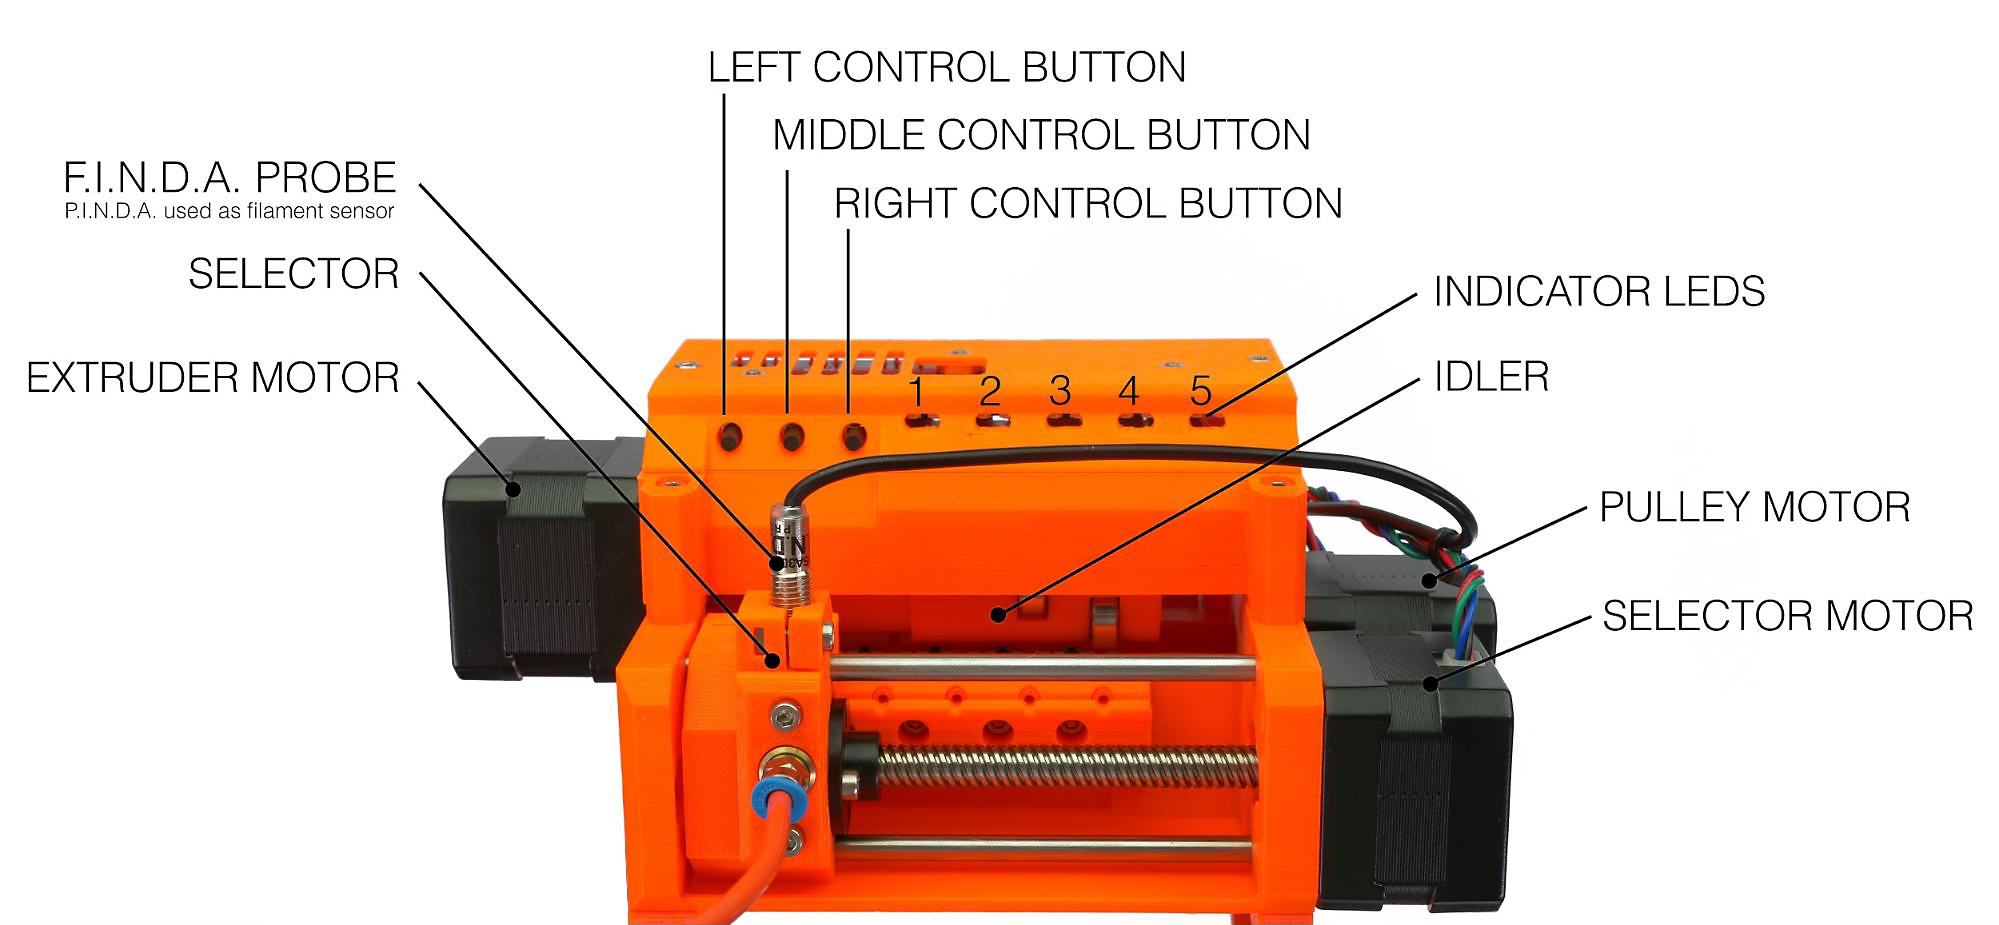
Reference for each part of the MMU unit.
Slow flashing Red
An error occurred during the filament loading process. This is most likely because the tip of the filament is too large.
- Pull the filament out of the MMU unit by winding it on the spool to prevent tangling. If you are unable to pull the filament out, loosen the idler screws (the long screws with the spring on top). No need to remove them completely, just loosen them and remember how much they were tightened originally. Once the filament is out, secure the idler screws at the same tension.
- Take the tip of the filament, cut approximately 10 cm (4 ”), and create a sharp tip (as you usually do).
- Insert the filament back into the PTFE tube behind the MMU2S unit. Make sure the filament is able to move freely inside.
- Press the middle button to test the loading sequence.
- Feed the filament in until the FINDA detects it and let the MMU retract it back to the "start position".
- If the LED switches to red-green flashing, press the right button to load the filament into the hotend and continue the print. (The hotend will re-heat first.)
- If the LED stays red, go back to step 1 and repeat the process. (If the selector moves to the right, move it back to the left by pushing the left button).
Rapid flashing red
An error occurred during the filament unloading process. The SuperFINDA sensor is detecting filament after the unloading process has been completed.
Stuck in the selector
- Remove the orange/white PTFE tube by unscrewing the silver-blue Festo fitting.
- Pull approximately 20 cm (7.8 in) of filament out of the MMU2S selector, making sure there is no groove or dent ground by the hobbed pulley. We need to get rid of the groove the pulley creates in the filament.
- Cut approximately 10 cm (4 in) of the filament. Create a sharp tip.
- Push the filament back into the MMU2S unit and let around 2-3 cm (1 in) of filament stick out of the selector.
- Press the middle button and wait for the printer to move the filament back and forth. If it succeeds to do that, the LED of the concerned filament starts flashing red and green. If the procedure fails, it will stay red, in which case try to cut and load the filament again.
- Finally, screw the Festo fitting back in and press the right button to continue the print.
Stuck in the extruder
- Unscrew both ends of the Long PTFE tube.
- Attempt to pull out the filament from the extruder. Use some force. If it is jammed, release the idler screw on the Printer's extruder and pull out the filament. Then tighten the Extruder idler screw again to the same tension.
- Cut approximately 10 cm (4 in) of the filament. Create a sharp tip.
- Push the filament back into the MMU2S unit and let around 2-3 cm (1 in) of filament stick out of the selector. If you have opened MMU, close it.
- Press the middle button and wait for the printer to move the filament back and forth. If it succeeds to do that, the LED of the concerned filament starts flashing red and green. If the procedure fails, it will stay red, in which case try to cut and load the filament again.
- Finally, screw the Festo fittings back in and press the right button to continue the print.
All red LEDs blinking
In case all of the red LEDs are on and the printer reports that it needs your attention, the problem is in the Selector or Idler position. This often due to the SuperFINDA remaining triggered.
- Make sure the filament is removed and that there is no filament in the selector.
- Use an Allen key to press the Reset button next to the mini USB port, located on the right side of the MMU.
- Wait until the printer resets the idler and the selector position.
- Make sure the selector is in the right place and that the correct color is to be loaded.
- Press the knob next to the printer's LCD screen to re-heat the nozzle and continue the print.
All five red and green LEDs blinking
The MMu2S unit can detect if the stepper drivers are not able to provide enough power to the stepper motors.
Resetting the MMU2S using the reset button on the side of the unit is usually enough. However, if all the LEDs keep on flashing simultaneously, then it may be a power issue:
- Inspect the signal cable and MMU2S power cable for damages and check if they are properly connected to the MMU2S control board and to the printer's Einsy board.
- Try flashing the firmware of the MMU2S unit again, even if you are on the most current version.
Check your calibrations, assembly and hardware!
There are several components and assemblies that must be put together correctly, and some even calibrated by you. Check out MMU2S Setup and Inspection for a complete run through of what you must make sure is correct before using your Original Prusa MMU2S.