The Prusa CORE One, and the Original Prusa MK4/S, MK3.9/S are equipped with a loadcell, which detects whether the nozzle is close enough to the steel sheet for printing and prevents damage from the nozzle digging into the steel sheet.
The printer firmware expects a measurement sample from the loadcell to occur within a specified time. In case this does not happen, the printer will show the message "There was a timeout while waiting for measurement sample, please repeat the action."
Error name: Loadcell Timeout
Error code: #31528 (CORE One) #26528 (MK4S) #13528 (MK4) #27528 (MK3.9S) #21528 (MK3.9)
A visual inspection
- the filament is unloaded from the extruder
- the printer is turned OFF and unplugged from electricity
- the hotend and the heatbed are cooled down to ambient temperature
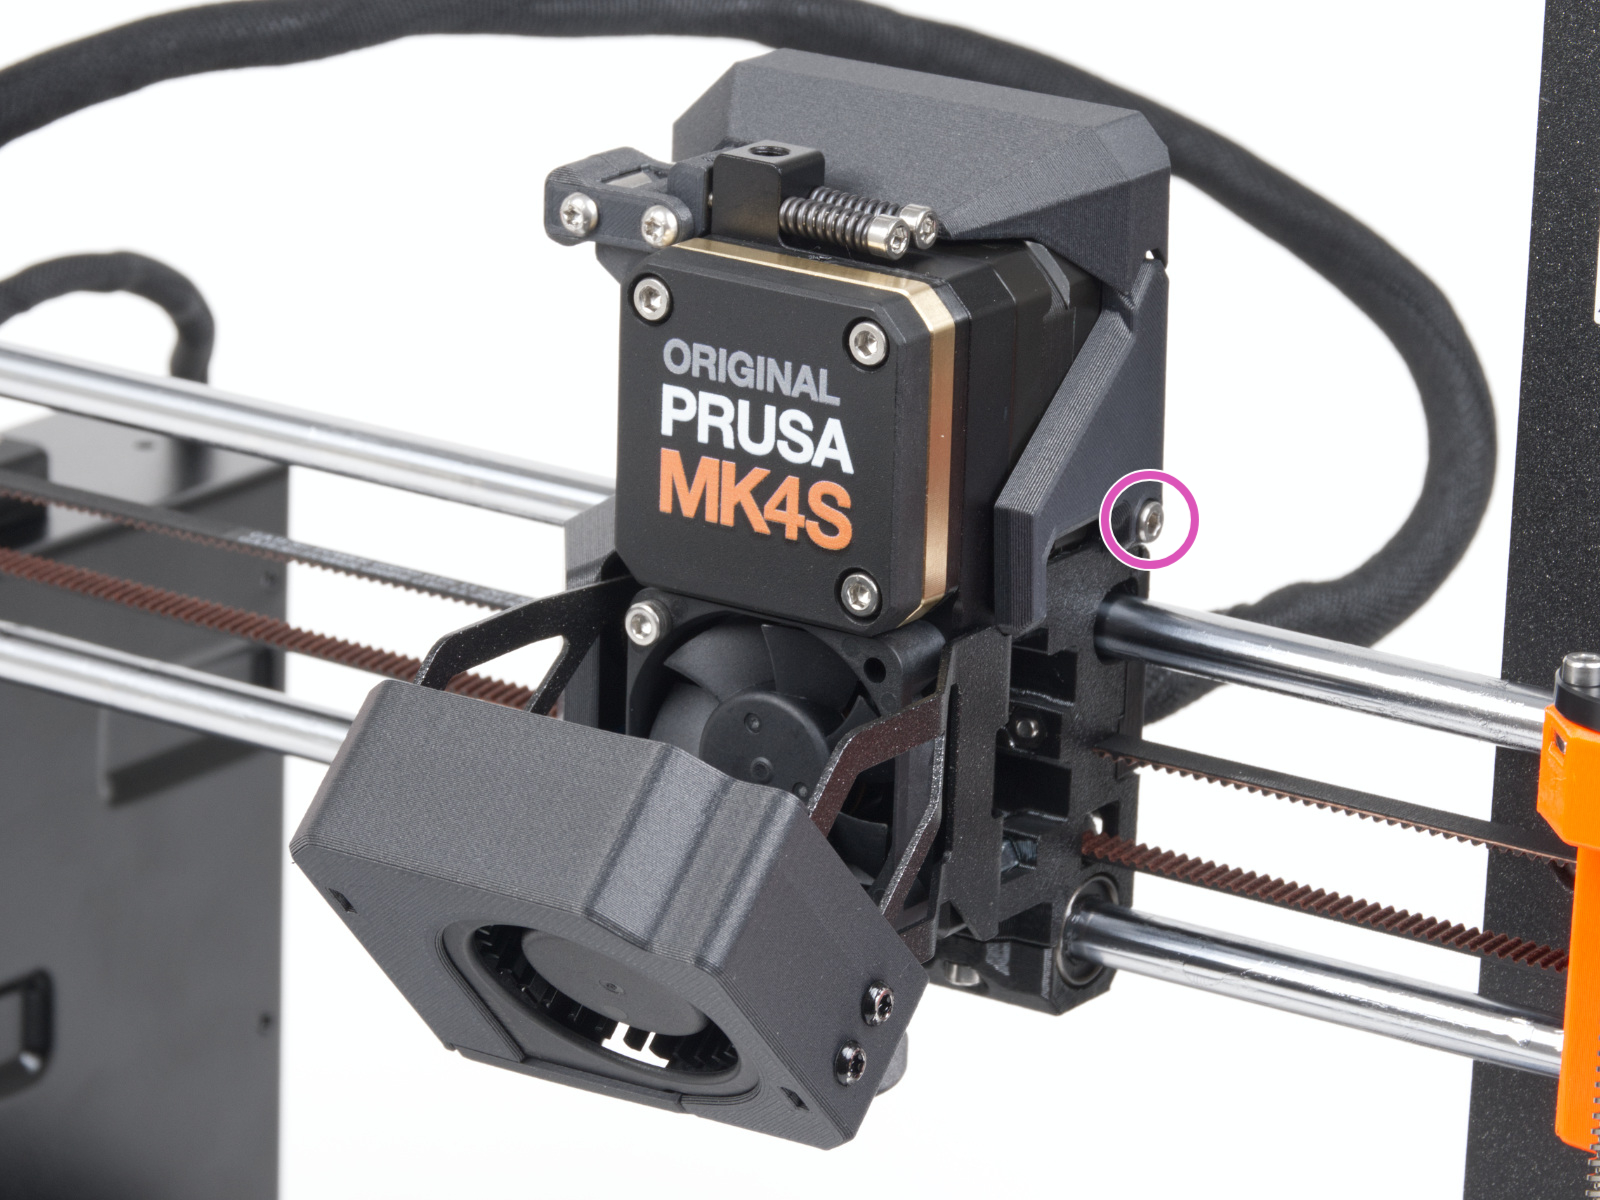
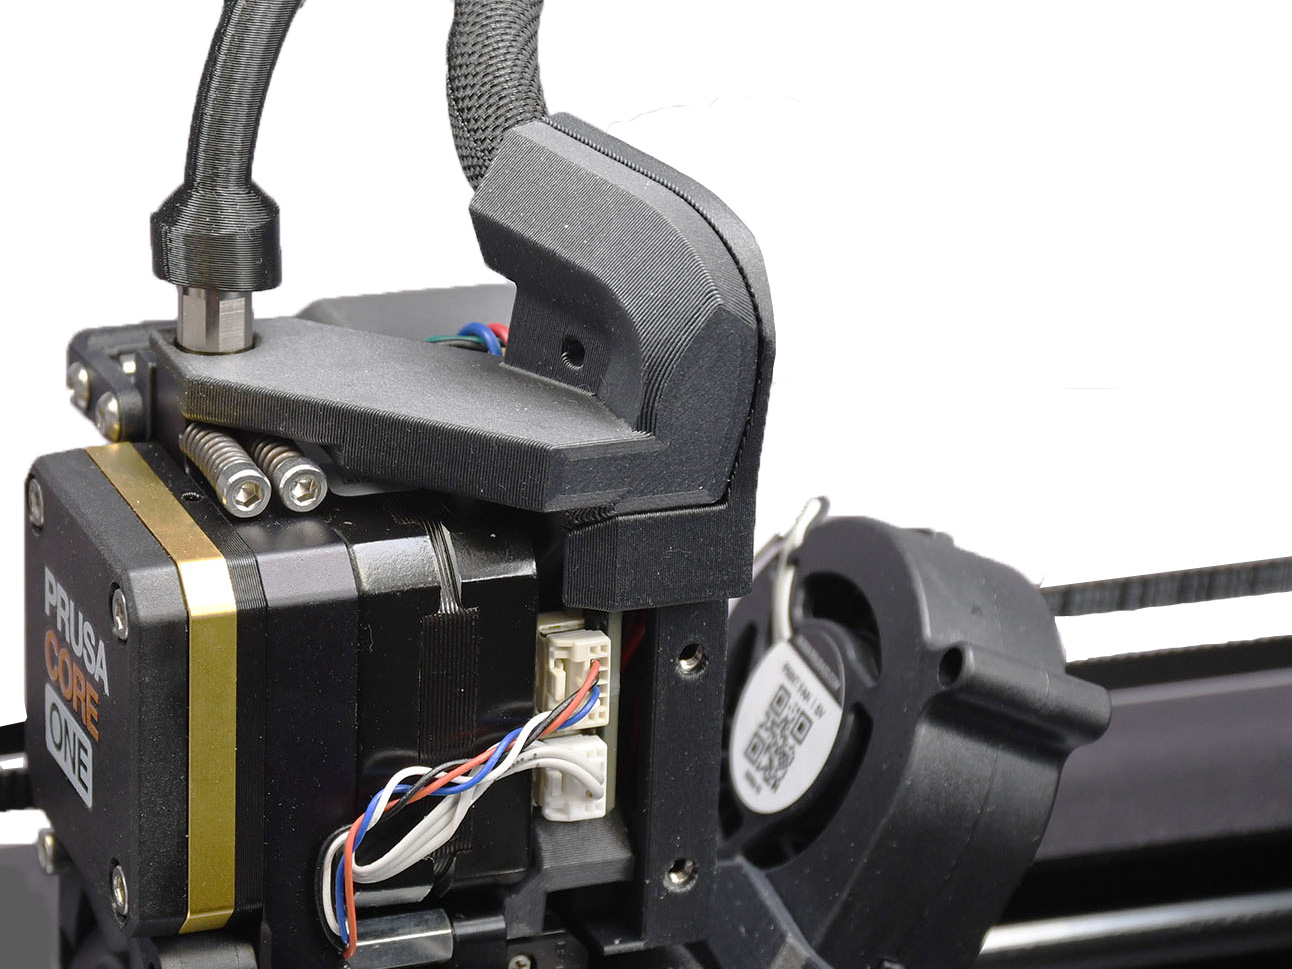
Access the right side of the LoveBoard, where the loadcell cable is connected. To remove the side LoveBoard cover, on CORE One loosen two M3x6 bolts, on MK4/S and MK3.9/S loosen one M3x10 bolt.
 |  |
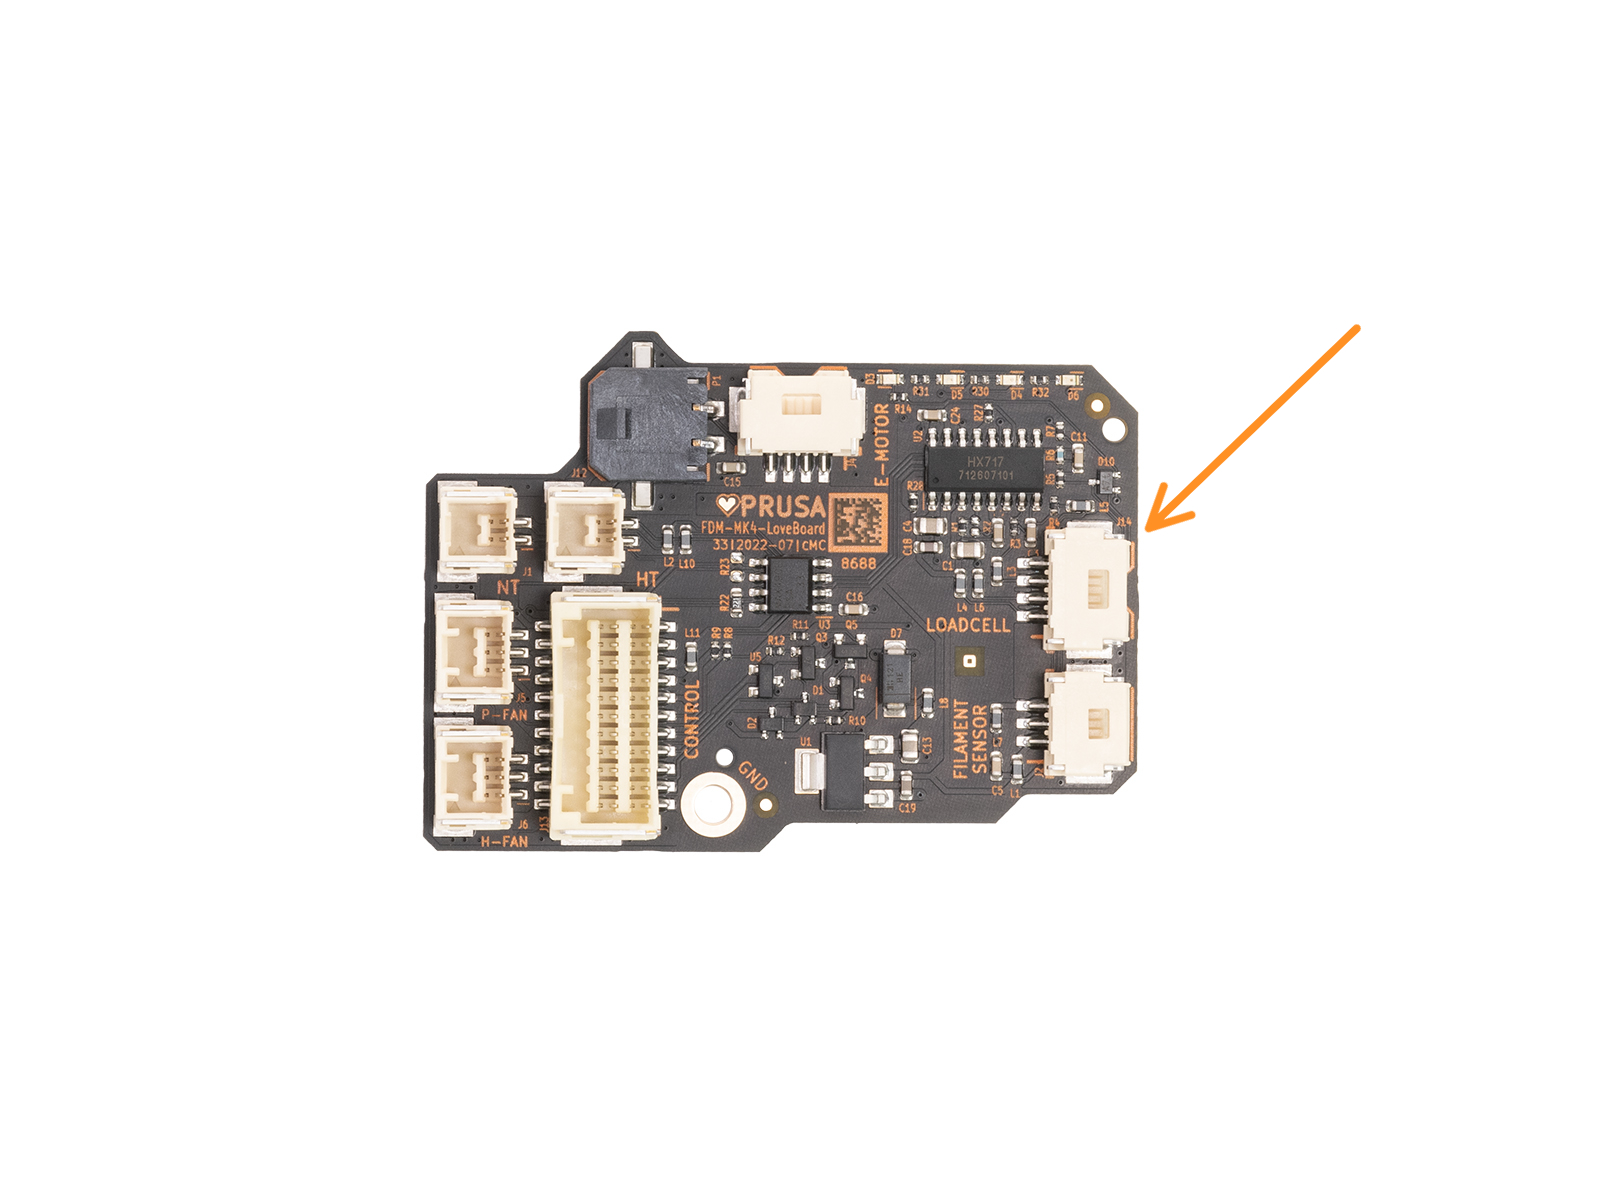
Once accessed, locate the loadcell connector and cable, and check for any loose cable, disconnected cable, or visible damage.
|
|  |
Re-test the loadcell
Navigate to LCD Menu -> Control -> Calibrations & Tests -> Loadcell Test to initiate a loadcell test.
During the test, you will be asked to tap the nozzle at a specific time, and a progress bar shown on the screen is filled, depending on the pressure applied to the loadcell. If the bar is not filled or is filled irregularly, please contact our customer support.
 |  |
PG-assembly-adapter printed with MK4/S
PG-assembly-adapter printed with MK3/S/+
- If any filament is loaded, unload the filament, then wait for the printer to fully cool down. After that, turn the printer off.
- Remove the PG-case, together with the PG-ring, gearbox, and main plate. Remove all of these parts in one piece.
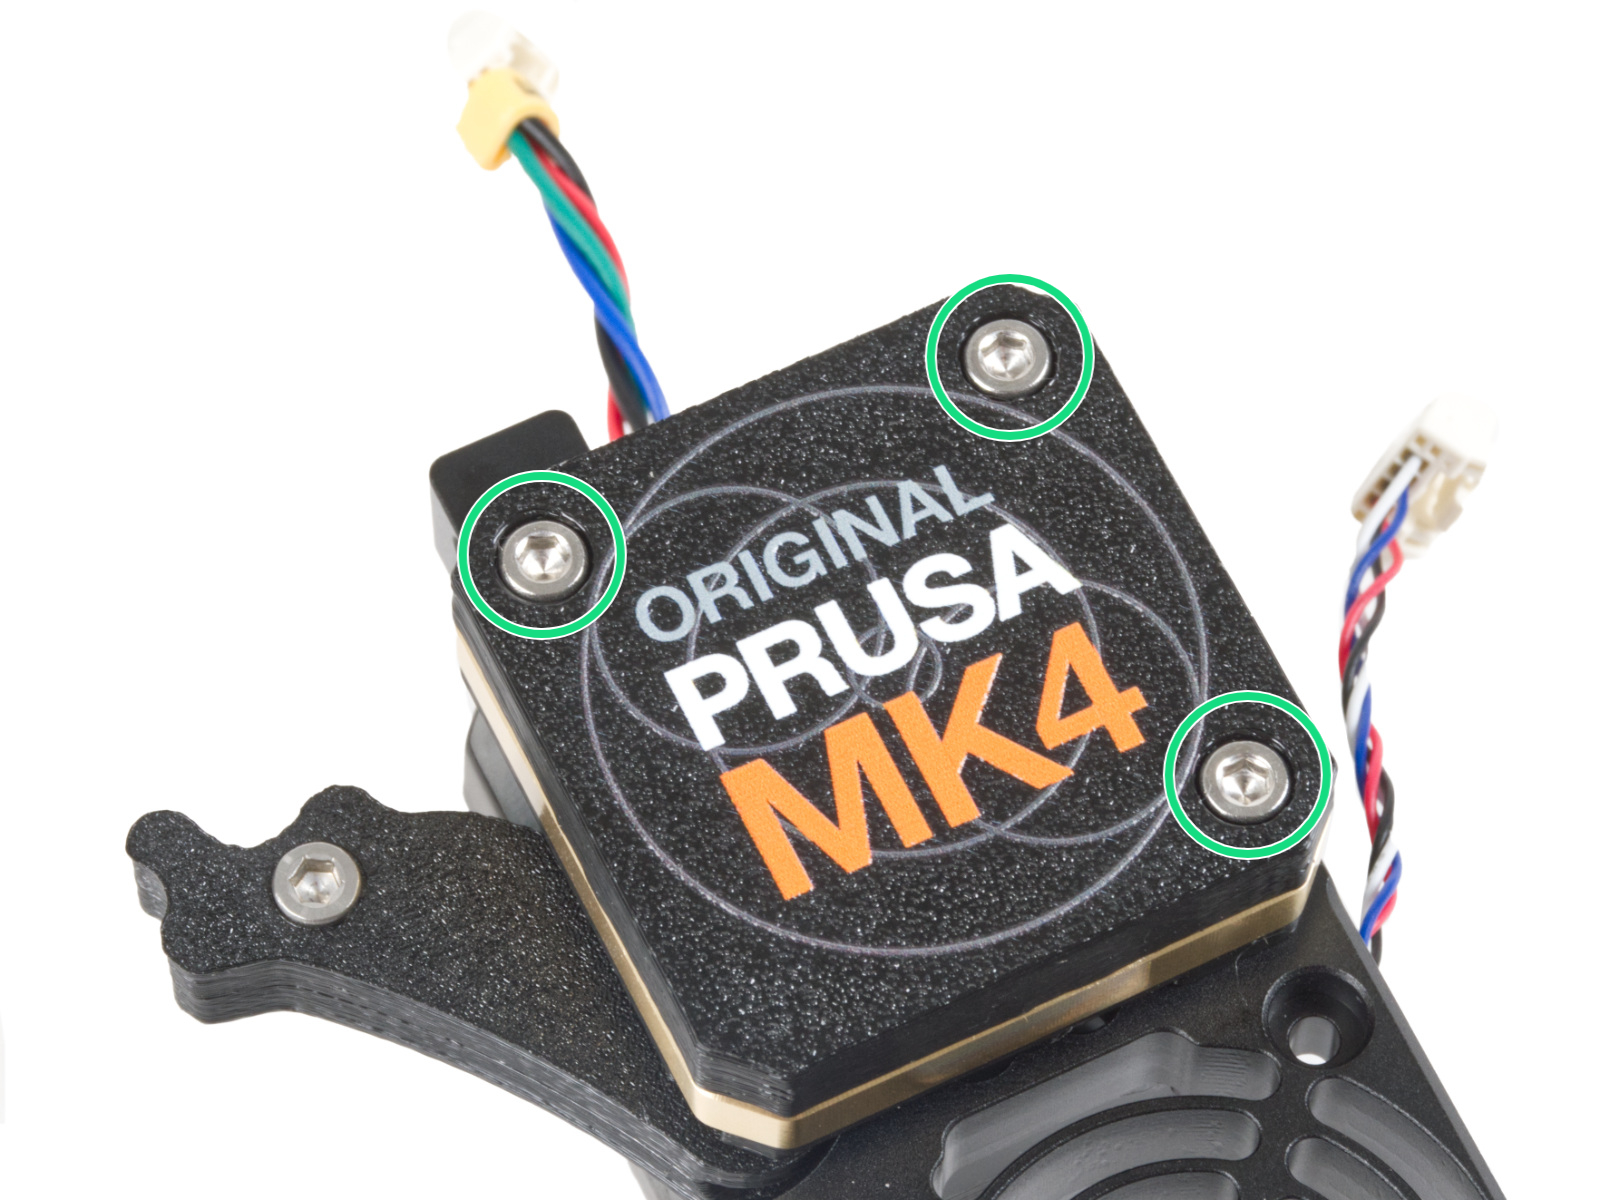 |  |
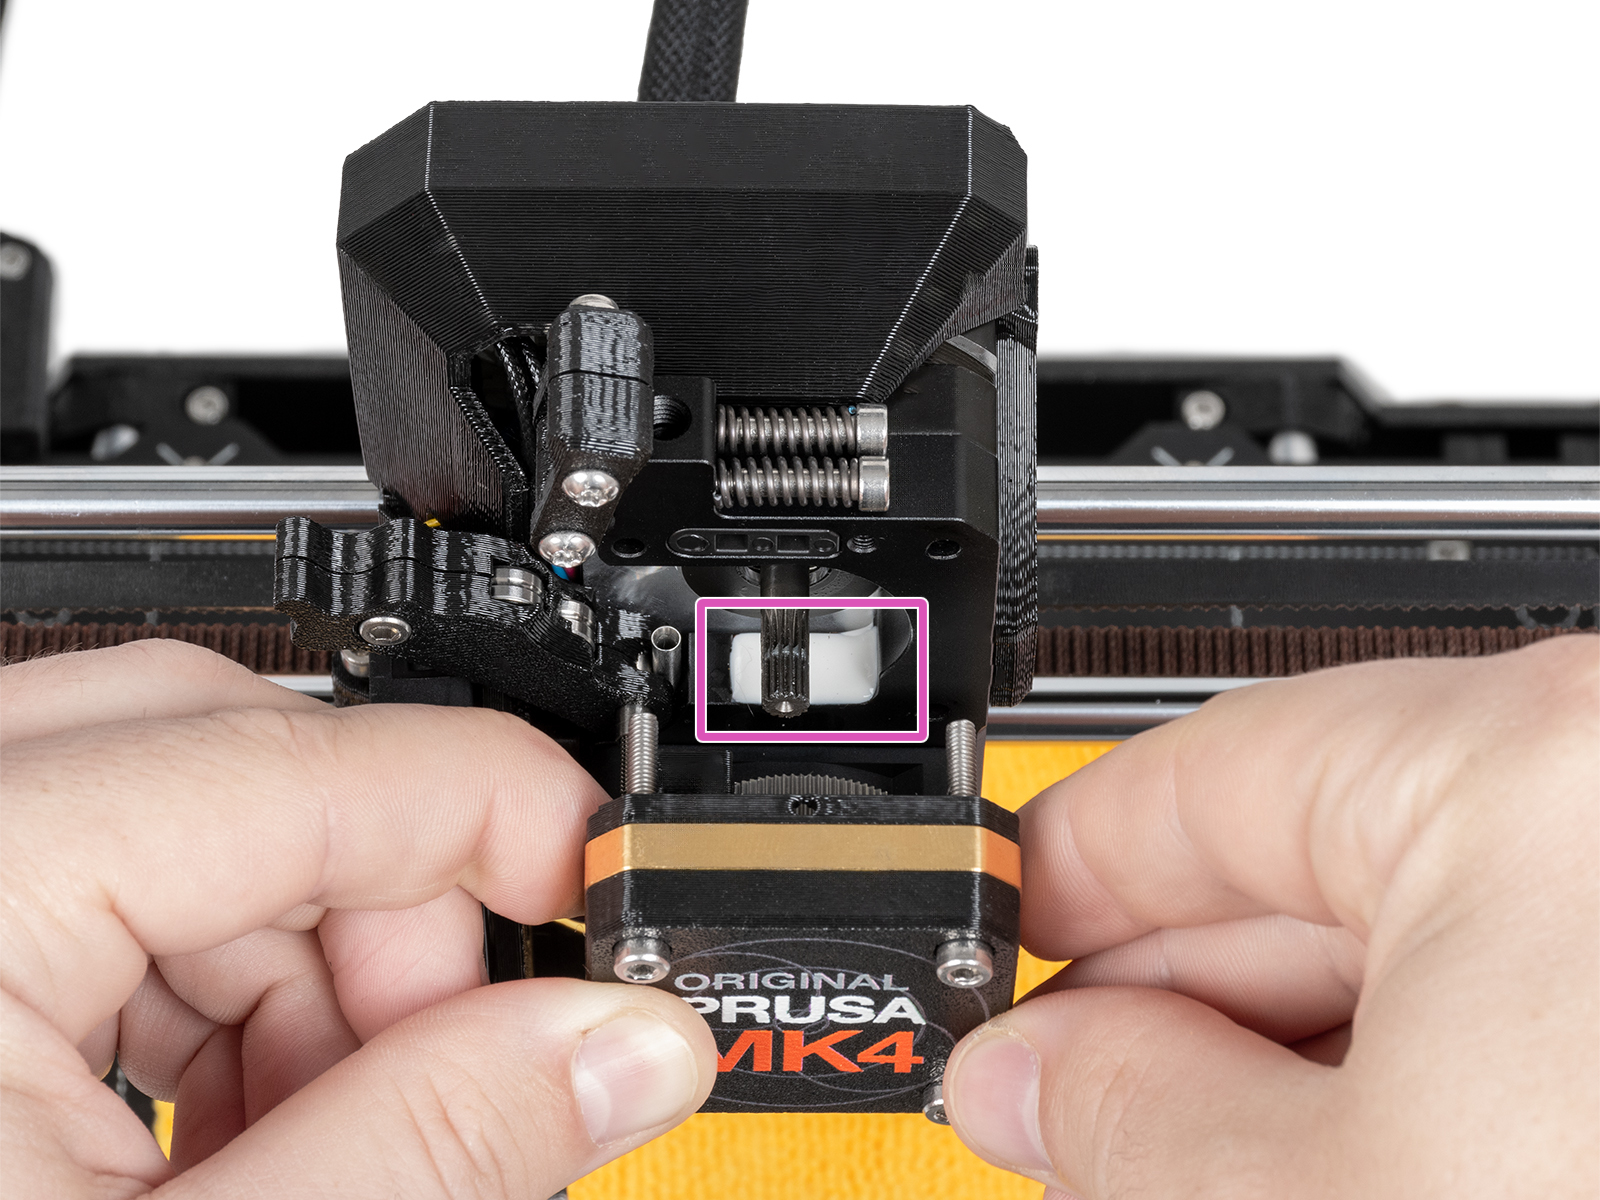
- The top part of the loadcell is now visible and has a white pad attached to it. Without touching the white pad, check it for damage.
- Reassemble the block of PG-case, PG-ring, gearbox, and main plate. In case the parts are not in one block, follow the dedicated steps from the Nextruder assembly manual, depending on your printer version.
- Perform the gearbox alignment.
3 comments
This message appears IMMEDIATELY after the bootloader runs. This is a brand new machine.
Please get in touch with our Support to troubleshoot this issue.
I hadn't updated WiFi firmware yet because I figured I would set that up later.
But after I inspected connections (good), looked around in the menus (filament sense said disconnected?), loaded/unloaded filament (heat cycle?), then I updated WiFi firmware, then load cell and everything continued fine.