Together with the Mesh Bed Leveling, the Bed Level Correction is an important feature designed to allow users to compensate for even the slightest imperfections in the first layer. It allows to virtually raise or lower the heatbed on the Left, Right, Front and Back sides, essentially enabling you to have a different Live Adjust Z value on each of the four sides of the heatbed. This feature is most beneficial if you frequently need to use the entire area of the heatbed.
How to use Bed Level Correction
The adjustment limit is +/- 100 microns (μm). However, even 20 microns can make a huge difference, so when using this function, make small incremental changes. The same way as Live-Z adjust, negative values lower the nozzle closer to the heatbed.
Preliminary steps
- Ensure you recently run the XYZ calibration for MK3/S/+, and the XY axis test, part of the self test, for MK3.5/S, MINI/+.
- Clean the entire surface of your steel sheet with 90% or higher isopropyl alcohol.
- Have a good baseline first layer calibration. Follow the dedicated instructions for MK2.5/S, MK3/S/+, MK3.5/S, and for MINI/+.
- Ensure to have checked the possible causes described in the dedicated article on first-layer issues.
Test models
Download and slice this test model for your printer version using the Prusa Slicer's default PLA settings, 0.20 mm layer height.
Procedure
- Print the g-code prepared in the previous step with a PLA filament (ideally light and opaque color). The print is just one layer high and takes up most of the printable surface. You do not have to print the entire file, stop the print as soon as the differences in layer height across the plate are obvious.
- Evaluate where the layer is too squished and full of scars and where there are gaps in between the lines. In the photo below, the lines are way too squished in the top-right corner, and the nozzle is too far away in the bottom-left.
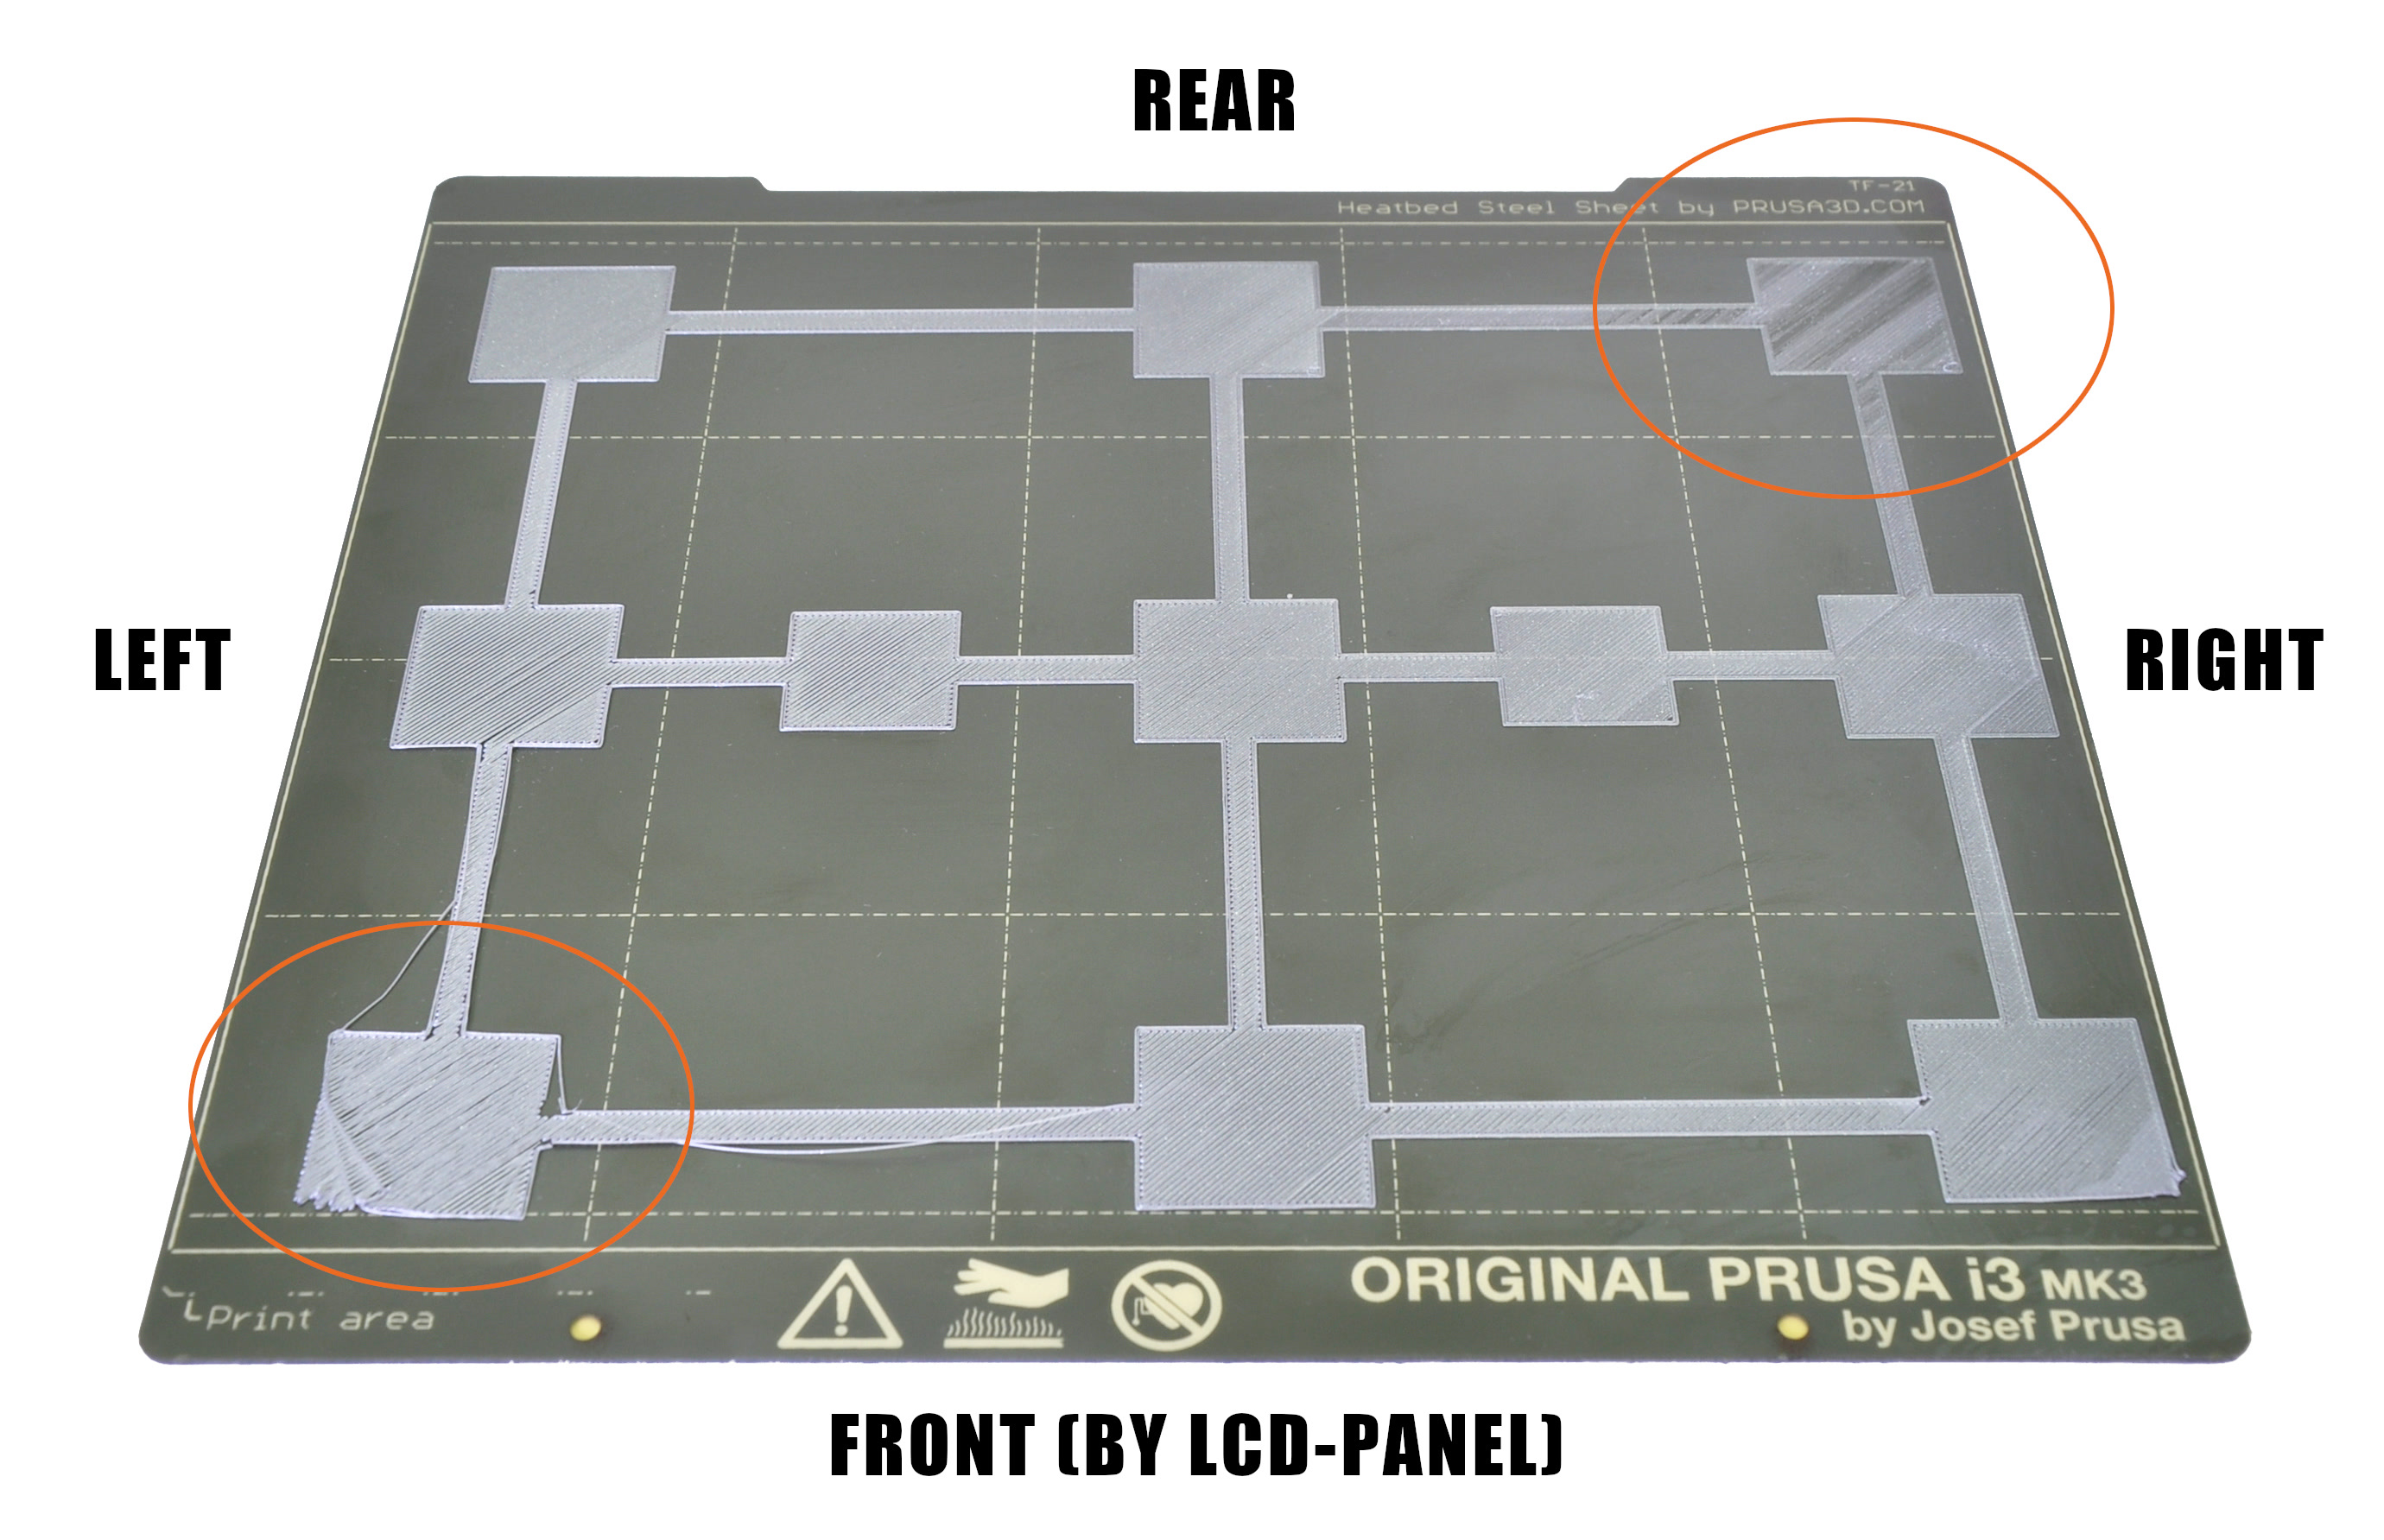
In the example above you want to adjust a minus-value on the left, bringing the nozzle closer and a plus-value on the right, moving the nozzle away. You may also need to adjust the distance front and back, but do a test print after adjusting the left and right side.
- Go to the LCD Menu -> Calibration -> Bed level correction. There, you can adjust Left/Right/Front/Rear values (understood from your point of view, as you are looking at the printer's LCD).
- Edit the values, we suggest going in steps of +/- 10. These values will be added to the baseline Live Z value set in step 1. Remember, a negative value will decrease the distance between the nozzle making the layer more squished. A positive value will increase the nozzle-bed distance, curing the scars on your first layer.
- Repeat the procedure until you are satisfied with the result (photo below for inspiration).
For example, let's say your Live adjust Z value is -1.000, and that the layer is too squished in the rear, and that you see gaps between the lines on the right side.
- Rear: you need to enter a positive value (at the end it will be 25 for example) to make the layer less squished
- Right: you need to enter a negative value (at the end it will be -10 for example) to make the layer more squished